Laminated 2x4 Bench Top?

Winegrower put together a way to surface slab wood with a router and linear bearings. It looks like the same set up would work to surface a table top.
 
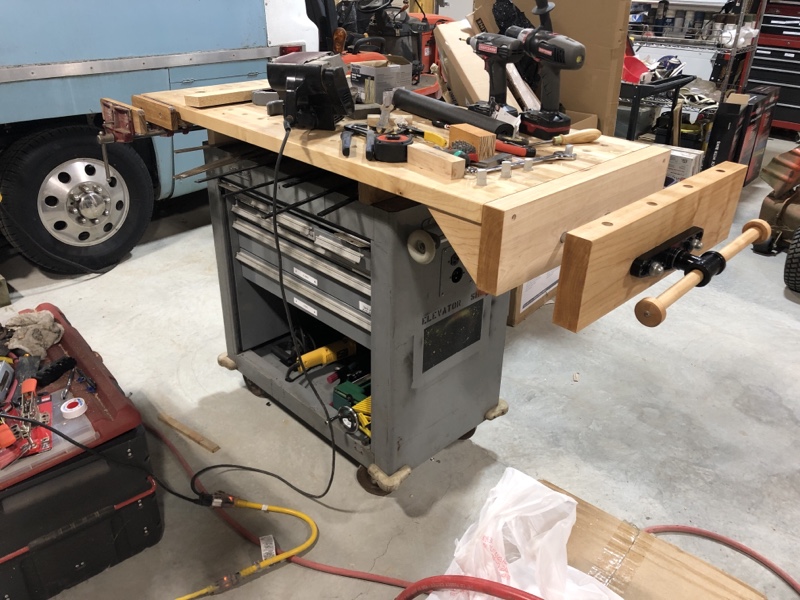
I owned and ran a commercial, custom woodworking shop, for over 20 years. I made several bench tops like that and many other butcher-block type laminations, countertops, curved laminations etc.
2X4s do make for a very sturdy top.
However;
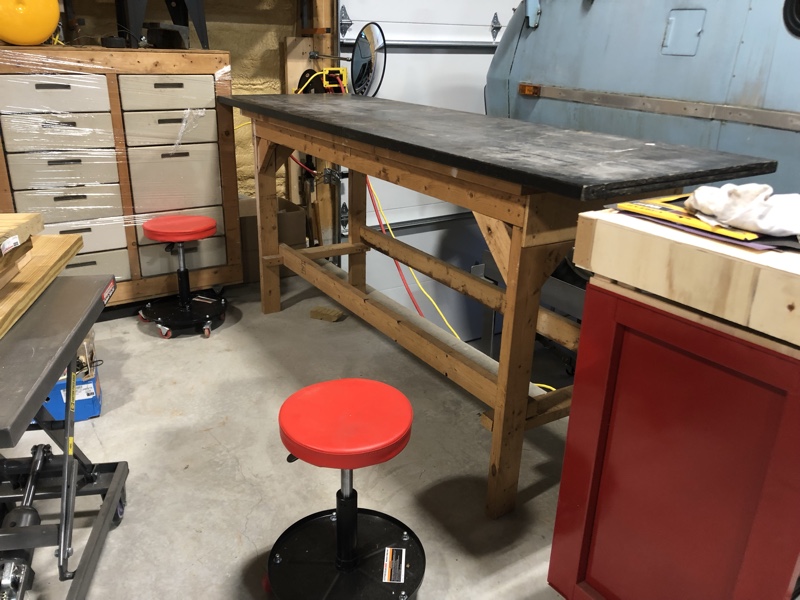
The best top bench top surfaces I found for both, general wood and metal work is Formica aka Plastic laminate or just laminate. This material is actually a phenolic laminate, made with paper and phenolic & melamine resin. It is very hard, durable and easy to clean, even dry wood glue pops off easily. These tops are also fairly quick and simple to make; 2 layers (If you want more mass you could use 3 or 4 sheets) of particle/flake board or MDF laminated together and the formica laminated on both top and bottom make for a very flat, hard and stable surface. It is very important to laminate the bottom otherwise the top will bow/warp with changes in humidity. There is even plain, non printed, laminate available just for this purpose. I used ¾" hardwood (usually Hard Maple) for the perimeter edges.

The laminated solid wood tops are best for very heavy work. They it also have the advantage that you can screw into it for blocking, jigs etc. I know some folks are rolling their eyes at that thought but in a commercial shop no one cares about such things, just getting the job done.

If you do go that route my two cents are;
Best to use Hard Maple but if using 2x4 stud go with KD, Southern Yellow Pine or Douglass Fir, avoid the "White Wood" spongy, studs. if you want one pice laminations, It's worth the effort to take your time picking through the lumber racks and select the straightest 2x4s, with at least one knot free edge for the top side, (small tight knots are okay) You can often even find a couple almost completely clear pieces if you are diligent, save those for the outside edges. Another strategy is to cut out the knots and stagger the interior joints.

It's best to first true the 2xs on a jointer, then run them through a thickness planer. Alternately, you can also true the edges on a table saw by fastening the 2xs temporally to a straight board, ripping off an edge, then ripping them parallel.

Glue up is a problem, as most woodworking glues set-up fairly quick and with so many joints it is hard to get it all spread aligned and clamped before some sections are starting to grab. A small paint roller helps with the application and a second set of hands is always good. Slow setting epoxy is best but is expensive. Don't use the Yellow Wood glue as it is too thick, use white glue, it will squeeze out better and has more open time.
Another approach is to assemble a few layers at a time, then join the sections together.
The threaded rod method is good if you don't have enough clamps and for exterior bench tops.
Of course the best way to true the top is to run the whole thing through a planer or wide belt sander, as I did but those machines usually not available. So carful set up when clamping, on a flat level surface is key. The guy in the video, working on two wobbly sawhorses is NOT the best way to go IMHO. I could go on...
Truing the top could be done by hand or power plane and a belt or random orbit sander.
Finish with several coats of urethane, top and bottom. Keeping the top waxed will help keep glue from sticking.
 
I did a glue up similar to this acouple years ago with a bunch of extra maple flooring I had left over from a floor install. I ripped the tongue off the boards and started gluing. I glued them in sections 6 boards thick the full length I was going for 8’. This gives you alittle more time getting the boards as flush as possible instead of gluing the whole thing. Once my sections were dry I glued the sections together. Once glued up a 60grit belt sander did the brunt of leveling. Then 80 and 120grit to finish it off. Table top came out perfect and will be passed down generations. Wish I had a picture did it for a friends parents that couldn’t find a dinning room table they liked.
Another good option is trying to find some bowling lane material. Always a ad or two on CL by me for cheap. And yes you can buy sheets of linoleum or counter top material at your local big box store. Masonite works but shreds or wears over the years.
 
It sounds silly, but a workbench is a very personal thing. I have several, one for electronics and model building, one for the (small) machine tools, another for metal working, and so forth. Each is a stand-alone for its' particular use, as in no two even resemble the others. Each is relatively small, 30" X 80ish. About the size of a door. Most of my work is small, but larger projects can be handled when necessary. I wouldn't try to hang an engine block from one, but Cat 1 three point stuff does get done.

The electronics bench is framed as a shelf from the wall, with diagonal braces(legs) that I knock my knees on occasionally. Framed with 2X4s, the top is fairly light(3/4") with a thin (3/16?) ply top. Underlayment? A small section right in front is replacable so when I drill too far or saw slots it can be replaced. My o'scope hangs from the frame and several "pegs" hold tools I use frequently. Dremel, hot air gun (like a hair dryer but hotter), soldering gun (heavy), others of that nature.

The small machine tool bench holds a (mini) milling machine, an arbor press, small sheet metal brake, things of that nature. It is framed with 2X6s, and topped with still more 2X6s, laid flat not laminated. Here also a sheet of thin plywood covers the surface to prevent loss of small parts. Located at the tailstock end of the C'man lathe, it also catches odd and ends from the lathe.

A heavy metal working bench, located in another building, is framed with 2X2X1/4 steel angle. With a steel top, maybe 1/4 inch thick. Something I can beat on or use a torch or welder on with little damage.

The "carpenter's" bench is actually bought (HF) and heavily modified to stabilize it better. That one has bench dog recepticals and drawers and a woodworker's vise. Wife does more "cabinet grade" work, I do framing work. She uses those two more than I do.

Each bench is sorta dedicated to its' particular function. I have to clean it(any one) off before starting a project, I suppose a cluttered shop is the sign if a cluttered mind. My mind is a mish-mash of thought, there may be several projects at the same time.

.
 
Grainger has several alternatives for wooden bench tops, but as noted by others, not cheap. Assuming 36" x 72":

Hardwood, 1-3/4" Thick, 1/8" eased edges, lacquer finish $492 3MKC5
Butcher Block Birch, 1-3/4" Thick, radius edge, oil rubbed finish $677 4KYY8
Engineered Wood (looks like dense MDF, like what Craftsman bench tops were), 1-1/2" Thick, straight edge, sealed finish $407 4TW90
Plastic Laminate (Melamine), 1-3/4" Thick, straight edge, gray satin surface $286 4TW77

I've had good luck with the Craftsman bench tops: they're dense, flat and stand up to reasonable abuse; mine are 7/8" thick, so 1-1/2" should perform even better. I always use a couple of thin coats of satin poly on them (top, bottom and edges) before placing them into service to keep oil from soaking in, and you can fill subsequent holes/gouges with a high quality wood filler.
 
Regarding maple and so on, which would cost hundreds of dollars if I could even find such wood around here, I'm using cheap wood because it's cheap. I save money, and I end up with a surface I don't care about. If I go with a fancy, expensive surface, I'll be afraid of hurting it. With Home Depot lumber, I have no qualms about dumping an oily chainsaw or a cart engine on the bench.

Also, soft wood is less likely to harm things. I'd rather dent the bench than whatever I put on it. My existing bench is cheap Home Depot wood, and it works great, apart from the design shortcomings.

Putting the top together is not a problem. Joint it, put several boards together with glue, run them through the planer. Repeat the process until you have several sections. Join the sections with glue and clamps. Plane the top if needed.

In the video, Paul Sellers did his work with hand planes. Fine for him, but I can joint or plane a board in 15 seconds with power tools, so I will not be doing what he did.

I may make the bench with 2x3's now that I think about it. Woodworkers need thick benches, but all-around shop people do not.

My plan is to attach the top to the bench with wood screws from below, just like the top for the shooting bench I made. I used pressure-treated wood for the shooting bench, and I didn't glue the boards together. If the top ever has a problem, I can just pop it off and put new boards on. The frame is indestructible.

12 15 20 shooting bench finished 02.jpg
 
I made a woodworking bench out of an old MBCentury cart and a 54x25 wood top I bought from Armor Tool. I installed an old cheapie "Brinks and Cotton" front clamp (with new oak jaws) and a cheapie Asian end clamp with very nice hard maple jaws. I like high benches and this one sits 3-1/2" above the top of the cart, providing space for clamp storage. The cart holds woodworking tools--chisels, scrapers, scribes, rules, saws, planes, etc.


IMG_8952-dsqz.JPG

(Sorry for the mess--new shop is still being organized.)

You'll regret the desire for casters, unless you make some caster chocks that are more effective than brakes. I need the casters but they are a pain--lots of woodworking puts a lot of lateral force on the bench.

For welding, a steel or cast iron top is quite useful, not least because it provides a safe route for the return ground.

But for machine assembly, where dog holes (or fixture threaded holes) are a problem, my favorite bench top is the asbestos concrete that I used on my main assembly bench. That top is heavy (I picked it up using the front loader on my tractor and set it on a lift table to move is to the bench on which it sits.) This was surplus bought from Oak Ridge National Labs. It's asbestos, so if you drill or cut it, you must do so wet with the appropriate breathing protection. But it's flame-proof and nothing seems to stick to it. I use it for general disassembly and assembly, which may be dirty, oily, or involve solvents or extensive soldering and other flame work.

IMG_8800-dsqz.JPG

(right after I installed it but before I loaded it down with crap :) )

Rick "willing to weld on that black bench top if sufficiently cleared off" Denney
 
I built one 30+ years ago and I love it, use it every single day. Cheap fir 2X4s from the box store. I used a simple router setup to flatten it - a couple long straightedges clamped to the long sides, and a wooden frame which held a router that could slide back and forth on them. Flattened it once when I built it, then touched it up a couple years later as the wood continued to move, but it's been stable since then.
It does have square dog holes - I addressed the 'lost parts' problem by mounting a thin strip of wood on the underside of the line of holes. If something drops down there I can just slide out the strip and there it is. You can also get/make spring loaded pegs that fit flush with the surface of the bench, and simply push down and out of the way when you insert a dog.
Weight is a primary desirable quality for a bench ( as well as rigidity), and 2X4s are a cheap and simple way to achieve that. Definitely recommend.
 
If you're in the US just make sure you realize 2x4's in the US have rounded corners. They will need to be removed to get a flat table top. It's a lot of work with a hand plane. Also 2x4s aren't usually great wood. You're better off buying 2x12 and cutting 2x4s out of each side and throwing away the pith in the middle.
 
Back
Top