Lathe solid tool post mount thoughts

You guys are focusing on a non existent problem. Look at Bill Stupak's. He made the base thicker to gain the extra height he wanted. Making the post is simply turning a steel bar to the dimensions you want.

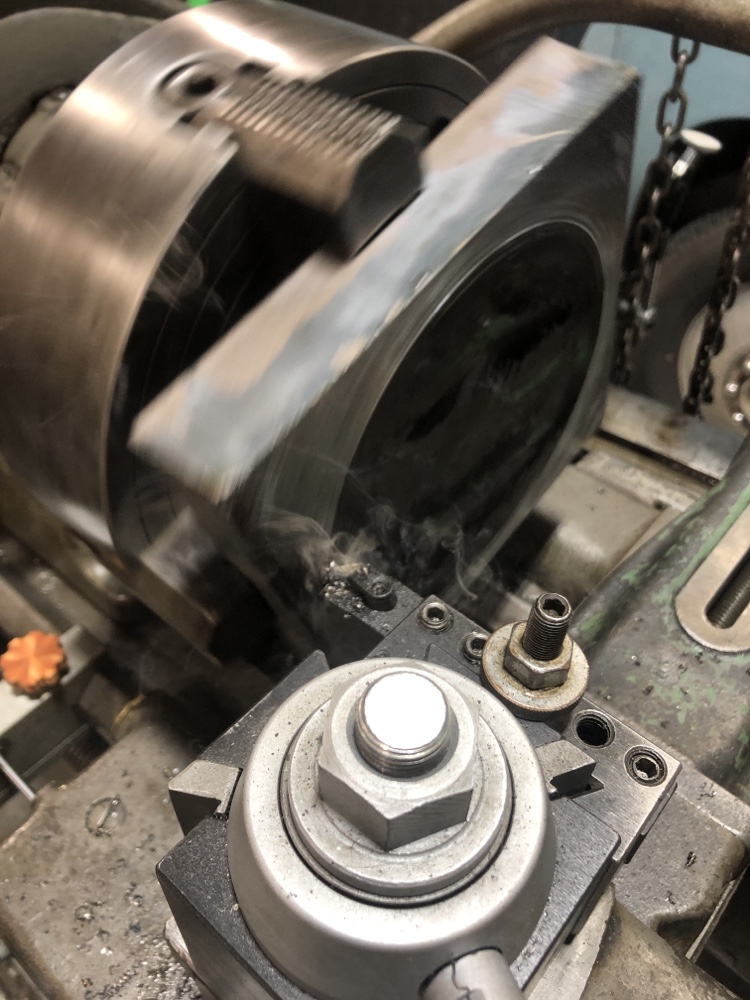
Step 1. Face the end of the bar.

Step 2. Drill the hole for the bolt that holds the base/post to the cross slide.

You may need a steady rest in steps 1 & 2. You may want to use a live center for steps 3, 4 & 5.

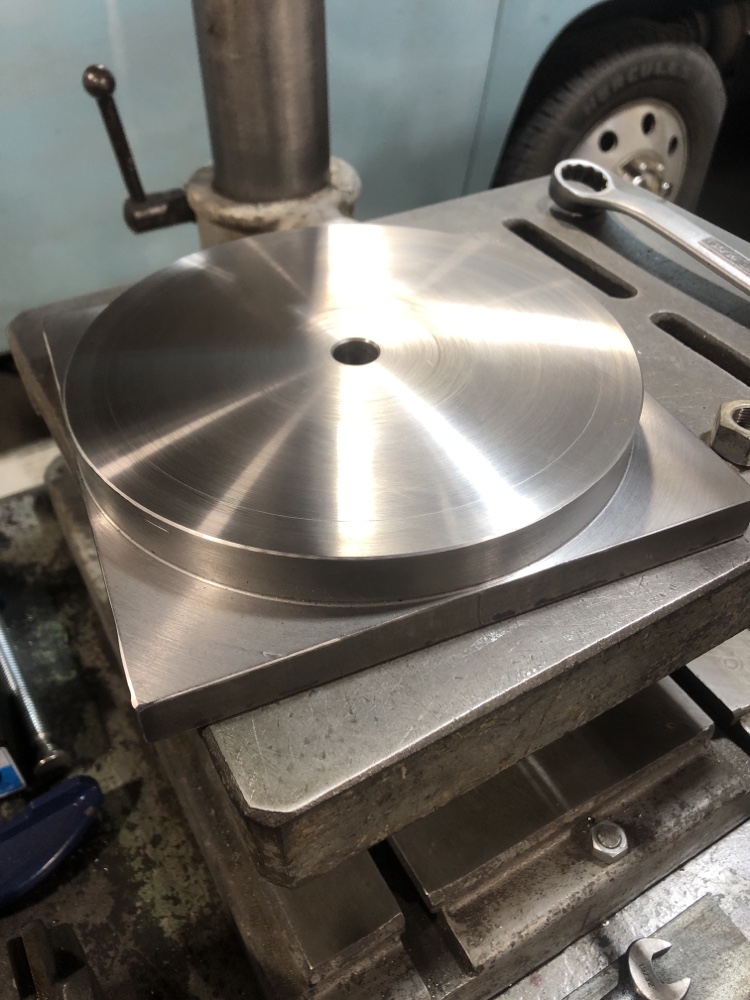
Step 3. First turn the bar to the OD of the base. Then measure off how thick you want the base to be and how long you want the post to be. Allow enough extra length to have a test piece for making the holders.

Step 4. Turn the post to the desired OD.

Step 5. Part off.

Your base/post is done. The bottom and the top of the base will be parallel and the post will be perpendicular to the post. The top of the post does not have be to absolutely parallel to the bottom of the base.

Making the base/post is the easy part in making a Norman QCTP. Making the tool holders is not hard. It was just time consuming for a newbie like me. You will use the 4 jaw to bore the hole for the holder. After you have the hole bored first saw a slot from the end off the holder to the hole. I used a hacksaw. Then drill and tap a hole for the bolt to clamp the holder to the post. Next drill and tap the hole for the height adjustment screw. Install the base/post on the cross slide and slip the holder onto the post. Adjust the height of the holder to the height needed to cut the slot for the tool bits or to drill a hole for boring bars. Drill and tap holes for set screws to hold the tool bits/boring bars. My first holder was for a boring bar. I now could use this tool holder to bore the holes in the rest of the tool holders.

To cut the slut for the tool bits adjust the height of the tool holder to the height needed for the slot. Put an end mill in the lathe chuck. A 3 jaw is fine because you will be milling the slot first to either the top or bottom of the slot. Then adjust the height of the tool holder to cut the slot to desired width.

The thread I posted above goes through this in more detail
 
I also made a norman style QCTP for my lathe. Easy but time consuming to make the holders. The only truly critical dimension is that the ID of the hole in the tool holders has to be within a .001 or two of the OD of the post to be easy to clamp the holder to the post. The top of the post does not have to be parallel to the bottom. The post probably doesn't even have to be perpendicular to the base. But that is easy to do on the lathe.

When I made mine I made the post about 2" longer then it needed to be. Parted off the extra and use it to test fit the hole.

I made a tapered plug gauge for boring out the holes in my Norman style tool holders. That way I can quickly and accurately determine how close I'm getting to the desired ID.

I agree with your "easy but time consuming" comment :).

Regarding the riser/plinth height, it doesn't have to be super accurate. The toolholder height-adjusting screws do the heaving lifting in that regard.

I turned a recess on the bottom of my mounting post, just to make sure it sits flat on the compound. If the bottom face has even a slightly convex taper the post's rigidity could be negatively affected because only the center would be in contact with the compound. Cheap insurance.
 
I'm used to QCTP, probably keep it that way for the time being.

Sorry, I wasn't suggesting that you change tool posts, only that I have no regrets in the base being round, and not a square block.

I thought about a round solid mount, the only problem I see is getting the two flat sides parallel. The QCTP inscribes a roughly 2.5" diameter circle which is manageable for turning and facing on a 7x10, however, once the faced part is removed from the chuck, rotated and re-chucked to face the other end, all bets are off for parallelism.

How far out would it be? Concentricity, sure, but the OD (if you were turning it), you might be off center a little, but it still should be parallel, or plenty close enough to it.
Or maybe not. I don't know your lathe, or your chuck(s), but even if they're wonky (one of mine is wonky), put an indicator on the tool post as it is, or anywhere that moves with the carriage, and clock in two "sides" that are 90 degrees apart. Bump those to parallel, and face the part. Then flip it end for end, and bump those two "sides" to parallel again. (round parts don't have sides, but you know what I mean.....), But with those two marked spots dialed in "straight", your ends will come out plenty close enough to parallel. (Any time you think anything's perfect, you just need a better micrometer).

Maybe if I turn the part and face it using the 4-jaw independent, then flip it and indicate the 4-jaw near the about-to-be-faced end, that'll be good enough for parallelism. I have to confess I've never tried that.

Don't indicate like you were trying to "center' the part. You don't care about centered. (Within reason, it'd be nice if you didn't have to duck each time the part came around). Put an indicater on the carriage somewhere, and sweep the sides, lengthwise, to make the part's sides "in line" with the lathe's centerline. By using that as a datum on the first facing cut, you can repeat that on the second facing cut.


Grab something cheap and practice with that. The tool post is good practice too, as you wouldn't know it if you were off a few thousandths on parallel. As long as the tools aren't over center, you'll never know if they're that small amount under center, because in practice they'll move that much anyhow of their own accord just from the cutting loads. All the science and geometry in the world won't make that settle in like a little experience will. If you're not getting parallel faces, you've got other errors in other parts too... Seriously, play with that. Parallel faces take a lot of funcitonal parts, and maks them good parts.
 
Here’s a base-shaped object I made entirely in a lathe from a $35 piece of 1-1/2” A36 plate that was 8” square.

IMG_1269-dsqz.JPG


IMG_1289-dsqz.JPG


Top and bottom are parallel within a thou.

Obviously, it’s an 8” part in a 14-1/2” lathe, but a toolpost plinth won’t be as big. Same principle—this makes as flat a surface as milling, especially a small mill. The sides really don’t matter.

I’ve thought about this. I made a plug to allow mounting a milling attachment in lieu of the compound on the lathe.

IMG_9939-dsqz.JPG


Another one bolted to the bottom of a block would make a solid plinth for a toolpost.

Rick “but needs the compound pretty often” Denney
 
I'd like to try a solid tool post mount on my 7x10 instead of having the tool post mounted on the compound.

My first problem is I don't own a mill so I'd have no way to square up a mount, nor accurately make it's height the same as the compound.

I've searched the internet to see if anyone sells such a beast, haven't found anything yet.

Then I got to thinking, what if I bought a compound bottom and top, then bolted them together into a monolithic assembly. There'd really be no need for a gib, nor gib screws, just a few holes drilled and tapped in the bottom, and corresponding holes drilled in the top, less than $100 in parts.

Thoughts?
I mostly skimmed over all the replies but did not see this answered.
Why do you wish to eliminate the compound?
 
Why do you wish to eliminate the compound?
I found on my 9x20 that you could easily see the tool tip flex up and down.
Replacing the compound with a solid plinth made the whole assembly so much more rigid particularly for parting.
So many freak out that you cant then thread at 29.5', I thread at 90' with no problems whatsoever, even up to M39x4mm threads.
The compound is only replaced when I need to turn a taper.

Heres how I built mine
Also make the top of the mount a little lower so larger tool holders will still reach centre height.
This is just speculation and I could be wrong, but I suspect the people who say "Why would you?" or tried it and say "Eh, made no difference" when this topic comes up, have never had to try to squeeze every last bit of extra rigidity out of their machine tools.

They've always used/had machines that were solid out of the (often US/UK/European) factory and never had/used smaller Asian machines.

When any product is at the bottom of the pecking order of any characteristic, there's often a lot of low hanging fruit for modifications/upgrades to that product which can make a big difference to that characteristic.

The compound slide (or top slide, if you're in good old Blighty) is part of that 'U' (the headstock, the section of the bed that runs from where the headstock is attached to where the saddle is and finally, the saddle and everything on top) that defines a large portion of the rigidity of a lathe.

If you can replace the compound assembly (and on smaller Asian lathes, the compound assembly is often not that massy/solid) with a more rigid, single part then you're likely to make a noticable difference to rigidity.

Of course the best strategy for this game is not to have to play and buy solid old iron in the first place. ;)

But then, everyone who has a Chinese bench or mini lathe, had their reasons for buying it (even, if like me, the reasons were a lack of research about the actual prices good used English lathes sell for and not the inflated asking prices you initially see:oops:) and once they have it, they'll benefit from doing the work to improve it; making a top slide replacement plinth (especially if you're doing it all on a lathe) seems to me to be a good learning exercise. :)
 
When I made my plinth I also used it as an opportunity to work on my scraping skills. I scraped the top and bottom of the plinth, and did the same for the top of the cross slide. The idea was to increase the contact area as much as possible & thereby further increase the rigidity. Did it make a difference? Hard to tell, but it looks nice :).

The plinth definitely improved results when it comes to parting-off. That's what I was after.
 
I found on my 9x20 that you could easily see the tool tip flex up and down.
Replacing the compound with a solid plinth made the whole assembly so much more rigid particularly for parting.
So many freak out that you cant then thread at 29.5', I thread at 90' with no problems whatsoever, even up to M39x4mm threads.
The compound is only replaced when I need to turn a taper.

Heres how I built mine
Also make the top of the mount a little lower so larger tool holders will still reach centre height.
Seems like a solid plinth would be an opportunity to build in a 29.5* position. Several QCTPs have dowel pin holes for positioning - so add another. If it doesn't exist, create it. Accept nothing that is nearly right, nor good enough. With apologies to H. Royce...

GsT
 
The compound slide (or top slide, if you're in good old Blighty) is part of that 'U' (the headstock, the section of the bed that runs from where the headstock is attached to where the saddle is and finally, the saddle and everything on top) that defines a large portion of the rigidity of a lathe.

If you can replace the compound assembly (and on smaller Asian lathes, the compound assembly is often not that massy/solid) with a more rigid, single part then you're likely to make a noticable difference to rigidity.


Of course the best strategy for this game is not to have to play and buy solid old iron in the first place. ;)

But then, everyone who has a Chinese bench or mini lathe, had their reasons for buying it (even, if like me, the reasons were a lack of research about the actual prices good used English lathes sell for and not the inflated asking prices you initially see:oops:) and once they have it, they'll benefit from doing the work to improve it; making a top slide replacement plinth (especially if you're doing it all on a lathe) seems to me to be a good learning exercise. :)

The real issue I see with the 7X Chinese lathes is that they are essentially a 5" lathe that has been biggined up. Ie, there's an extra inch of height baked in that really does not suit the design so they can claim its a "Bigger" machine. So the U is bigger and more flexible overall than it should be.

I made a plinth for my 5" Prazi and gained nothing but an art installation for the wall behind the machine.

My compound is low enough that just tightening the gib screws is sufficient, on the 7X....not so much.
 
Back
Top