Making a Cheepo Import machine...better...hopefully

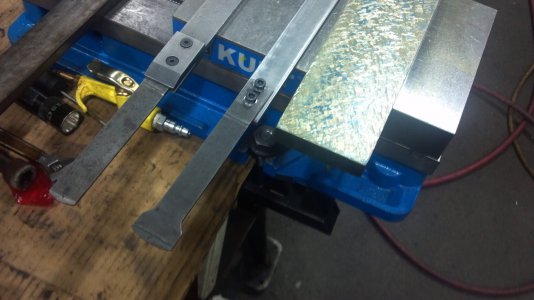
Tonights project complete! I know am a proud owner of a 150 long scraper shank. Made it from 6mm gauge plate that I found in the scraps at work. 19mm wide, 150 long overall, thin section 2mm. The insert is the one that came on my sandvik scraper and so is the top of the clamp.

Tried a first cut on the base ways and am very very pleased! I don't have to worry about the blade kicking back, the cutting is more controlled and best of all, when I am not scared of the initial touch. Jack hammer be gone!!!! The other R60 stubby will be retired for use with the hand scraper, with the extra length I find I have better control.

View attachment 54774

Well worth the effort....

Thanks Richard!

Now grind the blade with a tighter radius. I would grind the bade to a 60 mm radius. It now looks like a 150 r. Those flat blade tips can let you scratch the part when the corner of the blade digs in. I tell my students those blade come ground to a 120 or 150 and those Sandvik are straight I think. If your scraping soft gray iron grind the blade at a negative 5 deg on both sides. One thing you can do with an clamp on insert is to grind all 4 sides of the blade. You can grind a 120r on one side, a 90 r on another and a 60 r on 2 sides. Be sure to use a 300 grit diamond wheel or finer to get a cut with no little scratches from a roughed finish blade. With that new longer blade holder you will think your scraping butter. A happy Scraper makes a good scraper ..ha ha Rich
 
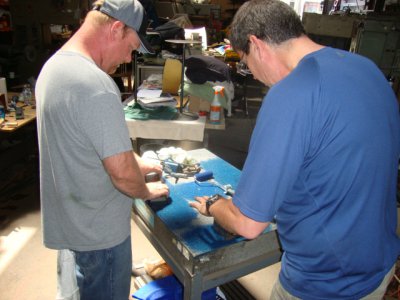
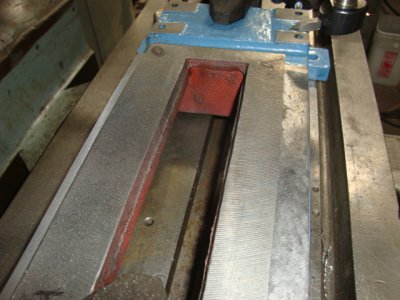
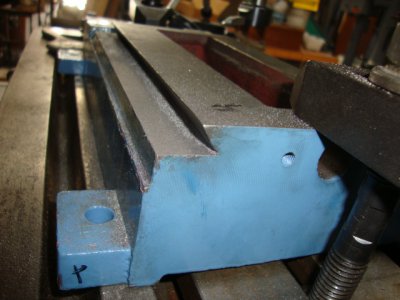
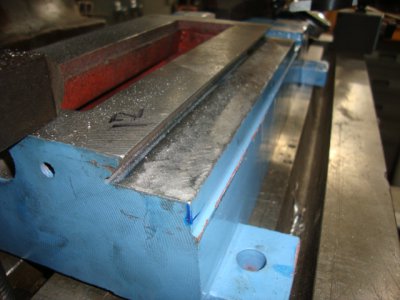
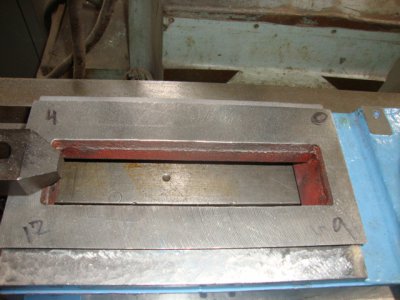
I finally downloaded the pictures of the Chinese Mini Mill that Mel brought to the CA scraping class. We first set the base on the granite surface plate and checked the 4 feet and the bottom of the base. The first check and the feet were not touching on one side and hitting on the bottom between the feet. Mel scraped and filed to get all for feet touching and the middle relieved. Then we tested the ways and starting on the bottom right side we made it 0, the left bottom way was + .004, the top right side was +.009 and the top left side was .012" so it came from the factory twisted .012". Mel had taken a cut off the ways as they looked as bad as the top before he scraped them. Spiral cuts that looked and I bet acted like a file on the mating saddle ways.

We then set the base on the Hosts Gorton mill and fly cut them parallel to .001" and cut the top. It was as if the factory had a dull fly cutter running super fast and it left circular grooves .060" apart. The ways looked as bad. It took .014" to clean up the top clearance.

Here are some pictures:

DSC01945.JPGDSC01946.JPGDSC01947.JPGDSC01948.JPGDSC01949.JPG

DSC01945.JPG DSC01946.JPG DSC01947.JPG DSC01948.JPG DSC01949.JPG
 
Last edited by a moderator:
Guys,

Could someone please post a photo of a roughed biaxed surface prior to being deburred?

I am getting some very thin scrape lines with the new blade assembly after I ground the bit to R60mm.

Thanks
 
Guys,

Could someone please post a photo of a roughed biaxed surface prior to being deburred?

I am getting some very thin scrape lines with the new blade assembly after I ground the bit to R60mm.

Thanks

Those lines are probably there because your not using a fine enough diamond wheel. You need to have a minimum of 260 grit, but I normally say 300 to 600. Run the edge of your fingernail along the blade edge and see if you can feel little nicks. It looks like the side of your blade is shiny, so that's not the issue. On some brazed blades the black edge gets rough and can cause the small scratches, so I recommend you lap the side so it is shiny. Here is what I can find now. I will take a pic and add it later. Rich But the blade would look like this
/\ but at 5 degree's neg. for soft cast iron

2012-09-19_17-40-08_749.jpg
 
My observations so far:

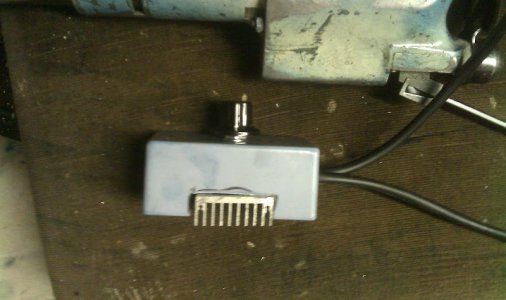
the Biax doing 120 strokes/minute is too quick for me. The extra lines I was seen were from the overlapping strokes I was getting. I have installed a dimmer on the Biax cable and this makes life 1000000% better. Dont run if you can walk eh?

IMAG0776.jpg

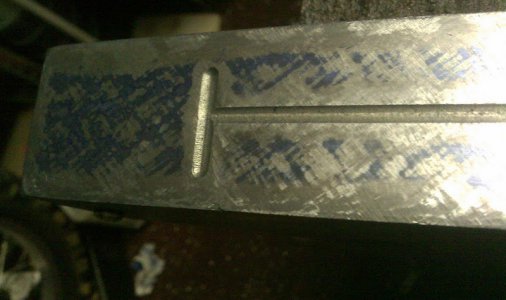
Following Richards teachings ( individual strokes and lines thereof) and some I got through the Machine tool reconditioning book I have been trying to drop the top of the saddle by around 0.08mm on two of the corners.

IMAG0777.jpg

Still waiting for the 600 grit diamond wheel I ordered last week but in the mean time I used my lapping sticks in 200, 400 and 600 grit to get a good smooth blade surface.

As always, I will update as I go along

IMAG0776.jpg IMAG0777.jpg
 
You sure are making progress! You scraping looks better every time you post. I've found that I don't need to slow the Biax down at all after some practice, but you are on the right track going slow to get some control before you speed it up.

It looks like you have some roughing to do, still (large sections still without spotting blue). Going to a larger radius can help removing bulk material. Then, when you are not roughing and instead are refining the spotting pattern, then go back to the small radius blades. The small radius blades will work fine for roughing, but the material removal is slower.

Your 600 grit wheel will make sharpening nicer, but it sounds like you have a fine workaround.


Also with the larger radius, be sure to keep the back of the scraper higher as if you allow it to be lower in the back the corners of the blade can gouge. I say to keep the scraper level or up a little in back. When you get tired one will let the back dip down and it will gouge. Mant time I tease the new students I am going to duct tape it up in back to there side. I have dreamt about using a gaitar strap to attach to it too....ha ha This is why you have to not use your arms when moving side to side. Be sure to move your body like your doing the dance the twist and not move your arms to tip the blade and gouge. This is why I recommend a new student to use the 60 radius blade as untill they learn to control their movement the gouge the corners. Thanks Erik for helping! You are making me so proud of you as I want my students to pass on what I have taught them! Good idea with the dimmer switch too.be sure the wires are big as small wires will cut down on the amps and the carbon brushes will wear or burn away faster. Rich
 
Eric, thanks for the confirmation that I am proceeding correctly.

Richard, do you mean to keep the angle of attack high? As in the stroke of the blade to not be parallel to the scraping plane? I have understood about the control of the Biax from the body, it is very inconsistent when just using the arms especially after a while.

More fun tonight!

Regards!
 
When you get tired one will let the back dip down and it will gouge. Mant time I tease the new students I am going to duct tape it up in back to there side.

Rich isn't kidding about letting the scraper slowly fall as you fatigue. You don't have to get the point of exhaustion for it to drop just a bit and it isn't a matter of strength -- more a mix of mental and physical fatigue. Even an all day scraping session (with the Biax) leaves me with physical strength to scrape, but I'm doing lots of dumb little mistakes at that point. A couple of tips on avoiding fatigue that work for me to keep mentally sharp when scraping for more than 10 min or so:
  • Stand on a soft surface. I have a rubber anti-fatigue mat that I stand on.
  • Lower the table or stand on a riser - whatever it takes to put the work where you naturally want to hold the scraper. Always make sure everything is secure (don't stand on something precarious)
  • Don't use the jackhammer blades
  • Figure out a way to approach the work at the +/- 45 degree angles without physically getting in an awkward position. I found an old milling vise with a swivel attachment works well. Sometimes I tack some wood scraps on the bench in two positions. No matter the solution, just find a way to be comfortable while being able to reach where you need.
  • Take a break if you do something dumb / out of character for you. It isn't punishment. The dumb move was probably your body telling you that it's tired.

I found it convenient to let my upper arm point straight down and hold the scraper end between your upper arm and body. If your arm is pointing straight down, there is no place for it to droop further.

Hope this helps.
 
My observations so far:

the Biax doing 120 strokes/minute is too quick for me. The extra lines I was seen were from the overlapping strokes I was getting. I have installed a dimmer on the Biax cable and this makes life 1000000% better. Dont run if you can walk eh?

View attachment 55085

Following Richards teachings ( individual strokes and lines thereof) and some I got through the Machine tool reconditioning book I have been trying to drop the top of the saddle by around 0.08mm on two of the corners.

View attachment 55086

Still waiting for the 600 grit diamond wheel I ordered last week but in the mean time I used my lapping sticks in 200, 400 and 600 grit to get a good smooth blade surface.

As always, I will update as I go along

I was scraping today and was thinking about your lines and how better they got when slowed down the speed. You were getting chatter I think, That looks like a file sort of and you get chatter from holding it to long in one place and digging. So when you slowed down the speed, your scratches disappeared. Another thing you need to check is your stone because the outside edges look low. You will be shocked if you set your flat stone on the granite and hinge it, The majority of stones are hitting on the ends on one side and high in the middle on the other side. It looks like you using the side that is high on the ends and your getting a convex surface. Take a magic marker and mark the edges and stone it and see if it comes off. In the last CA class I broke one of my stones in 1/2 because it was warped. MS-24 Norton tapered slip medium grit Indian stone. Sometimes if the blade is dull you press harder and get chatter or you have the tip sharpened to flat. Lots of variables to learn and what to look for.

Happy Scraping. Rich
 
Back
Top