- Joined
- Nov 29, 2014
- Messages
- 20
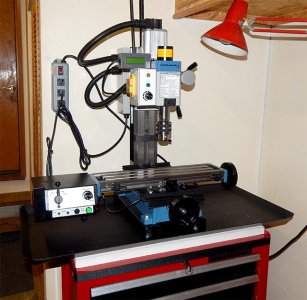
This is my first set up of my new (LMC 8.5” X 16” HiTorqueBench Lathe and LMC HiTorque Mini Mill) in my garage area.
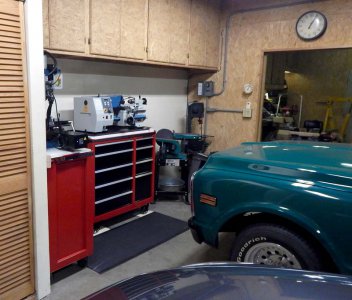
As everyone does building around what they have for space and what they use it for and sometime build a shop to fit their needs, I fall into the first category of working with what I have. I do have a 3 car garage and enjoy working on my cars and prefer parking my cars inside to work on and that definitely limits my area to place shop tools. My 2 cargarage is 21’ X 19’ and my 1 car garage is 21’ X 14’ that I do most of my work on project cars in.
This is the first mill and lathe that I’ve owned and new to actually doing mill and lathe work. I have worked around technical areas primarily airplanes, 20 years as an instructor flight engineer in the USAF and 20 years as a functional test inspector for the Boeing Co., at the present time I’m retired and usually consider myself as a home garage mechanic. Yes I’ve worked around high end tools/measuring equipment and engineer specifications/drawings down to +/-.0005 tolerances, but that kind of tooling or tolerances are way too high for my needs as a home garage mechanic. So as a hobbyist my tooling needs are less than high end and not making a living from my work this is the selections of tools that I’ve made to meet my requirements.
The setup of my mill and lathe, I decided to go with putting them on top of tool boxes. This gave me some benefits as well as problems to solve. Mounting the lathe and mill to the top of the boxes I used some 1 inch Melamine surfaced MDF from Home Depot, plus for the lathe the chip tray, this should give me a flat surface for mounting. More concerned about a flat surface than absolute level I did put some 1/8 inch shim plywood under the front wheels of the lathe to bring the lathe into close to level compensating for the slight slant of the garage floor. With a lathe of 200 plus lbs. on top of the tool box made it top heavy plus a little wobbly, I lag bolted some 2 X 4’s to the wall studs and with some cheap 1 inch ratcheting cargo straps & eyebolts secured the box to the wall. This definitely eliminated the wobbly condition plus any concern of the lathe tipping over for whatever reason like an earth quake or to many open drawers at once. I don’t plan on moving the mill or lathe around for doing work but if need be they can be moved.
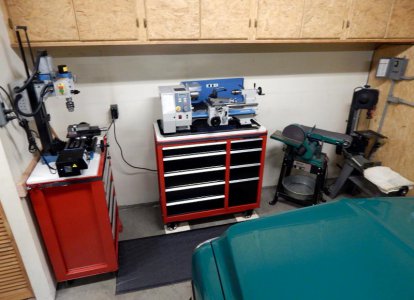
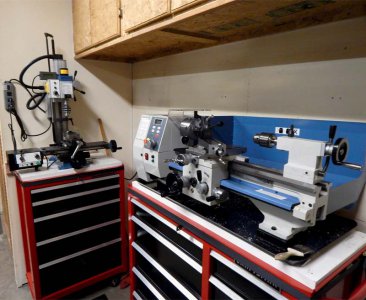
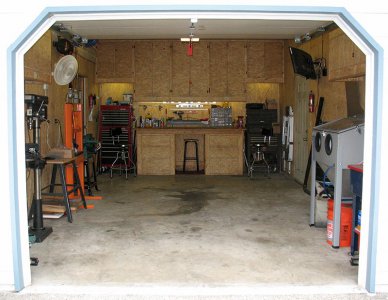
As of this posting I found that lathe is working fine on the few things I’ve done so far but the mill is going to need a little more setup to make me happy. I found that I should have set the mill on a pedestal area just to give added clearance and when the chips start flying the mill area could use a chip tray to help contain them for cleanup. After looking around to see ifI could find a chip tray for the mill I didn’t find one made for this mill that was within my budget concerns. But I did find the chip tray that I used on the lathe appears to be the size of a chip tray I need and with a few modifications should work for me plus the cost is only about $30.00 more cost than the raw stock material if I was to make my own. The chip tray is on order and should be here in a few days, I will let you know how well it works out.
For those that might find it of interest I’ve spent the last few years build a custom 1972 Chevy pickup in my shop and what went into the build can be found on my build thread http://67-72chevytrucks.com/vboard/showthread.php?t=318544 at 67-72 chevy trucks forum.Note, no need to log in or register to view the build. You might find the how to’s thatI used in making my build with hand tools in a garage of interest.


As everyone does building around what they have for space and what they use it for and sometime build a shop to fit their needs, I fall into the first category of working with what I have. I do have a 3 car garage and enjoy working on my cars and prefer parking my cars inside to work on and that definitely limits my area to place shop tools. My 2 cargarage is 21’ X 19’ and my 1 car garage is 21’ X 14’ that I do most of my work on project cars in.
This is the first mill and lathe that I’ve owned and new to actually doing mill and lathe work. I have worked around technical areas primarily airplanes, 20 years as an instructor flight engineer in the USAF and 20 years as a functional test inspector for the Boeing Co., at the present time I’m retired and usually consider myself as a home garage mechanic. Yes I’ve worked around high end tools/measuring equipment and engineer specifications/drawings down to +/-.0005 tolerances, but that kind of tooling or tolerances are way too high for my needs as a home garage mechanic. So as a hobbyist my tooling needs are less than high end and not making a living from my work this is the selections of tools that I’ve made to meet my requirements.
The setup of my mill and lathe, I decided to go with putting them on top of tool boxes. This gave me some benefits as well as problems to solve. Mounting the lathe and mill to the top of the boxes I used some 1 inch Melamine surfaced MDF from Home Depot, plus for the lathe the chip tray, this should give me a flat surface for mounting. More concerned about a flat surface than absolute level I did put some 1/8 inch shim plywood under the front wheels of the lathe to bring the lathe into close to level compensating for the slight slant of the garage floor. With a lathe of 200 plus lbs. on top of the tool box made it top heavy plus a little wobbly, I lag bolted some 2 X 4’s to the wall studs and with some cheap 1 inch ratcheting cargo straps & eyebolts secured the box to the wall. This definitely eliminated the wobbly condition plus any concern of the lathe tipping over for whatever reason like an earth quake or to many open drawers at once. I don’t plan on moving the mill or lathe around for doing work but if need be they can be moved.


As of this posting I found that lathe is working fine on the few things I’ve done so far but the mill is going to need a little more setup to make me happy. I found that I should have set the mill on a pedestal area just to give added clearance and when the chips start flying the mill area could use a chip tray to help contain them for cleanup. After looking around to see ifI could find a chip tray for the mill I didn’t find one made for this mill that was within my budget concerns. But I did find the chip tray that I used on the lathe appears to be the size of a chip tray I need and with a few modifications should work for me plus the cost is only about $30.00 more cost than the raw stock material if I was to make my own. The chip tray is on order and should be here in a few days, I will let you know how well it works out.
For those that might find it of interest I’ve spent the last few years build a custom 1972 Chevy pickup in my shop and what went into the build can be found on my build thread http://67-72chevytrucks.com/vboard/showthread.php?t=318544 at 67-72 chevy trucks forum.Note, no need to log in or register to view the build. You might find the how to’s thatI used in making my build with hand tools in a garage of interest.


