methods of single point threading ?

I think the divided answers are based on interpreting how you are reversing direction. As RJSakowski said, if you disengage the FWD / REV lever on the lead screw, you will lose sync. Many of the import lathes do not have such a thing.
Additionally, the backing the tool out is critical. Many lathes are not "tight" enough to maintain the tool synchronization in reverse.
You can check it, but rubbing the tool in reverse is a losing situation - remember a "spring" pass removes material - you don't want to rub your tool and all that.
The only way I know of on most our lathes with SAE lead screws is to maintain half nut engagement, back out the cross slide (or compound) and reverse the direction of the spindle and therefore the lead screw. This will maintain sync.
edit - BGHanson and Bob Korves have it right too.
 
One variation for threading by leaving the half nut engaged was demonstrated by Tom Lipton, OxTools. When threading mtric on an Imperial lathe, the half nut has to remain in the same threads on the lead screw throughout the threading process. This is where reversing the lathe at the end of the thread cut to take it back to the beginning of the cut comes into play. The problem arises when threading to a shoulder as the lathe has to come to a stop. the cutter backed out and the direction reversed. The momentum of the drive will cause the spindle to continue turning for an uncomfortable time. The usual practice is to coast to a stop before the end of the cut and finish the cut by turning the spindle by hand.

The variation consists of running the lathe with the half nuts engaged on a mark to the end of the cut and disengaging the half nuts and shutting the lathe down. This prevents running into the shoulder of the work. Back the cutter out and reverse the direction of the lathe. Reengage the half nuts on the mark as it passes. The half nuts will then be in the exact same threads on the lead screw that they were during threading. This doesn't really save any time as the carriage has to move back at the threading rate rather than hand cranking the carriage but it does permit threading to a shoulder.

 
I want to try threading with the half nut locked and never opened , but many changes have to occur before I can do that...
gott'a repair that idler gear , get a new bushing for the gear beneath it, get a proper threading tool buy a micrometer and learn how to read the silly thing ....... and last but not least get a reversing switch on the lathe and a chuck lock arbor.......and then I might be able to make the attempt again...
so it will be a while LOL......
one thing I have learned in life when facing a big project is do something on it each day and soon it will be done !
.....Bob........
 
I cut both internal and external threads on my Seneca Falls Star #20 machine leaving the half nuts engaged. It does have a reversible motor so I shut it off at the end of the cut, back off the tool and reverse the motor. The key is to reverse the carriage about an inch farther back than the start of the thread so when the motor is restarted in the forward direction all the play is out of the drive train before the tool starts to cut.

I have done hundreds if not thousands of threads this way. The machine doesn't have a thread dial, and there wasn't even one offered as an accessory when the machine was built. I usually thread at between 60 and 80 rpm, so unscrewing the chuck is a non issue. I must admit it's far easier to cut threads with my Sheldon machine that does have a thread dial.
 
There is a good article here - https://journeymans-workshop.uk/flipupth.php on making the swing up threading tool. I did one a few years ago and almost all of my thread cutting is done on the little AG50 using it - works brilliantly, just reverse the lathe motor at the end of the cut and the tool rides up over the job as it goes back, you can even advance the tool for the next cut as it is returning.
 
tel47 :
that definitely looks like a worthwhile project there ! THANK YOU !
....with that I could leave the half nut engaged , Not mess with the cross slide at all ( in and out) and just use forward /reverse on the motor....
and with it in back gears it's slow enough to be less stressful ! LOL
.... I do not like having to try and hit the exact mark on the thread dial as my eyesight and reactions are questionable now....
though I used to be able to catch a fly in my hand....those days are long gone ! LOL now I am lucky if I can see the stupid fly ! LOL......
......
I gott'a get that 3 position switch soon.....for the forward /reverse of the motor......
but where will I mount the thing ? I guess on the headstock belt lid where it is easy to hit !
...........

Looks like the start of a home made lathe there ! well done ! although I would have made it about 3 times as big it should give
you all kinds of options !
.....nice looking threads too ! you should see mine their scary ! LOL......
later !
Bob.......
 
Thanks Bob, that's exactly how I cut them, getting the AG50 with its screwcutting gearbox put my screwcutting ahead in leaps and bounds, until then I had to fiddle with setting up change wheels on the Myford and that put me off doing a lot of threads.

The little lathe is my 'recuperation project' - smashed up my hand (in a block splitter) back in June, so its been more or less built one handed. Its a bit further advanced now, up to the point of cutting metal. On with a tailstock next.

Cheers

Terry
 

Attachments

  • cutting#1.jpg
    cutting#1.jpg
    232.2 KB · Views: 17
LOL I was going to ask if you were going to make a tailstock for it or not.... LOL GOOD for you !
I hope the hand is healing up good and you still have full use of it !
......
this evening I remembered a project so I ran out to the shop and did it.... I made a carriage Lock for the Logan...as it was missing and I have needed it several times.....
it only consists of a allen head bolt about 3" long and a special NUT.... so I found some thicker bar stock and a nut that fit the bolt and proceed to guess my way through it .... I had to drill out the hole just a little bit so the bolt would fit the carriage and that made the nut real thin by the bed ways
but the angle grinder came to the rescue once again and I got it to fit nicely.... then I had to weld an extra piece on top of it so it would reach the underside of the bed ways..... now.....just a quick twist of the bolt tightens the cross slide where it won't move for love nor money ! and it doesn't jamb when moving the carriage so I'm calling it a success.... the question is will it fall off due to vibration or not as there is only about 1/4" of bolt in the nut I welded on.... but I guess we shall see..... I needed that thing for my cut off tool usage ! I had the holder but no blade for it, so I found an old file that fit it and ground one to shape LOL..... it works a treat ! never had any luck with a cut off tool on the 3 in 1 as it is so prone to chatter/harmonics
even with all the gibs tight it still refused to accept cutting off stuff ! but the logan does that easy ! it's really nice to be able to part off things !
otherwise I would resort to a sharp tool and make a deep "v" and then hack saw the rest !
it's a waste of good material !!!!
so at least I accomplished something today on the lathe.... not much but it is something !
.....
Bob....
 
Single point threading on an ordinary lathe is not a big deal. Stack the deck in your favor while eliminating the chances for early failure and being scared to death. Practice the moves a bit, then get the mostly finished part you are making that already has 20 hours work into it and the final operation is an ordinary external thread -- but you have never tried making a thread before...

First try a couple test passes. Set up your part you are going to practice on, get all the gearing and other settings correct on the lathe, move the tool right up next to the end of the work, screw in the feed to make the cut, and then... STOP!!!

It is dumb to try to accomplish all the things you need to get perfect results down solid on your first try. So, let's make this a lot more simple and learn one thing at a time, and learn it well.

First, back the tool away from the end of a longer test piece, giving it plenty of room, say tool 3" from the end of the work. Set the tool depth so it will not touch the work at all. Then the cutting tool should be able to run over the test piece for a LOT of revolutions before it hits the chuck or anything else in the path.
OK, half nuts disengaged, everything set up so you can very easily shut the thing off before hitting anything. Start the spindle turning at the lathe's slowest speed. Work well away from the work for a while, and practice shutting it off quickly and efficiently. Repeat until it is in muscle memory and you no longer need to look at the knobs and handles to find them.

Then practice engaging and disengaging the half nuts well away from the work. Do it slowly and feel what is going on. The lead screw is usually Acme, which means the half nuts ride on the flats if you start the engagement too early, and then fall into place properly. So try it over and over maybe 50 times, trying a little bit before it drops in and then go later and later until you miss the proper tooth on the threading tool. Soon you will have the feel for it, and will know that moving the lever a little bit early is not a problem, it only postpones dropping into the correct tooth. Right on the number works perfectly, and engaging too late, even by a little, can make you miss entirely and cut a double thread. With a little practice and knowing nothing can go wrong by dry practicing, you will soon be doing it confidently every time. Now try starting close to the end of the work, with the tool pulled out just safely far enough that it will not engage the work as it traverses. Start three inches away and engage the half nuts, and then try to stop the cut right at the start of the work. (A miss means that you may have run the tool into a face if it was a for real job...) Keep trying it closer and closer to the end of the work, stopping it before the work, until you fail. Now you know what you cannot do. You probably also notice that you really don't waste much time engaging the half nuts a safe distance from the work, safe enough to easily disengage them prior to reaching the work. Practice it over and over, getting the feel and the muscle memory, and learning and getting better with every try. Now add to the equation backing out the cross slide a quick full turn at the same time the half nuts are disengaged -- without looking at them, only looking at the work. More practice, until it all becomes natural. It doesn't really take that much time to feel confident when you advance your skills slowly enough that failure is unlikely.

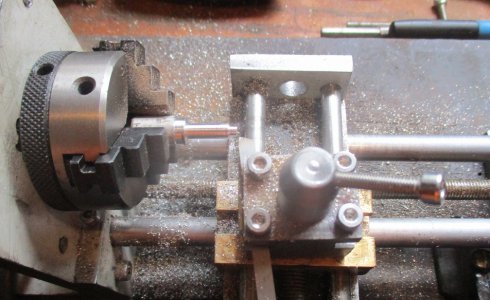
When you have the muscle memory down, you are doing it each time the same way, and you don't really even need to think about the quick disengagement sequence, then you are ready to cut metal. Choose something soft like an aluminum bar, perhaps 1/2" to 1" in diameter, long enough to extend several inches out from the spindle. Set up the lathe feed rate for a relatively slow feed, perhaps something like 24 tpi or 1mm. Bring the tool over the beginning of the metal with the carriage hand wheel, and then move the cutting tool in until it just touches the metal. Zero the threading dial, back out a quarter turn of the dial, and move the carriage to the right until you know that you will be ready for an instant stop of travel and tool back out before hitting the work. (I won't get in to threading dial number rules here, just use the same number for each cut until you want or need to learn more. It is a bit slower, but it works for all threads, as long as it is English threads on a Imperial lead screw machine, or metric threads on a metric lead screw. Crossing that boundary will require another lesson.) Turn the cross slide handle back to where you touched of at, and then add .005" (or .1 mm). Run the cut again, this time you will get a light cut with a curl of metal coming off. Disengage the half nuts at a previously marked point as best as you can, turning the feed knob out one revolution at the same time. Go back to the beginning, turn in the cross slide another .005" (.1mm), and repeat as before, continuing until the threads come almost to points. See how nice it looks (if you did it right!). Making a proper thread to mate another threaded part is beyond this already far too long post. There is no reason to be afraid of threading if you work up to it one simple step at a time, trying things that are as simple and safe as possible. Save the fussy stuff until you feel up to it.

Please do not use short cuts. Learn each thing in the logical sequence. We must learn to crawl before we learn to walk, and to walk before we run. Patience, grasshopper...
 
Back
Top