- Joined
- Jan 21, 2015
- Messages
- 67
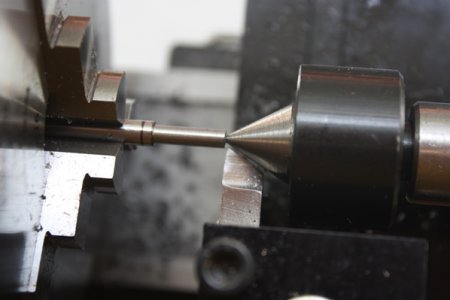
I was having trouble making a steel screw. Cutting such small diameter steel (less than 1 mm), it would bend out of the way of the tool. I had to come up with a way to cut the threads while holding the tiny screw in place. So I used a tiny center drill to put a divot in the end of the screw, then put a live center on the tailstock:
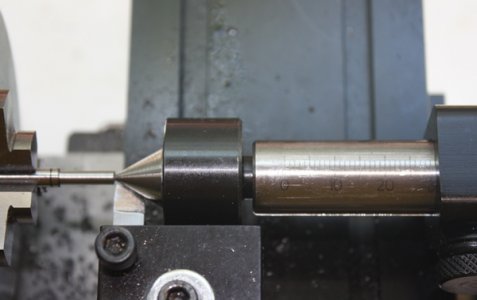
Of course I didn't need a live center since I thread by hand, with the motor detached from the lathe, so speed is not an issue. But the center has to be held in the tailstock and I thread with a tool holder on the carriage, so the tailstock has to reach out over it. The dead center wasn't long enough to reach. The live center just barely does:
Once I had a screw shape, the threads come next. You can see how small the shaft is when compared to the 1/4 inch HSS cutting tool. These threads are at a 0.45 mm pitch.
The threading worked easily because I ground the HSS tool without it getting hotter than say 250 degrees even on my cheapie grinder (how to do that is a neat trick). So I didn't lose the hardening that HSS has. And, to cheat further, this is 12L14 LEADED steel. Cuts like a dream. I use a 4x jeweler's loupe while cutting.
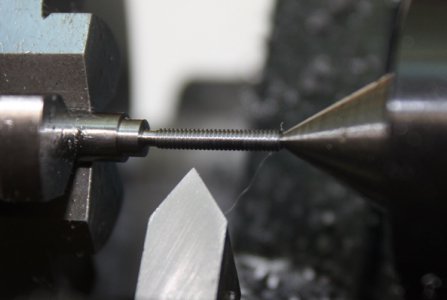
The final screw is supposed to be less than 4 mm in length. So why is this screw so long? This screw is its own tap!
To tap the plate, I filed self-tapping slots into the end of the finished screw and did not cut it from the rod stock. I held the 'tap' in the mill head with an untightened collet. The collet holds it perfectly perpendicular to the brass plate and I could turn the entire rod by grasping the rod with pliers.
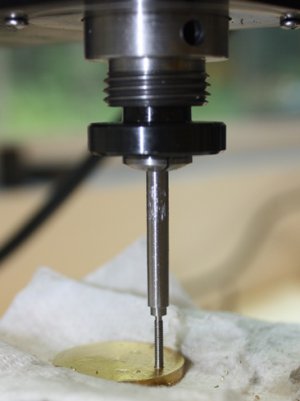
Believe it or not, this worked. I was able to almost completely tap the brass hole with decent looking threads that of course perfectly matched the screw. But just before I completed the entire hole depth, I got lazy and thought, "I bet I could put an entire half turn in at a time!"
No, I couldn't.
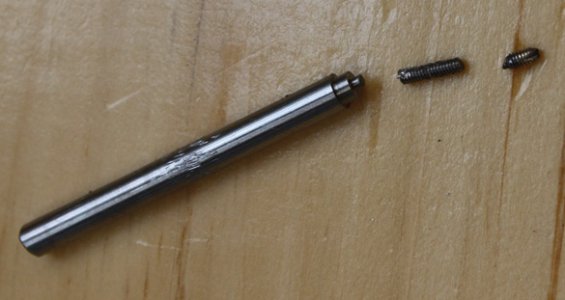
It snapped off, then I destroyed it thoroughly by using vice grips to turn the broken tap out.
The threads in the hole looked great and I was able to tap about 7/8 of the way through. I could have easily finished it if I hadn't gotten impatient.
So close. Next time for sure!

Of course I didn't need a live center since I thread by hand, with the motor detached from the lathe, so speed is not an issue. But the center has to be held in the tailstock and I thread with a tool holder on the carriage, so the tailstock has to reach out over it. The dead center wasn't long enough to reach. The live center just barely does:

Once I had a screw shape, the threads come next. You can see how small the shaft is when compared to the 1/4 inch HSS cutting tool. These threads are at a 0.45 mm pitch.
The threading worked easily because I ground the HSS tool without it getting hotter than say 250 degrees even on my cheapie grinder (how to do that is a neat trick). So I didn't lose the hardening that HSS has. And, to cheat further, this is 12L14 LEADED steel. Cuts like a dream. I use a 4x jeweler's loupe while cutting.

The final screw is supposed to be less than 4 mm in length. So why is this screw so long? This screw is its own tap!
To tap the plate, I filed self-tapping slots into the end of the finished screw and did not cut it from the rod stock. I held the 'tap' in the mill head with an untightened collet. The collet holds it perfectly perpendicular to the brass plate and I could turn the entire rod by grasping the rod with pliers.

Believe it or not, this worked. I was able to almost completely tap the brass hole with decent looking threads that of course perfectly matched the screw. But just before I completed the entire hole depth, I got lazy and thought, "I bet I could put an entire half turn in at a time!"
No, I couldn't.

It snapped off, then I destroyed it thoroughly by using vice grips to turn the broken tap out.
The threads in the hole looked great and I was able to tap about 7/8 of the way through. I could have easily finished it if I hadn't gotten impatient.
So close. Next time for sure!


