Nantong Milling Machine part needed?

Richcan22

Registered
Registered
Joined
Jun 19, 2021
Messages
29
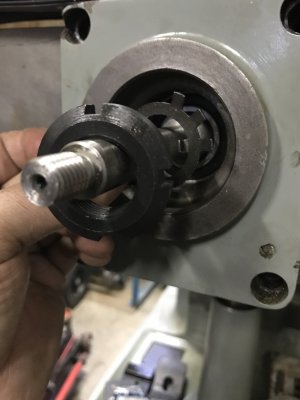
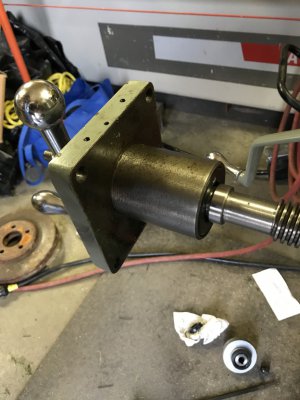
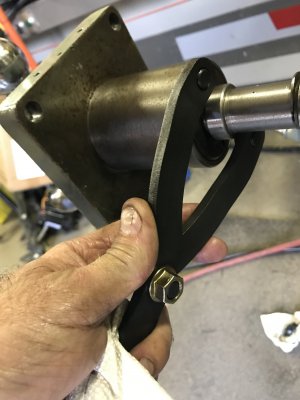
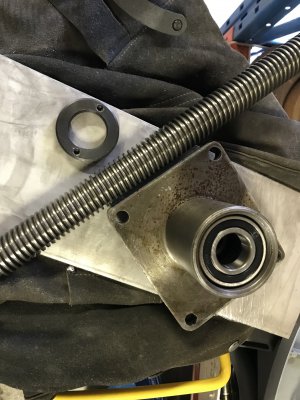
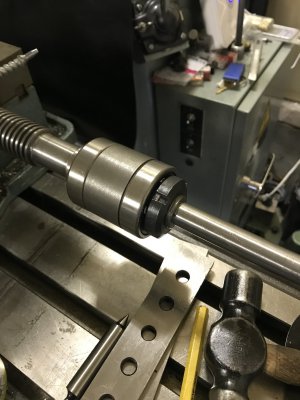
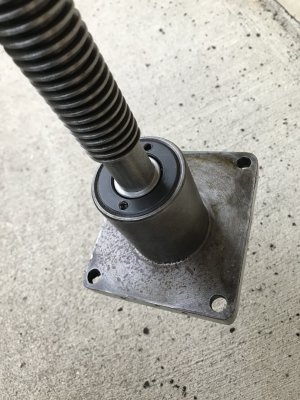
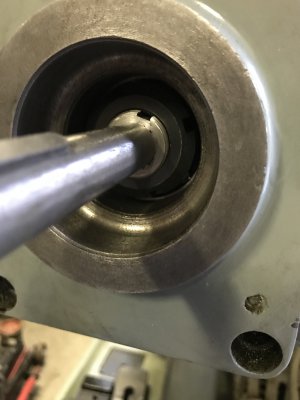
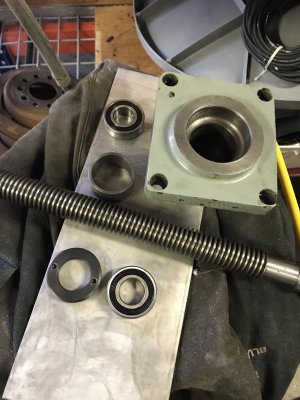
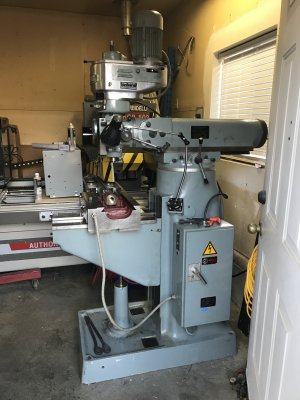
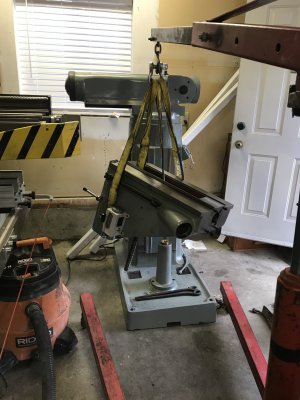
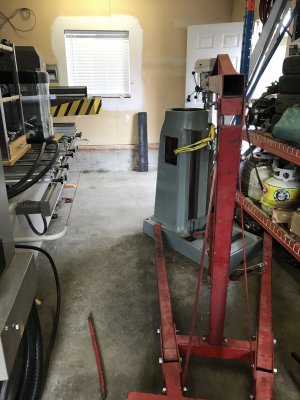
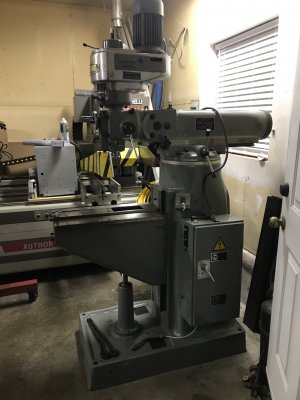
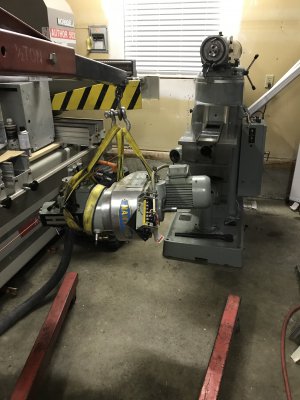
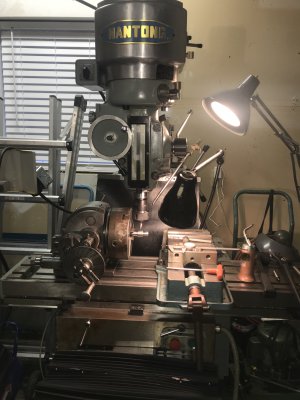
Picked up this machine from a retired guys basement! Was quite the battle to get it up the stairs. Anyways I posted a video on YouTube Nantong Milling Machine Cross Feed Missing Part? I took this apart and replaced all the bearings and gave it a good clean up! I think I’m missing a part? If anyone has this machine can check their machine. Looking to get DRO and power feed. Installed front splash and rear splash rubber guard. Not sure where to mount collet holder and DRO any pics or ideas would be greatly appreciated!
 

Attachments

  • 3D0135A8-EC1F-4C52-84A6-CE5692544C5A.jpeg
    3D0135A8-EC1F-4C52-84A6-CE5692544C5A.jpeg
    1.4 MB · Views: 275
  • 3C549B42-B733-42DF-9176-ABA828354CF3.jpeg
    3C549B42-B733-42DF-9176-ABA828354CF3.jpeg
    1.4 MB · Views: 221
  • 402D32FF-04F0-4DF0-B6A1-FF3A789F5C35.jpeg
    402D32FF-04F0-4DF0-B6A1-FF3A789F5C35.jpeg
    1.4 MB · Views: 166
  • EDDCE3DD-4958-4328-859F-5228583F880F.jpeg
    EDDCE3DD-4958-4328-859F-5228583F880F.jpeg
    1.3 MB · Views: 177
  • 2372CDE7-BC9E-46AC-B384-D884BC59A830.jpeg
    2372CDE7-BC9E-46AC-B384-D884BC59A830.jpeg
    1.8 MB · Views: 159
  • 90A5C83C-164E-42DB-9B67-A48A80463367.jpeg
    90A5C83C-164E-42DB-9B67-A48A80463367.jpeg
    1.3 MB · Views: 148
  • 1AC013C9-857C-49F0-B07D-FA0D49BA211C.jpeg
    1AC013C9-857C-49F0-B07D-FA0D49BA211C.jpeg
    1.4 MB · Views: 179
  • B353ADC9-DFDA-47CA-A1A2-74CE4C3A8B87.jpeg
    B353ADC9-DFDA-47CA-A1A2-74CE4C3A8B87.jpeg
    1.2 MB · Views: 197
Good looking mill ! :encourage:
 
Can you describe the suggested missing part ??

this is the video on YouTube. Behind the cross feed screw there’s a nut and locking washers but can’t remember if I’m missing something it can fall out of place when machine is running over time with vibration. I can move it wit tapping it with screwdriver.
 
Looks like the washer is on a threaded shaft. I would think there should be a nut of some sorts to hold the washer, and lock the bearing in place.
You have to measure the treads and find a nut. The washer may have to be turned around to expose the tabs. These tabs would then lock into the nut slots.
1626289049854.png
 
Ok thanks I was thinking about that the other day. I looked in the video wasn’t sure if enough threads but a thin lock nut would do it. I’ll check it out when I get day off from work and I’ll look around for a nut in the shop. I took pics taking it apart but missed out on that one. I have the parts book but not very good drawings and missing that parts picture. Was going to make some type of bushing to press up against it. The shop is jammed pack and hard to look under stuff if it fell off onto the floor and rolled under something? Thanks!
 
Looks like the washer is on a threaded shaft. I would think there should be a nut of some sorts to hold the washer, and lock the bearing in place.
You have to measure the treads and find a nut. The washer may have to be turned around to expose the tabs. These tabs would then lock into the nut slots.
View attachment 372134
Just sent reply below but looked at video and looks like I have washer on wrong side? Your picture is inside. I’ll see if I can take it apart and swap. Maybe I’d did this after where I couldn’t get access to bend the tabs towards nut. Thanks for your help was just bugging me when it’s not perfect. It’s a job I can get off my mind. I’ll take apart and send video or pictures when I get around to it.
 
Looks like the washer is on a threaded shaft. I would think there should be a nut of some sorts to hold the washer, and lock the bearing in place.
You have to measure the treads and find a nut. The washer may have to be turned around to expose the tabs. These tabs would then lock into the nut slots.
View attachment 372134
Ok got it together now! Thanks for your help. I had the washer with the handle part and dial so like the last pieces and couldn’t figure out even if I had to put behind the nut but how would I bend the tabs back towards me but wasn’t even thinking of that? Thanks!
 

Attachments

  • EE800F6F-9FCF-4ECE-9126-9E35BCB3660B.jpeg
    EE800F6F-9FCF-4ECE-9126-9E35BCB3660B.jpeg
    1,011.2 KB · Views: 114
  • B89120FA-C9F6-4140-8DC8-050E5F59478D.jpeg
    B89120FA-C9F6-4140-8DC8-050E5F59478D.jpeg
    1.1 MB · Views: 122
  • 10751DCB-A4A1-49B8-82EC-81CDD04E3A53.jpeg
    10751DCB-A4A1-49B8-82EC-81CDD04E3A53.jpeg
    1,021.2 KB · Views: 110
  • 5EA0FA05-EB08-4B82-9CA2-8642990EE933.jpeg
    5EA0FA05-EB08-4B82-9CA2-8642990EE933.jpeg
    1.6 MB · Views: 111
  • 2B46BC9D-DC5A-41E8-9AAB-5F39BC640B77.jpeg
    2B46BC9D-DC5A-41E8-9AAB-5F39BC640B77.jpeg
    1.3 MB · Views: 100
  • 77C2356C-AC95-4A66-9D32-0D03F9ED5AEC.jpeg
    77C2356C-AC95-4A66-9D32-0D03F9ED5AEC.jpeg
    1.3 MB · Views: 106
  • 59F45037-9036-4CDC-A914-50DB40588186.jpeg
    59F45037-9036-4CDC-A914-50DB40588186.jpeg
    1.5 MB · Views: 110
  • 952BC90B-E3C6-4F07-9E1E-0DFC01C9EDF0.jpeg
    952BC90B-E3C6-4F07-9E1E-0DFC01C9EDF0.jpeg
    1 MB · Views: 114
  • 1101A4F5-F643-40DB-B451-876C7A416794.jpeg
    1101A4F5-F643-40DB-B451-876C7A416794.jpeg
    1.4 MB · Views: 113
Back
Top