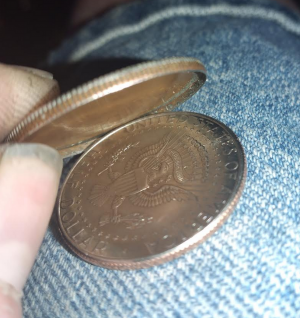
Need some ideas on expanding the outer edge

i was trying to use a refridgeration tool that expands pipe but some kind jig will need to be made but no clue what the jig should look like lolso i started where anyone would a holder for the tool as for the
Glue?

"Those who tell don't know and those who know don't tell" I definitely don't know but lots of folks use crazy glue to hold small parts.

John
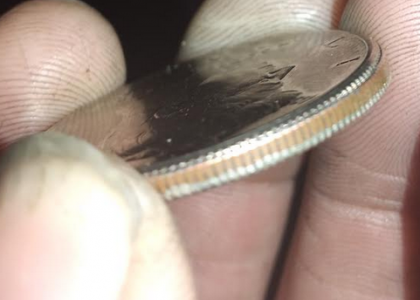
added a pic
 
That pic sure looks like the outer ring was soldered to the face as I described above. Polishing or chemical should work. You may need some of both.
 
That pic sure looks like the outer ring was soldered to the face as I described above. Polishing or chemical should work. You may need some of both.
the coin in my hand is the fake coin the coin on my leg is a real coin that not been gaffed
so which one looks soldered?
 
Maybe bore out the shell and don't try to expand the edge. Turn the solid coin down to fit and knurl the outside. Challenge will be work holding of the coin. You might try turning an arbor with a pocket for the coin, held in the head stock. Mash a center drilled round held in the tail stock into the face of the coin. Then peck away at the OD of the arbor/coin to diameter. You'll be turning away the pocket for the coin and relying on friction to hold it in place.

Another thought is mash the tail stock piece to the coin with some JB Weld. Turn the OD, knurl and apply some heat to remove the coin.

Bruce

P.s. I have a few old Gilbert Mysto Magic sets that use a stamping for the shell. Definite loss of details in the stamping but it was a kid's toy. Still makes for a nice truck shaking coins in your hand and making one disappear.
 
Another classic is using a modern zinc core penny, score one side, then toss in nitric acid. It will eat the zinc out of the copper-clad penny and produce a shell, which a dime will fit perfectly in. The old turn a penny into a dime trick. Because the colors are not similar the change is from penny to dime is very clear. Because the copper "shell of a penny" is very thin when the zinc core is removed, it can simply be easily crushed into a BB sized wad of copper (thus ridding any evidence that the "penny" ever existed. No carefully milling or expanding a rim required.
 
the coin in my hand is the fake coin the coin on my leg is a real coin that not been gaffed
so which one looks soldered?

The one in your hand. Looking at the seam between the inside of the rim and the inside of the flat face. That does not look like a machined corner. It looks to be a solder joint.
In this application you could even soft solder it so the temps will never be high enough to discolor anything.
 
I suggest making a nest that the shell can sit in, that has your target diameter so you have good control of the motion. Maybe a shelf around the edge and a central plastic filled recess to support that area.

Make an expander that just goes into your shell's rim and swage it out.

As for the expander, one route would be a split ring with a tapered ID and a matching tapered plug. A segmented collet is another thought.

My best idea: use a rubber plug either recess size or a little taller. Use a steel punch that is a pretty close fit on the shell, and some kind of alignment jig. The rubber will follow the shell outward. It will also drive the shell down, so for that one you may want a max OD control ring with a rubber plug under the shell to avoid boogering the face. That design would also make centering the punch easy! You will have to fiddle clearances to get rubber extrusion under control. 0.010" gap should be safe for pretty high pressure.

You may need to try and spot anneal the rim. Depends on the work hardening during the coining process.

Sent from my SM-G892A using Tapatalk
 
Btw, coins are made from layered blanks with a Copper core. I'm pretty sure they are metallurgically bonded during rolling, rather than soldering.

Sent from my SM-G892A using Tapatalk
 
Back
Top