- Joined
- Nov 9, 2013
- Messages
- 790
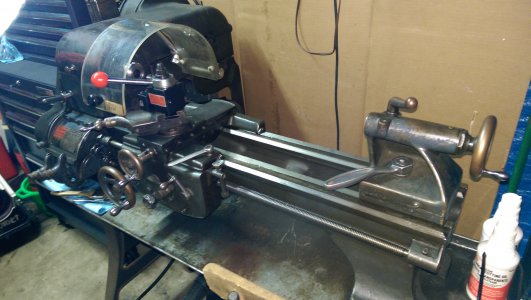
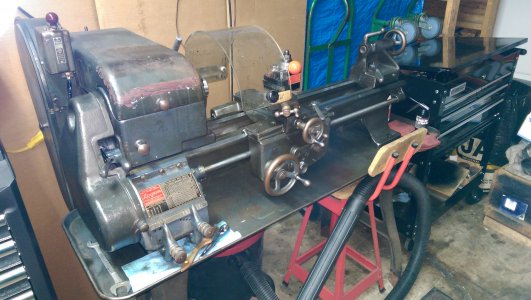
About 3 weeks ago I bought a Logan 820 off Craigslist. It had been sitting in the guy's garage unused for 11 years, but was in decent enough shape with only minor surface rust. There was a stripped gear in the QCGB, the bull gear was missing 3 teeth (in a row), and the reverse gear handle casting and shaft had eaten each other due to lack of lubrication. The main spindle shaft bearing was "cogging" because of the old dried out grease, and the 3/4 HP, 220v, 3 phase motor had the wires cut off. The taper in the tailstock quill felt like it was rusty, so I figured that would clean up.
First, I bought a Baldor 115v 1 HP motor, built mounting adapters so it would fit properly, turned a bushing so the 3/4" bore pulley would fit the new 5/8" shaft, and lined everything up. Mr Halligan was kind enough to help me get the drum switch wired properly so both forward and reverse worked. (Thanks again!)
Fortunately, I kept my other Logan lathe until this one was rebuilt so I could make parts. I turned down the shaft on the reverse gear lever, and bored out the casting so I could fit it with a new bushing made out of bearing bronze. One of the retaining screws for the reverse gear selector was sheared off in the headstock, but fortunately it was easily backed out with a sharp punch.
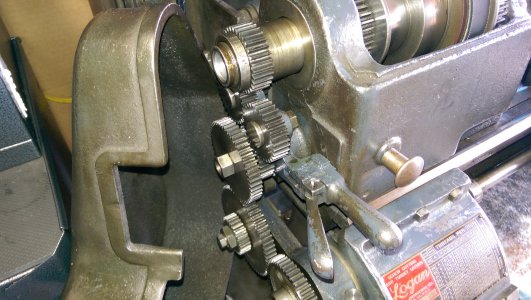
Next, I pulled the spindle shaft to fix the bull gear and main bearing. I pre-heated the bull gear for 3 hours in front of a red-hot electric quartz heater, then MIG welded over the missing teeth. I peened and cooled very slowly in front of the heater for another 5 hours, and NO cracks! I cut and profiled teeth out of the weld material with a high speed cut-off tool and needle files. It's not perfect, but runs quiet and smooth, and saved me $506 over buying a new gear or $200 over buying a used one. This seems to be a common problem with 820's, and used replacement gears are not cheap. The flare from the flash kind of covers it up a little. One tooth isn't perfectly square all the way across because I didn't quite get enough of a weld bead on it. I was trying hard not to put too much heat into it, and keep the welding time to an absolute minimum (5 seconds).
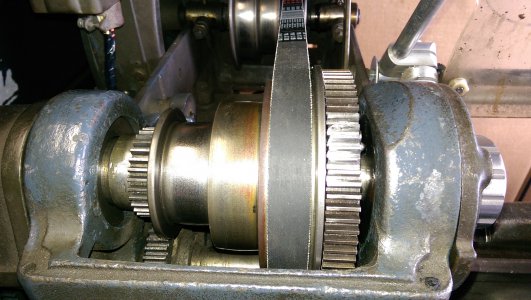
I pressed the main spindle bearing off the headshaft, and soaked it with kerosene, then Brakleen, and blew it out. I re-packed it with a cone style bearing packer, and used the green high pressure industrial grease. It spins smooth, free, and quiet now. While I had the spindle out, I installed an automotive serpentine belt on the cone pulley. I like it a lot.
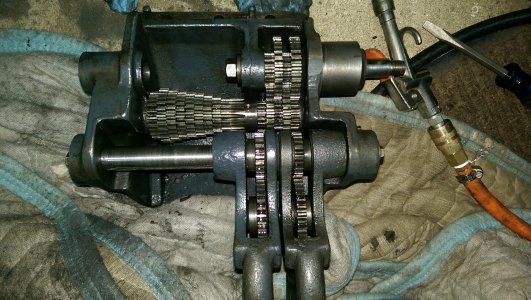
The QCGB was really dirty with compressed dirt, chips, and hard grease in every gear tooth. The "E" gear range didn't work at all, and it turns out every tooth was stripped clean from it. Again, a common problem on 820's. I bought a new one on eBay, cleaned the box with kerosene and Brakleen, and reassembled using Royal Purple synthetic differential gear lube as an assembly lube. It was surprisingly easy to get all the gears lined up, and for a minute I thought I must have done something wrong. The shaft for the gear selector levers was also scored and galled, so I made a new one out of .750 O-1 drill rod, and milled the 1/8" keyslot to match the old one. It all works slicker than snot on a glass door knob!
I changed the oil in the apron, and filled it back up with fresh ND10. I adjusted the belts and tried it out, and it runs smoooooth and quiet! The only issue left is a badly scarred tailstick quill. The MT2 taper is messed up, so I ordered a set of MT2 reamers to see if I can save it. Initially I didn't think it was very bad, but after cleaning it up it was worse than I thought. We will see what happens once the reamers get here.
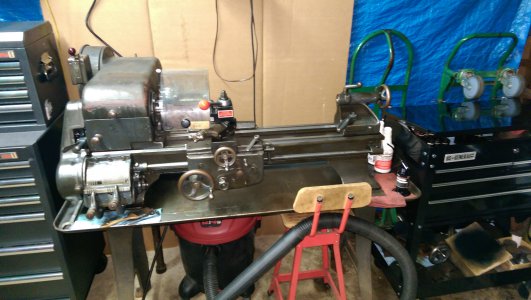
I don't do fancy paint, but the machine will be 100% functional once the quill is repaired or replaced.
GG


First, I bought a Baldor 115v 1 HP motor, built mounting adapters so it would fit properly, turned a bushing so the 3/4" bore pulley would fit the new 5/8" shaft, and lined everything up. Mr Halligan was kind enough to help me get the drum switch wired properly so both forward and reverse worked. (Thanks again!)
Fortunately, I kept my other Logan lathe until this one was rebuilt so I could make parts. I turned down the shaft on the reverse gear lever, and bored out the casting so I could fit it with a new bushing made out of bearing bronze. One of the retaining screws for the reverse gear selector was sheared off in the headstock, but fortunately it was easily backed out with a sharp punch.

Next, I pulled the spindle shaft to fix the bull gear and main bearing. I pre-heated the bull gear for 3 hours in front of a red-hot electric quartz heater, then MIG welded over the missing teeth. I peened and cooled very slowly in front of the heater for another 5 hours, and NO cracks! I cut and profiled teeth out of the weld material with a high speed cut-off tool and needle files. It's not perfect, but runs quiet and smooth, and saved me $506 over buying a new gear or $200 over buying a used one. This seems to be a common problem with 820's, and used replacement gears are not cheap. The flare from the flash kind of covers it up a little. One tooth isn't perfectly square all the way across because I didn't quite get enough of a weld bead on it. I was trying hard not to put too much heat into it, and keep the welding time to an absolute minimum (5 seconds).

I pressed the main spindle bearing off the headshaft, and soaked it with kerosene, then Brakleen, and blew it out. I re-packed it with a cone style bearing packer, and used the green high pressure industrial grease. It spins smooth, free, and quiet now. While I had the spindle out, I installed an automotive serpentine belt on the cone pulley. I like it a lot.
The QCGB was really dirty with compressed dirt, chips, and hard grease in every gear tooth. The "E" gear range didn't work at all, and it turns out every tooth was stripped clean from it. Again, a common problem on 820's. I bought a new one on eBay, cleaned the box with kerosene and Brakleen, and reassembled using Royal Purple synthetic differential gear lube as an assembly lube. It was surprisingly easy to get all the gears lined up, and for a minute I thought I must have done something wrong. The shaft for the gear selector levers was also scored and galled, so I made a new one out of .750 O-1 drill rod, and milled the 1/8" keyslot to match the old one. It all works slicker than snot on a glass door knob!

I changed the oil in the apron, and filled it back up with fresh ND10. I adjusted the belts and tried it out, and it runs smoooooth and quiet! The only issue left is a badly scarred tailstick quill. The MT2 taper is messed up, so I ordered a set of MT2 reamers to see if I can save it. Initially I didn't think it was very bad, but after cleaning it up it was worse than I thought. We will see what happens once the reamers get here.
I don't do fancy paint, but the machine will be 100% functional once the quill is repaired or replaced.


GG


Last edited:

