Offset key for Sherline Lathe Headstock - need one made

Opening up an old thread after "pondering" for awhile.

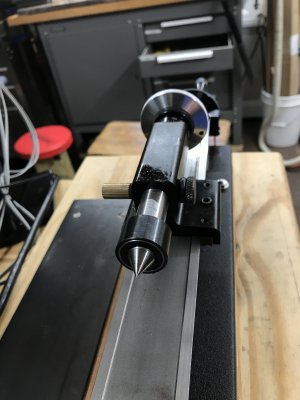
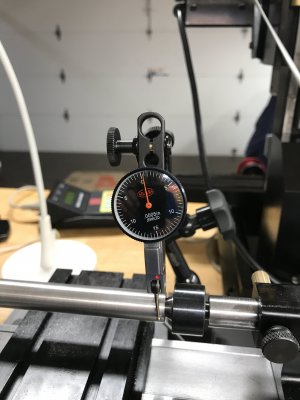
My Sherline tailstock, to be in better alignment to the headstock (after the headstock is independently aligned very very well to the ways) needs to move TOWARDS the operator (front of lathe). It can't do that because of the design. AND when the tailstock spindle is locked with the tailstock locking screw, it pushes the spindle AWAY from the operator. That makes the alignment worse. Since the tailstock is pushed away from the operator and the cutting tool, the shaft being cut will be bigger on that end than on the headstock end.

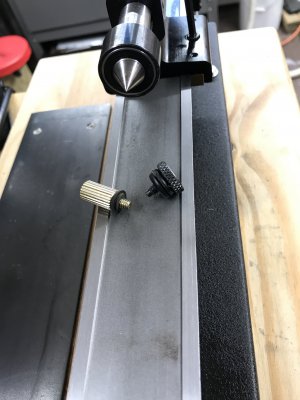
WHAT IF the tailstock locking screw was relocated to the backside? That would improve the alignment somewhat, I think.
Of course the spindle itself would then be upside down so you can't read the scale on it,, so the locking screw would engage the keyway,

Have any of you Sherline owners tried moving the locking screw to the back side? I am thinking about it and might try it.

sherline tailstock.jpg
 
Last edited:
Haven't tried it but it makes sense. Why not try it and let us know how it works out?
 
Haven't tried it but it makes sense. Why not try it and let us know how it works out?

I did try it Mikey.

First I drilled and tapped a hole 180 degrees from the original locking screw. I then installed the locking screw on the back side and tested the results. Found that it moved the tailstock in the direction I needed, but too MUCH.

Then I made a locking screw from brass and installed it on the backside and reinstalled the original locking screw on the front side. I found that I could then "dial" them in to eliminate taper on a 4.5" test piece. I used brass on the rear screw to reduce gauging the tailstock spindle. I used only finger tightening to dial in. I found that there was about 0.003" of total movement to work with. That is shown by the two indicator readings. One with the spindle shoved in each direction by the locking screws.

I am satisfied with the results of this first test. I started the test before the modifications and had 0.0035" taper over 4.5" on a piece of 5/8" round. Using the two locking screws in concert I reduced the taper to 0.0002"
 

Attachments

  • IMG_2167.JPG
    IMG_2167.JPG
    1.5 MB · Views: 48
  • IMG_2169.JPG
    IMG_2169.JPG
    1.3 MB · Views: 44
  • IMG_2170.JPG
    IMG_2170.JPG
    1.3 MB · Views: 39
  • IMG_2171.JPG
    IMG_2171.JPG
    1.6 MB · Views: 40
Last edited:
Good job! I never thought of using a brass screw on the back side to back up the tailstock ram. Good thinking, Forty Niner!!!
 
That backside locking screw is a clever addition to the tailstock, Forty Niner.

I have a Sherline 4400, and I am a beginner to machining. This thread has gotten me asking myself what necessary function the tailstock serves. Is the only necessary function to provide a center? Can drilling, reaming, and threading-an-ID-using-a-tap be done as well or better from the cross slide? I think that the answer is no for a long piece that requires the support of a steady rest (mounted on the cross slide).

I examined the tailstock on my lathe today, to see the effect of adding a locking screw on the backside. I was struck by how much play there is between the tailstock spindle and the tailstock case. It's a disconcertingly loose fit.

Sherline says here that each tailstock spindle is individually ground to fit each tailstock case:
In ordering a new spindle, one can specify the OD. The default is 0.618-0.619".

Would the following idea work to align a tailstock with the headstock?
1. Order a tailstock spindle with an oversize OD.
2. Align the headstock very well with the ways.
3. Mount an endmill at the headstock that matches the OD of the new tailstock spindle for a nice fit.
4. Mount the tailstock to the left of the cross slide. Adjust the tailstock gib tight and evenly.
5. Feed the tailstock onto the spinning endmill.
6. Install the new tailstock spindle.
 
Last edited:
Karl,
You've given this a lot of thought, and I hate to discourage you, but in my humble opinion the procedure you outline would not have any hope of working.

*Precision boring, as far as I know, is not done with end mills. Tolerance for the fit to the spindle and bore finish would not be acceptable.
*Headstock alignment to the ways, unless impossibly perfect, would cause the bore to be out of round.
*End mill and end mill holder would not run absolutely true, so bore would be cut oversized.

The Sherline lathe is priced reasonably low, and at that price level one cannot expect the precision of lathes costing 10 times more.

When it comes to machinist work it is often said that "90 percent of the job is setup". That is true for these little lathes. They work well within their envelope and we endeavor to work with the setups to get the precision desired. I puzzled over the tailstock issue for years before I decided to add a little brass screw to the backside of the tailstock, then was surprised at how easy it was and how I could coax the tailstock center into giving me less taper.

I encourage you to continue your quest to fully utilize your lathe and develop your machinist skills. I have not addressed your questions about the actual use of the tailstock. Just wanted to reply to the brainstorming you had.

When you want opinions on how to set up your lathe to machine a part, please post on this forum. I have gained knowledge from the experienced people on this forum.
 
Karl, your idea shows your are resourceful. I agree with 49er that an end mill would not do it. A boring head would be more suitable but any kind of boring would be tricky because its a rather deep hole for such a small diameter.

I always prefer to turn an OD to get a close fit rather than the opposite. If you start with a new oversized spindle then why not turn it to fit the bore in the tail stock? You would have to make tight fitting extensions for both ends of the new spindle. To turn between centers you would have to have a way to align the original spindle. Or use a four jaw chuck and steady rest.
 
Back
Top