Overly complicated vise stop

petertha

H-M Supporter - Gold Member
H-M Supporter Gold Member
Joined
Jan 15, 2016
Messages
994
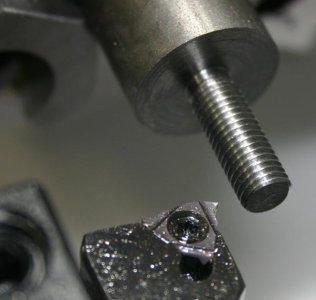
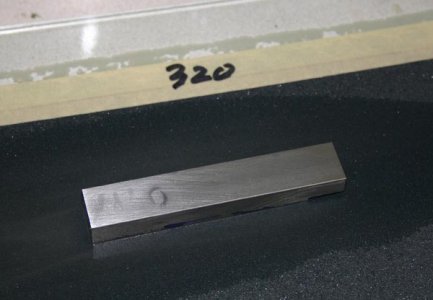
One advantage of the Kurt mill vises & their lookalikes is that they they have rectangular jaws. They lend themselves to jaw replacement, sacrificial jaws and those clamp-on work stops. I'm a big fan of stops. They help a lot with accuracy as the part can go in & out as often as you like & preserve the same position. Unfortunately my (Bison 5") mill vise has prismatic jaws. I shouldn't complain because its super accurate. But you cant use the typical rectangular clamp on stop due to the taper on the back face & also there is very little lip. I have a stop that comes in from the side but it takes a little longer to set up. When you have little parts around the middle of the jaw, the clamp-on kind of stops are easier.

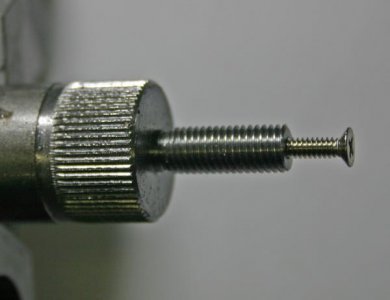
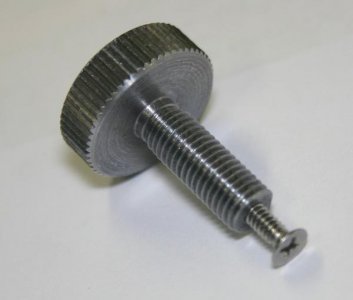
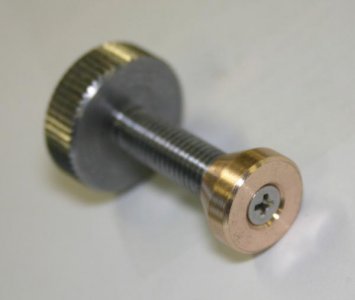
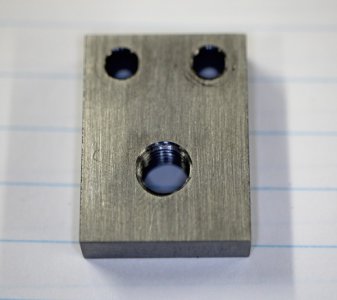
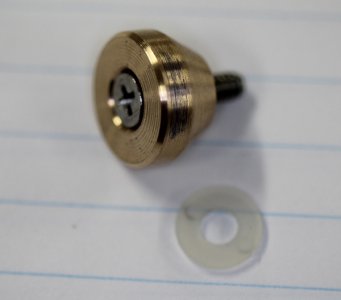
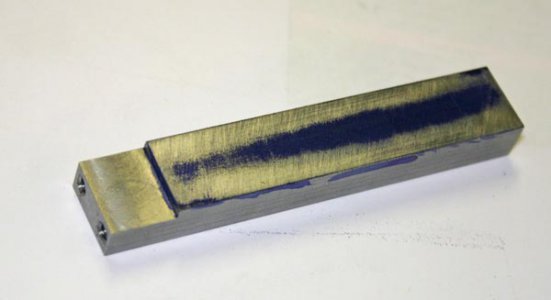
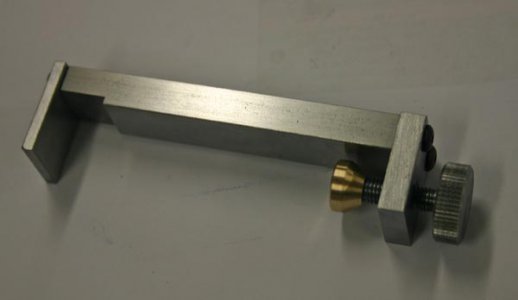
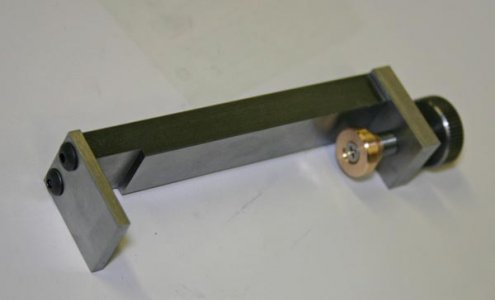
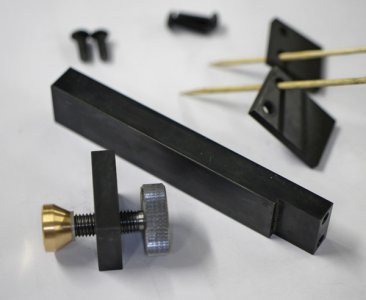
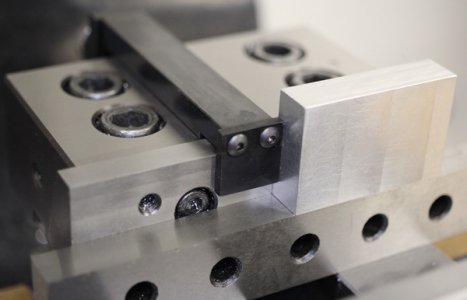
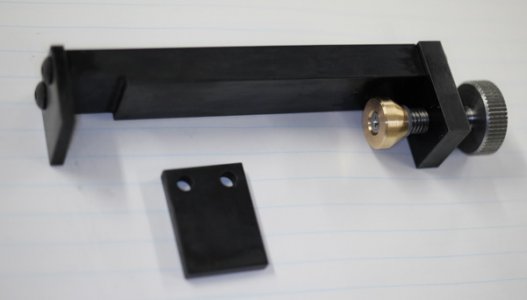
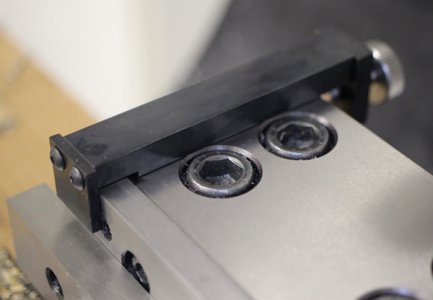
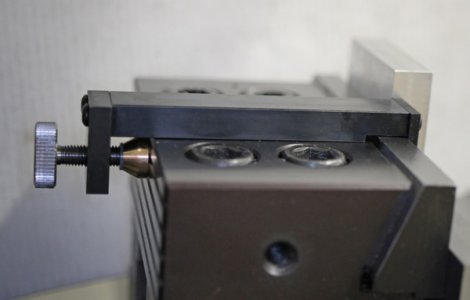
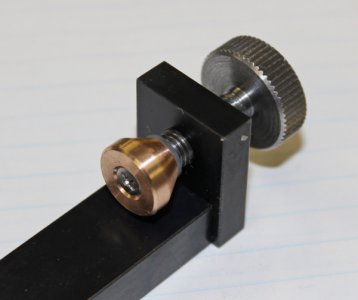
So I came up with this arrangement. Its basically a steel bar with a bolt on front lip stop. It saved me milling away a bunch of material from solid & gives me flexibility to attach different thicknesses or custom shapes if I choose. I had to relieve a notch in the top bar so it would clear the jaw protrusion. The rest lies flat on the top of the vise block. My vise also has big cap screw heads protruding proud on the block but I decided to not relieve for those or there would be little left of the bar to lay flat on. So my range is just a bit limited between the socket heads but it will be fine.
 
Last edited:
The overly complicated part comes with the clamping mechanism. Its funny how you take a POS hardware store C-clamp for granted. I wanted a shoe that would clamp tightly, accurately & in-line as much as possible with the stop area. That means the foot has to be able to free rotate about the threaded screw. If its fixed to the screw the whole assembly skates sideways as the shoe makes contacts & torques against the surface. There is a reason why clamp feet are designed this way. Many commercial clamp shoes have a ball in socket which nice, but not easy to replicate. Some are just an open cup with a peened over end on the screw.

I machined what looks like a big thumbscrew with 1/4-28 TPI threads from 12L14. The end is tapped 4-40 for a flathead 4-40 screw which retains the brass shoe and a nylon spacer washer. It gets blue Loctite so it retains the right clearance fit. The shoe is countersink so the bolt head sits slightly inside.
 

Attachments

  • IMG_8093_edited-1.jpg
    IMG_8093_edited-1.jpg
    31 KB · Views: 28
  • IMG_8094_edited-1.jpg
    IMG_8094_edited-1.jpg
    19.7 KB · Views: 28
  • IMG_8095_edited-1.jpg
    IMG_8095_edited-1.jpg
    19.6 KB · Views: 26
  • IMG_8096_edited-1.jpg
    IMG_8096_edited-1.jpg
    13.8 KB · Views: 23
  • IMG_1695_edited-1.jpg
    IMG_1695_edited-1.jpg
    67.1 KB · Views: 23
  • IMG_1694_edited-1.jpg
    IMG_1694_edited-1.jpg
    44.8 KB · Views: 26
Clamp body parts. Plain 1018 mild steel. I probably should have machined the surfaces flat but just a bit of hand filing & wet/dry on a glass plate made it acceptable.
 

Attachments

  • IMG_8097_edited-1.jpg
    IMG_8097_edited-1.jpg
    16.1 KB · Views: 25
  • IMG_8100_edited-1.jpg
    IMG_8100_edited-1.jpg
    11.2 KB · Views: 29
  • IMG_8099_edited-1.jpg
    IMG_8099_edited-1.jpg
    15.6 KB · Views: 28
  • IMG_8098_edited-1.jpg
    IMG_8098_edited-1.jpg
    26.8 KB · Views: 28
  • IMG_8101_edited-1.jpg
    IMG_8101_edited-1.jpg
    11.4 KB · Views: 34
I made a shorter length stop finger just to give me more options around different parallel heights. And finally the blackening treatment on the bar parts which came out blotch free this time. I think there is something beneficial to those scuff pads as a surface treatment, methanol wipe to remove any oils, handle with rubber gloves etc.

The more I play with this stop, the more I like it. Its so quick to set up. And it stays put with a very positive grip.
 

Attachments

  • IMG_1698_edited-1.jpg
    IMG_1698_edited-1.jpg
    51.2 KB · Views: 37
  • IMG_1700_edited-1.jpg
    IMG_1700_edited-1.jpg
    50.3 KB · Views: 41
  • IMG_1699_edited-1.jpg
    IMG_1699_edited-1.jpg
    28.7 KB · Views: 40
  • IMG_1704_edited-1.jpg
    IMG_1704_edited-1.jpg
    49.8 KB · Views: 42
  • IMG_1701_edited-1.jpg
    IMG_1701_edited-1.jpg
    41.1 KB · Views: 44
  • IMG_1719_edited-1.jpg
    IMG_1719_edited-1.jpg
    48.1 KB · Views: 41
Last edited:
Another stop that works well is the Aloris stop, intended for their tool posts for repeditivestop 001.JPG operations, it mounts on a tapped hole on the right side of the toolpost, or tapped holes on the sides of a mill vise. They are quite widely adjustable, and easy to make, I copied this one from an original that I bought from Aloris many years ago, I use it both on the mill and lathe.
 
Last edited:
Another stop that works well is the Aloris stop... mounts on a tapped hole on... the sides of a mill vise.

I made myself one of those too before & engages into a threaded hole on the side of the vise as you say. I'll have to dig up some pics. I also have a T-slot mounted stop. Maybe i should see a tool psychologist about my 'problem' LOL.

Those are well suited to when the work is outside of the vise jaws or the part thickness is greater than the stop rod or bolt diameter. That's the issue I was having with small, thin parts in particular. I either needed a long skinny rod (practically wire size) to poke within the jaws. I also don't like clamping short parts out near the end of the jaws as the other side isn't supported. Not a biggy but its just nicer when its being clamped around mid-jaw. i should have picked a more representative smaller part specimen for the picture than the block of aluminum that was laying around.

Thanks for the thumbs up & comments
 
I built a stop system for my Kurt. This video shows the completed stop system


Sent from my iPad using Tapatalk
 
Bob do mean like these?
 

Attachments

  • 2019-04-11_12-07-11.jpg
    2019-04-11_12-07-11.jpg
    55 KB · Views: 14
Bob do mean like these?
Yes. You don't want to clamp them to death, they are not designed for heavy work, but just slide them until they are the same thickness as the work and then tighten the 2 screws, and install on the opposite end of the chuck from the work...
 
Back
Top