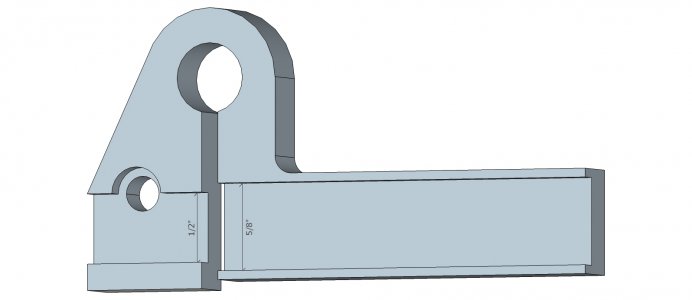
Parting tool for Atlas Craftsman lathe

ARC-170

Jeff L.
H-M Lifetime Diamond Member
Joined
Oct 17, 2018
Messages
922
I needed a parting tool that would give a little, so I based my design on designs I found on the internet.

Side view. This is steel. Not sure of type; it's made from scrap.
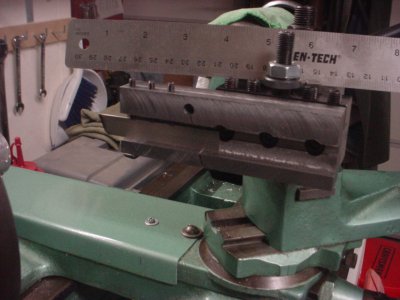
DSC00263.JPG

Back view showing how it's mounted to the tool holder. This is two parts: the blade holder and a bar I milled and drilled and tapped (1/4-20) to bolt to the blade holder that holds the whole assembly in the tool holder.
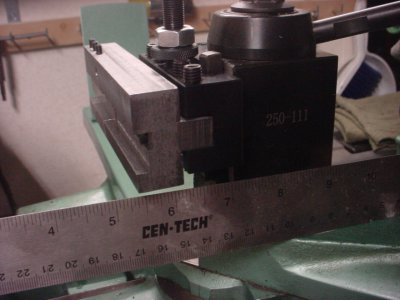
DSC00264.JPG

Front view. Not a very good shot, but it does show the thickness.
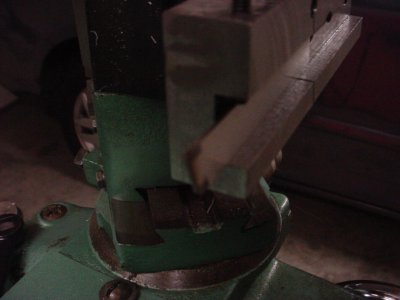
DSC00265.JPG

I took a practice cut on some 1" diameter aluminum rod. It cut really nice, but it "dished out" the cut. My colleague at the adult school machine shop told me the small parting tool (it's the thin one), coupled with the thick holder and the set screws (#8-32) causing the blade to be slightly crooked, didn't allow it to flex much (I saw it flex very little) so the tool "wandered" a bit. For smaller diameters it should be fine. A thicker blade would probably work better as well. The relief hole that allows the flex might be a little small, too. I've flattened the tips of the set screws so the blade sits straight.
 
I have thought about making something similar for my norman style QCTP. I could not tell from the photo but it is my understanding that for these flex style parting tool holders to work the slot for the blade has to be wider than the blade past the flex slot so the blade can move. Here is a sketch I did.

gooseneck parting tool holder ver 02.jpg
 
Having so much overhang is not a good thing for parting, the tools should be as close to the tool post as possible, all that overhang invites hanging up and breaking something.
 
I have thought about making something similar for my norman style QCTP. I could not tell from the photo but it is my understanding that for these flex style parting tool holders to work the slot for the blade has to be wider than the blade past the flex slot so the blade can move. Here is a sketch I did.

View attachment 333535
My design has room for the blade to move. It doesn't show up very well in the photos.

The set screws don't hold the blade as well as I'd like. A modified screw, such as the one that will probably go on your design, would work better.

It's funny that I'm taking a beginning machining course and I'm making some of the tooling I need since I don't have it at my house! Ha!
 
Having so much overhang is not a good thing for parting, the tools should be as close to the tool post as possible, all that overhang invites hanging up and breaking something.

I made it about as small as I could get it. It fits the parting blades I have. You are right about keeping it as close as possible. I need to make sure the compound is not cranked out too far and that the tool holder is secure, but not hanging out too far. I think I've figured that this is really for smaller diameter items.
I may make a smaller one based on what I've learned from this one. I think this one is a bit over-built.

The relief cut and the way the holder is designed is supposed to eliminate or reduce any potential to hang up; it flexes down and out, so the blade actually disengages from the part. The other parting tool I have flexes into the part if it gets hung up.
 
I can't say that I have had any positive experiences with spring tools; best cure for parting woes are cured with more speed and hand feed, and adequate lubrication in the form of MagicTap.
 
I can't say that I have had any positive experiences with spring tools; best cure for parting woes are cured with more speed and hand feed, and adequate lubrication in the form of MagicTap.

I haven't either! :) I found going really slow (rotation and feed rate) with LOTS of lube helped me. This tool I made is probably too stiff for the smaller blades. I may drill the hole bigger.
A tool like this needs proper engineering and I'm just flying by the seat of my pants and basing the design on what I found on the internet.

Still, it was fun! And, my colleague at the adult school was impressed.
 
In my experience, slow cutting speeds were not at all conducive to successful parting, slow speeds make slow feeding problematic, and as I said, fast speeds and agressive feeds by hand have worked best for me, but to qualify it, this was with heavier machines.
 
I brought two of these gooseneck tool holders made by Armstrong on Ebay and didn't realize that they were way too big for my lathe. I measured the hole. It is 11/32" The slot is the width of a hacksaw blade. That will give you a reference on how big Armstrong thought the hole and slot should be,

Winky's Workshop has an interesting video on a parting tool holder that he made.
I have thought about using his technique to make one with a gooseneck.

In a thread that I had on parting issues it was suggested to use a draw bar through the spindle to tighten a keeper (probably wrong term) against the chuck. Theory was that as long as there were different TPI on the drawbar verses the chuck the two different threads would work against each and the chuck could not unscrew when running in reverse. Haven't made the keeper yet so no experience with this idea. Being able to run in reverse on the front side would solve a lot of parting issues.
 
I brought two of these gooseneck tool holders made by Armstrong on Ebay and didn't realize that they were way too big for my lathe. I measured the hole. It is 11/32" The slot is the width of a hacksaw blade. That will give you a reference on how big Armstrong thought the hole and slot should be,

I have thought about using his technique to make one with a gooseneck.


Thanks for the info. How thick is the parting tool you bought? My hole is 1/4" and the slot is a saw kerf wide. I think my tool is too thick for the blades I'm using.

I saw that video when I was researching how to make mine. I wasn't fond of making the scribe line then machining to it because I wasn't sure I could get it EXACTLY so the parting blade was on center and I didn't want to use shims to fix it.
However, I may revisit mine and use his method for clamping the blade.
 
Back
Top