Pinching in pressing operation

Maplehead

Registered
Registered
Joined
Feb 20, 2017
Messages
437
Hi All
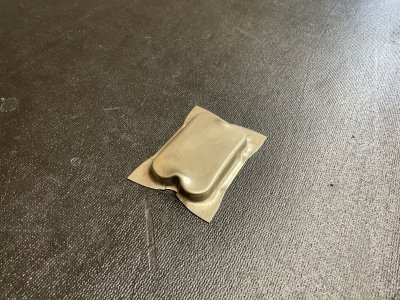
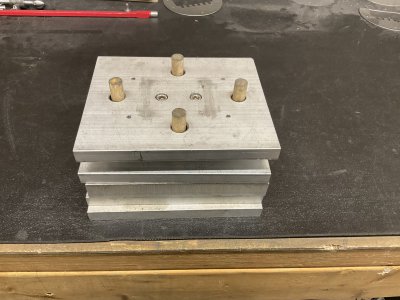
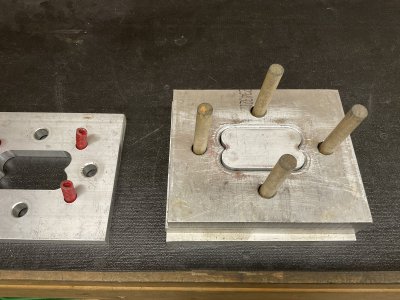
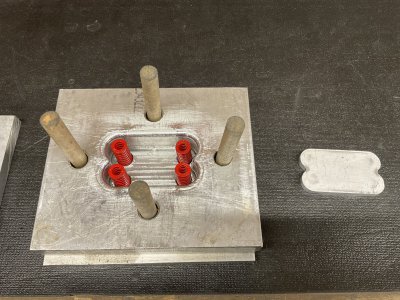
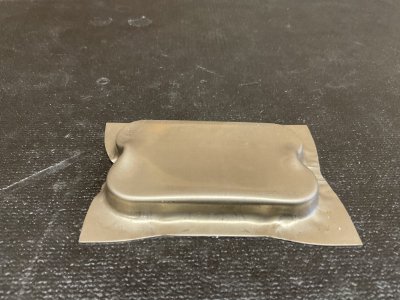
Any die press pros out there know how I can greatly reduce or eliminate the “pinching” you can see at the top ends of these pickup covers I pressed?
This is 24 gauge nickel-silver.
 

Attachments

  • 21E3775D-5F51-4958-A2EA-A841ECA6650C.jpeg
    21E3775D-5F51-4958-A2EA-A841ECA6650C.jpeg
    1,015.1 KB · Views: 43
  • D8AA5BA6-2BBA-41B4-AA21-D37370FE2741.jpeg
    D8AA5BA6-2BBA-41B4-AA21-D37370FE2741.jpeg
    557.9 KB · Views: 43
I'm not a die press pro, however I'll throw out a suggestion.
I think the key is to get the metal started down, over the corner, in area of the two indentions before the rest.
Use a progressive approach (multiple, incremental dies) rather than a one hit approach.
I'm thinking work the two indentions first, maybe about halfway down (so the excess material won't be moved up to the flat plane).
Then finish with your current die set.
Just thinking out loud.
Any pressing of parts I've seen don't use a progressive system, I think alignment would be awful.
Anyone troubleshooting this will need to see the dies, and know the clearances.
 
To my eye it looks like you need clamps on the excess material right where those kinks are. I think they would have to allow limited slip or they might tear the metal. I wonder if some heat might help too?
 
Last edited:
Was this done in two operations? To my untrained eye it looks like the piece was formed then pinched to form the mirrored look. Looks like the male die didn’t bottom out either. Annealing it first?
 
It looks like there is no draw ring or plate. That is something that would put pressure on the blank while it is being drawn in the die. With out that component of a die it will not form with out being wrinkled. I am no expert by any means. Hopefully someone with better back ground can help. If it was the top to a soda can or beer can, I have experience with that. The tooling was all premade and well designed. What I am seeing in your part looks like what happens with a faulty draw ring. Usually the springs were broken so the blank wasn’t held with enough pressure. The material was 5182 aluminum about six and a half thousandths thick. C-bag is on the right track.
 
Last edited:
Photos are always hard to troubleshoot............
It looks to me like you're bottoming out on the shoe plate before the block though.
Are those your actual guide pins?
 
Back
Top