Plasma Cutter Salvage job..

cathead

CATWERKS LTD
Registered
Joined
Feb 7, 2013
Messages
2,486
P1020931.JPG
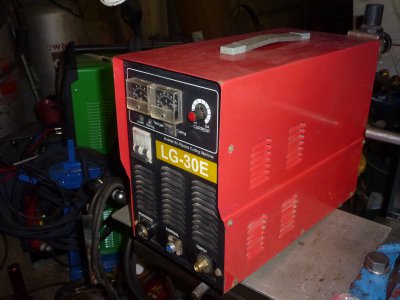
Here's a photo of the plasma cutter after I cleaned it up a bit. The torch output was missing a part which I had to
make. It was the plastic feed through insulator that was gone and the whole brass output thing was loose on its moorings.
I was lucky in that I had a piece of hard plastic that I could machine to fit. At this point I have no idea if this thing will work
but it came to me for no cost so nothing invested but my time. I might even learn something.:) There were several things that
would make the unit nonfunctional so I'm fixing each thing I come by. The current rheostat(22k wire wound) had a bent knob and it promptly
broke off as I applied just a little pressure to straighten it. The shaft was 4mm and I just happened to have a piece of it! On the inside end
of the shaft was a molded part that ran the wiper so carefully removed it and installed the new shaft piece. That worked out just fine but
the reassembly of the rheostat was somewhat difficult. P1020927.JPG
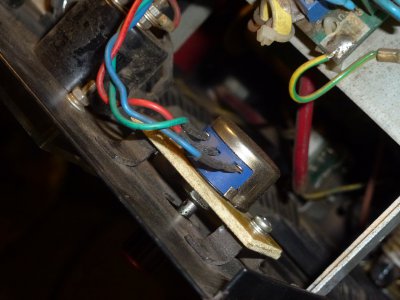
This is the rheostat with its new shaft installed.P1020929.JPG
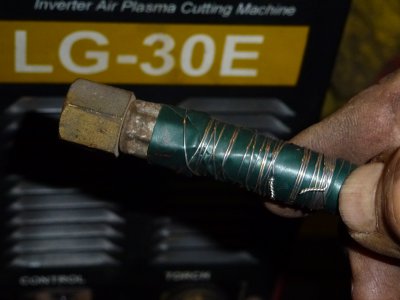
The end of the hose was somewhat compromised so taped it up and applied some safety wire to hold it together. If the thing works,
it would be worth making a better repair but good enough for right now. P1020925.JPG
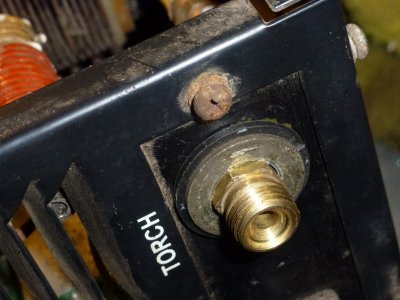
Here you can see the plastic part I fabricated behind the washer that holds the torch output hose. P1020930.JPG
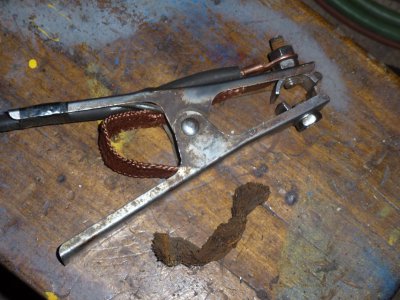
The ground clamp was pretty poor so cleaned it up a bit and fashioned a new copper bonding strap. I made it out of the braid of some RG-8 coax
and used some 5/16 inch copper pipes to make a nice transition. The old raggedy copper strap was just press fitted under the clamp insides.


The innards of this machine were very dirty and looked like it had a fair bit of shop time in a welding shop environment. I used an acid brush
to clean the circuit boards and associated parts. The black dust came off easily using a brush that was shortened so that the bristles were
sticking out about a quarter inch. I need to affix a power cord on the unit and also make some reparation to the trigger switch as it is just
hanging out in free air presently with a loose wire dangling with no connection. So time will tell if this unit actually will do some cutting.
The electronic parts all look fine but of course that means practically nothing. There was no obvious burned parts so will have to see.
I think this unit has IGBT transistors in it but I could be wrong about that. If worse comes to worse, there are some good parts so I really
can't lose. It's a fun challenge to see if it will work.

So now, it smells like turkey in the house now and I take this opportunity to wish you all a HAPPY THANKSGIVING even though the
conditions are not the greatest these days.


Cathead @ CATWERKS:)
 
Last edited:
It's amazing the difference in attitudes between hobbyists and commercial shop owners when it comes to resurrecting tools. Last year a friend of mine that owns a commercial shop recycled 2 perfectly good Miller plasma cutters. When I asked why he responded the consumables were just too expensive. His newer cutters not only cost less, the price of consumables was less than 1/3 that of the older Millers.
 
P1020932.JPG
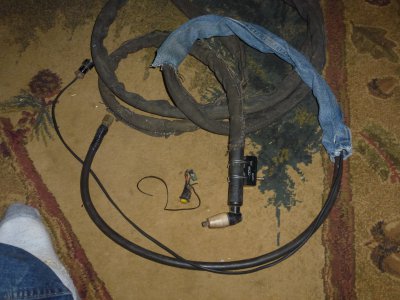
Yes, I know it looks ugly but waaay better than it was. I used my chinese shoe patcher sewing machine to
repair the denim sheath on the cables. The blue denim part was the hardest to make, something like making a pair of pants for a flamingo I guess. The switch was another interesting find. There are only two control wires on this machine
and there were two krapped out momentary switches wired in parallel at the handle. I have no idea what that was
about and the soldering job was laughable. I soldered on a microswitch(SPST) to the end of the cable and safety wired
it on to the handle, not beautiful but at least should work. I used the shoe patcher machine all along the black sheath as
it was all falling apart, being careful not to sew into the electrical cable as I went along. The air hose has a braided
copper cable that runs inside it, interesting how that was made. Even if this machine doesn't work, I have learned a lot in the process so I will not consider it time wasted even if I end up using the machine for parts. Now all that is left before testing it is to hook up an air hose and install a 220 volt plug.
 
Last edited:
@cathead ,

Thanks for sharing this resurrection.

Best of luck with the first power-up!
I am "watching".

-brino
 
First off, a special hello to Brino from Almonte, Ontario. I had to look it up to find out where you are.
This morning, I hooked up the plasma cutter to 220V and applied some air. The fan came on when I
turned on the breaker switch. The test button releases air from the wand. Pressing the microswitch on
the wand releases air as well so the solenoid air switch is working. It has no output though. I see
the volt meter come up momentarily but the current meter does not. If course it doesn't cut, no indication
of anything but air at the business end. So, I need to get out the Simpson 260 test meter and see what I can
determine what might be wrong. First, though, I need to educate myself a little using the computer to
have a better understanding of the details of how it works. There are eight IGBT or maybe MOSFET
devices so will look them over with a test meter and do some other voltage testing. So anyway it is all
in one piece and I need to figure out why it is not working in the electronics department. I'm hoping
that I can find a circuit diagram for this machine on the web.
 
@cathead,

I had to look up Bemidji too. It turns out that:
  1. We are both near different rivers called "Mississippi". The wikipedia page on Mississippi, states:
    European-American settlers named it after the Ojibwe word misi-ziibi (English: Great river).
  2. You are North of me! According to Wikipedia, Bemidji is at 47°28′25″N 94°52′49″W and Almonte is at 45.22629°N 76.19452°W

You are in a beautiful area too. So many lakes and trees.

Back to the problem at hand.......
If you can post some pictures of the circuit boards, perhaps the group can help. (more eyes and brains on the problem)

Any parts you can identify on the boards can help with debug. For instance, if you find an op-amp and then find a datasheet for it, that will tell you the expected power-rails for the device. Then check whether that part is powered properly.

Do you have an oscilloscope?
It might be useful to see the gate drive to the mosfet/igbt transistors.

Obviously, be careful poking around in there. When functional there will be some high voltages!

Interesting project, and we're rooting for you!

-brino
 
To start with, I located the high voltage electrolytic capacitors. I turned it on and measured
the voltage across them and it has about 350 volts DC across them so there is
high voltage at the supply board. I also tested for voltage on the output lead that connects
to the wire inside the air hose. I don't get any voltage reading there when pressing the trigger.
Also with the cover off, there is a flyback transformer and some points that arc over, I assume that is
the plasma generating unit. So far I have not found a schmeatic which would be a big help.
The two vertical circuit boards make it difficult to see into the middle of the machine to track the HV
line. It could be as simple as a fuse on the back of one of those two boards but so far have not been
able to see the board's back side. I do have an oscilloscope, it's a Siglent 1202. I will post again when
I have some photos and hopefully more info on the unit. Have a good day.
 
This morning I watched several YouTube videos on plasma cutters which prompted me to take a good
look at the innards of the plasma cutter tip. I polished up what I could with a 400 grit diamond hone and
put it back together. I turned it on and the plasma cutter actually has fire on the tip so it is working!
I have a brand new Everlast 80 amp plasma cutter that I will be using in my home shop. So far I have not even
plugged it in so I am a neophyte plasma cutter user for sure. It looks like I will need some tips for the LG30E
as I have no spares and the only tip I have looks well used. I looked around on the web and couldn't find any
consumables for that machine. I plan to take it to my other shop where I have a 6500 watt Honda 110-220 volt
generator. I am a little leery of running my new Everlast on a generator but will have no problem using the
LG30E over there. The plasma cutter tips look like copper with a center conductor down the middle of
some other type of metal, tungsten probably? Maybe someone on here knows. Now I can put the cover
back on the unit knowing it will work.
 
I polished up what I could with a 400 grit diamond hone and
put it back together. I turned it on and the plasma cutter actually has fire on the tip so it is working!

Fantastic!
Congratulations.
-brino
 
If you can post pictures of the plasma cutter tips, maybe someone will recognize them as same as another vendor/machine.
That could help find replacements.

-brino
 
Back
Top