I was looking for the next project (challenge) and decided on the PM Number 6. It was a lot larger and seemed like something that would keep me in the shop for a few hours.
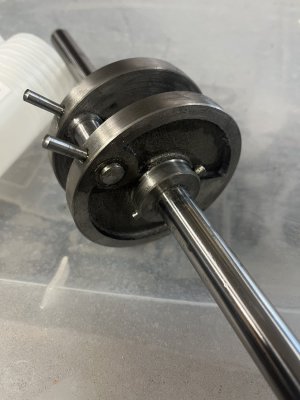
The first thing I tackled was the crank. I had never done a multi piece crank. I decided to leave the solid bar for the mains and cut it out later. It worked completely as expected. I used taper pins and locktite and ended up with no visible run out.
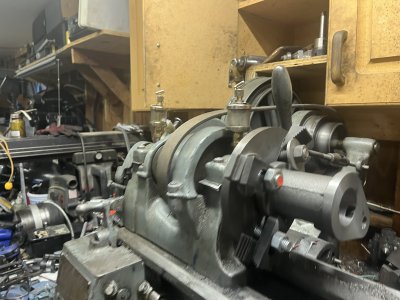
The next challenge was boring the cylinder and cross slide. They were long bores and took some creative fixtures. The interrupted cut on the cross slide gave my 1937 South Bend 9A everything that it could handle. The depth of the bore was at or beyond the recommended stick out for the boring bar. The bar wanted to catch on the edges of the opening if the cuts were more than .003 or .004. I didn't have a choice and got through it with acceptable taper of .003 or so. Lots and lots of passes.
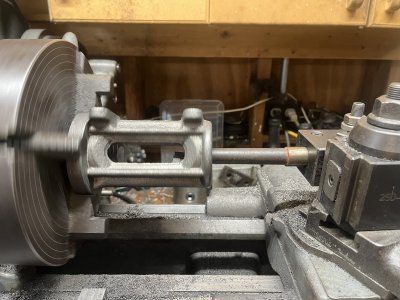
I had fun with the connecting rod. I saw an idea on YouTube to use a tool holder to fixture the rod.
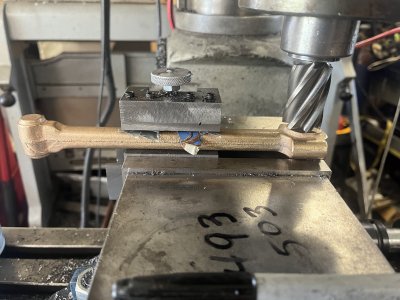
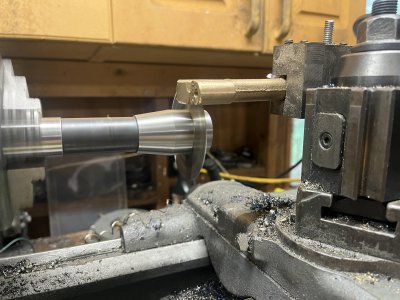
The shaft on the rod is close to a cylinder. The holder becomes the reference if I never remove the rod. Every feature in in the correct plane. Then I came up with a "creative" way to split the rod end. The rod in the holder was too tall for the mill with the slitting saw. So I moved to the lathe. I put the R8 slitting saw in the three jaw and the rod on tool post. I can already hear the "you did what???". I moved really slowly to keep the tool pressure low. I got perfect cuts and the R8 was none the worse for wear.
In the end after 7 weeks and north of 100 hours everything is done. I understand that the socket head screws are not correct period pieces. They are better that the pilaster head screws that came in the kit and I had a drawer full of them. See below... It is running on 6-7psi and 100 feet air hose. The knocking sound is the air exhausting from end of the valve body.
View attachment IMG_5074.MOV
I hope somebody finds this interesting. My biggest question is "what's next".
Will
The first thing I tackled was the crank. I had never done a multi piece crank. I decided to leave the solid bar for the mains and cut it out later. It worked completely as expected. I used taper pins and locktite and ended up with no visible run out.

The next challenge was boring the cylinder and cross slide. They were long bores and took some creative fixtures. The interrupted cut on the cross slide gave my 1937 South Bend 9A everything that it could handle. The depth of the bore was at or beyond the recommended stick out for the boring bar. The bar wanted to catch on the edges of the opening if the cuts were more than .003 or .004. I didn't have a choice and got through it with acceptable taper of .003 or so. Lots and lots of passes.


I had fun with the connecting rod. I saw an idea on YouTube to use a tool holder to fixture the rod.

The shaft on the rod is close to a cylinder. The holder becomes the reference if I never remove the rod. Every feature in in the correct plane. Then I came up with a "creative" way to split the rod end. The rod in the holder was too tall for the mill with the slitting saw. So I moved to the lathe. I put the R8 slitting saw in the three jaw and the rod on tool post. I can already hear the "you did what???". I moved really slowly to keep the tool pressure low. I got perfect cuts and the R8 was none the worse for wear.

In the end after 7 weeks and north of 100 hours everything is done. I understand that the socket head screws are not correct period pieces. They are better that the pilaster head screws that came in the kit and I had a drawer full of them. See below... It is running on 6-7psi and 100 feet air hose. The knocking sound is the air exhausting from end of the valve body.
View attachment IMG_5074.MOV
I hope somebody finds this interesting. My biggest question is "what's next".
Will

