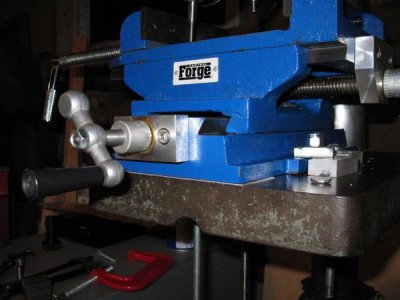
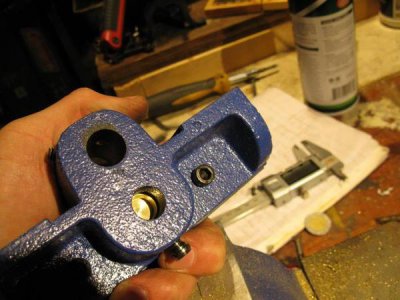
Polishing a turd or fettling a HF X-Y vise

You're welcome :) couldn't wait for setting things up properly and did a small test cut - worked a treat! I'm so excited! Pictures tomorrow, have to sleep now..
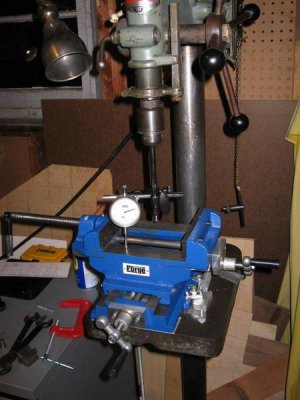
 
got a little bit more done - "trammed" the vise so that it's 2-3 thou out front to back and 1-2 thou out side to side. Given the amount of effort that it'd take to remove that to 1 thou or less (which would probably be wasted when I raise or lower the table :)) and the work I'm going to do, that's just fine by me

I unscrewed the base off my mag base indicator stand and stuck the whole lot in my chuck :)
IMG_3283_zpsa8926a87.jpg

Macbook pro battery shim
IMG_3284_zps9e4dabee.jpg

Collet chuck and collets are now done, so I'm pretty much good to go. I've a few more tweaks to do (chip tray, thrust bearings, bronze gibs + extra gib screws, couple of mods to take out the slack in the moveable jaw), but it's pretty much there. I'll keep plugging away at it in the meantime..
 
it's been slow going (no kidding!) as my parents were here for a few weeks and I've been busy with job interviews, but I managed to get a few more things done:

- now has a removeable chip tray (ex-alu baking pan)
- thrust bearings turned up from China ($2 each) and work amazingly. They've reduced the rotating friction from noticeable to nothing and have made all the difference
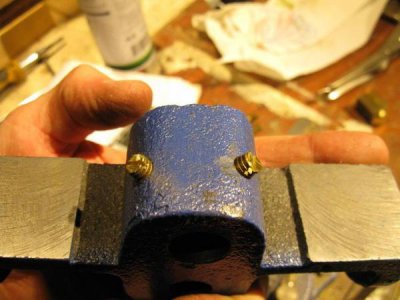
- added a couple of brass screws to the moveable jaw to take up some of the slack between the jaw and the top slide. Unfortunately, now I've done that I now know that the guide and the top slide aren't perfectly parallel, so we'll see what we can do about that.

IMG_3302_zps066cd8bc.jpg

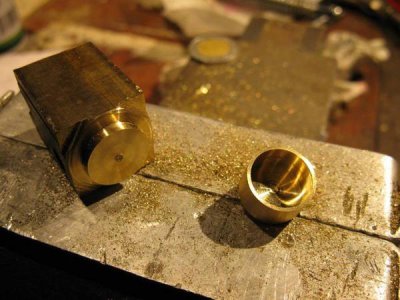
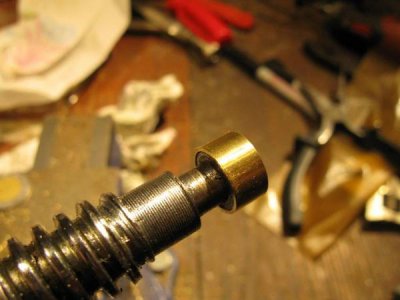
- fixed the slop between the screw and the moveable jaw. Adding a larger retaining screw helped a bit, but there was still ~1/2 a turn before the jaw would change direction and all the closing force was acting on the retaining screw, not the jaw. So I turned down a piece of scrap brass (I think, dusty shavings not curly chips) and pressed it in to the jaw. First time using my new telescoping bore gauges and micrometers too! Works a treat, no slop at all now.

IMG_3299_zpsa41a6af2.jpg
IMG_3300_zpsf1fd004f.jpg
IMG_3301_zps0abec635.jpg

Extra gib screws, brass gibs (perhaps) and "DROs" coming up :)
 
Nice to see how this has progressed. Looks like you end up with something superior to what you bought. Well done. :goodjob2:
 
Nice job on the vise rebuild. As I say, Chinese cast iron tools are a parts kit that needs to be built. Or re machined :))
How do you plan to mill on your drill press? Please tell me your using collets.
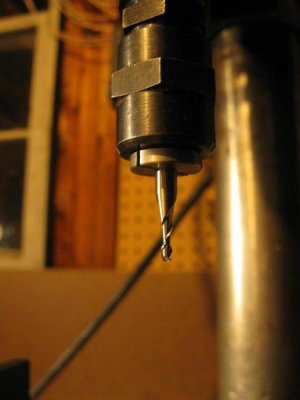
 
Nice to see how this has progressed. Looks like you end up with something superior to what you bought. Well done. :goodjob2:

thanks! I just wish it had progressed a little quicker :)

Nice job on the vise rebuild. As I say, Chinese cast iron tools are a parts kit that needs to be built. Or re machined :))
How do you plan to mill on your drill press? Please tell me your using collets.
My thoughts entirely, although it would have been perfectly serviceable as a drill press vise out of the box if you just wanted it for drilling a few holes.

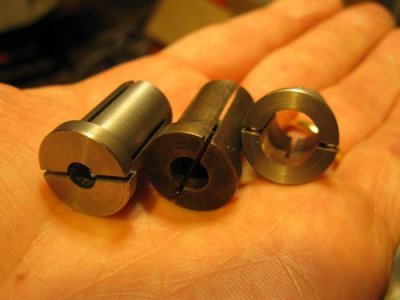
Thanks to the generosity of George Wilson on here I have a screw on collet chuck and I made some extra collets so it can now hold 1/8, 3/16, 1/4, 3/8 and 1/2in shank tools:

IMG_3292_zpsb256da04.jpg
IMG_3289_zpse5e23015.jpg
 
This is a very nice project & thread worthy of being an article in one of the machinist magazines and even a project of the month on this forum.

I found one at the scrap yard a few days ago @ .25 per pound it cost me $5.00 it was in fair looking shape missing both cranks for the X & Y and the movable jaw was rusted/bound up on the shaft, I disassembled it & soaked it in Evaporust, reassembled it and it looks like new. I bought it to resale but by the time I make or find the cranks I think that will be fruitless so I may copy your project and hang on to it at least for now. Mine was identical to yours except in color, it has 100 on one of the castings.

Again this is an excellent project for this forum.
 
thank you Charley, that's very kind, but anything I've done on this pales in comparison to some of the truly amazing work I've seen on here. It's been a great learning experience though and if it's of use to anyone else, that's a big bonus! I've got a bunch of work to do on my car and commuter bike this weekend, so this will probably have to wait until next week.
 
you did a nice job on that vice. I got one just about like it , I bought off a guy for $5 selling scrap metal. It really looked bad ,but after cleaning it up and reworking all the parts it works really smooth and the gibs and dove tails fit up very tight with only a couple thousandths give. more than adequate for anything I will use it for. I gave mine a new paint job with grey hammered finish and it looks great (my wife doesn't even know what it is and she thinks it is real pretty). now the bad part. THOSE DIALS. there is slop, you cant read them and those end plates!. I like what you did and I was thinking of doing the same thing ,but I am making the plates from cold roll steel. I found three piece thrust ball bearings at McMaster Car really cheap, but didn't know how I was going to get a good fit on the lead screw. I like the little top hat thingy you made. That idea will solve my problem. I ordered some more thrust bearings with a little bigger ID to fit the top hat hickey. The screws work really well in both directions now and the backlash is almost nothing since I can preload the bearings. The only backlash is in the screw and nut and I am working on a design for an adjustable nut to replace it ( just have to find a cheaper way. the blanks are too expensive for this project)b but amazingly the cast iron nuts in this vise are pretty tight. I have run lathes with more backlash. So with the $5 I paid for the vise and $30.00 worth of new hardware, I have a high quality X Y axis vise. Oh , and the thrust bearings are less than a 1/4 inch thickness for all three pieces so the plates don't have to be exceptionally thick. My only improvement left is to make new dials a little bigger and easier to read. I would take some pics but I haven't figured out how to get them on here yet.

I think you did a great job on it

Mark F.
 
thanks Mark, much appreciated and glad I could provide some inspiration. I'd be really interested to see what you came up with, especially those thrust bearings which are 2/3 the thickness of the ones I bought. I agree about the dials, can't see any point to them and I don't even know what the graduations represent. I'm just going to bolt on a couple of cheap plastic 6in digital calipers ($7 each!) and use those instead. Gets rid of any backlash issue (I still have some even on my set up), zeroable and I can use whatever units are appropriate at the time. Haven't figured out how to attach them yet, but it should be too hard.
 
Back
Top