2018 POTD Thread Archive

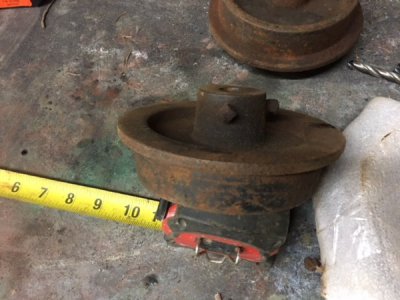
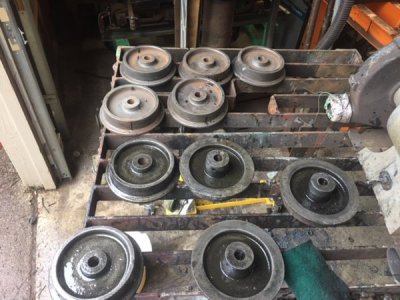
Built up a 20 gal electrolysis tank out of a Home Depot plastic storage tub. ended up using a battery charger running through a spare 12v marine battery, then jumped to anodes and cathodes in the tub. After much experimenting I derusted 16 miniature cast iron railroad wheels and four cast steel Bettendorf style trucks. Took the better part of a week to process all the parts. Bit of a challenge doing 6 of the wheels at a time, in series. Burned out two el cheapo power supply’s and found I needed to add a second positive charge collection plate to increase my anode surface area. But the end product came out pretty well. A lot better than standing in a cloud of grinding wheel rust dust day after day.

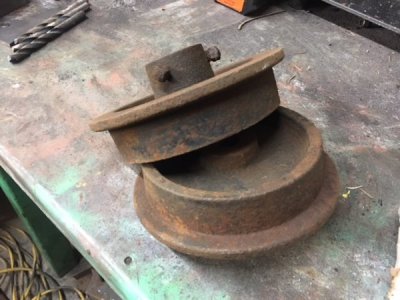
Final step was to run each piece through a wire wheel grinder to get rid of the gray oxide residue produced by the electrolysis , and then paint the wheels with Ospho (phosphoric acid) to kill the flash rusting and add a protective layer to the newly cleaned wheels. Latter in the summer I need to bore out the axle diameter, make up and sweat on new axles and bearings and remount to the trucks, prior to building up a couple of riding cars for my backyard RR.
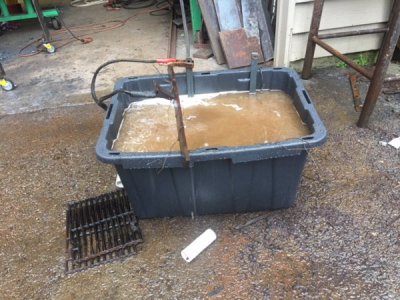
343A3BEF-17D5-4ECD-9CE4-8DD00058FC0A.jpeg

CA71A30E-372D-4D52-8871-4C792A059934.jpeg

65BDC583-0518-4E74-A76B-E457FD86BBBC.jpeg
F
9DC82729-0785-49A8-BAC5-F0DF5F0DED24.jpeg


Here’s a couple of more photos of the set up and the 3” scale trucks.

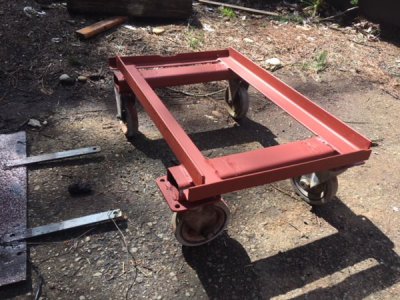
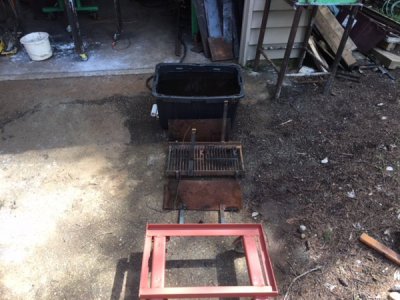
Frame with wheels to hold the immersion bucket:
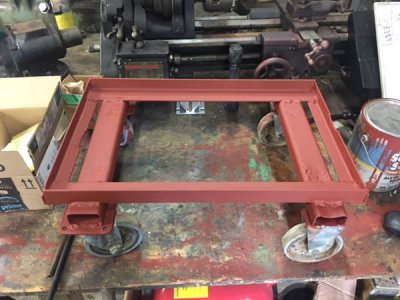
82B4D0AB-07EA-4B24-8950-87595D79AB8E.jpeg

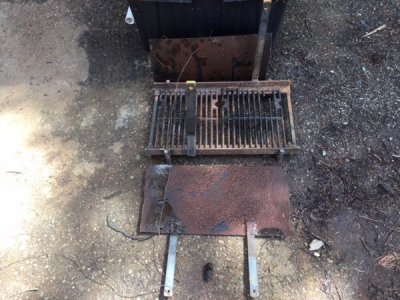
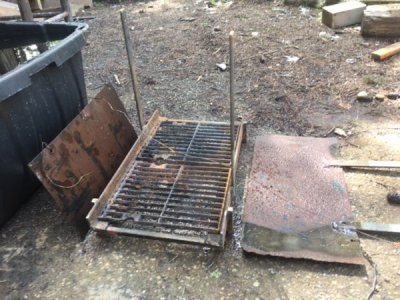
Anode plates and cathode rack . The idea behind the rack was to bond multiple pieces to the cathode lead and derust stuff in volume. Didn’t really work like I hoped. Turns out better to hang each piece in the bath with wire and run the lead ends up to the primary negative lead coming off the power source. Maybe make a power bus at the point to run. Ultiple wires down to the work pieces.
ED719282-70B6-4742-95C2-46073A4E996A.jpeg

6911E365-ADC5-42E6-BB39-E8C96A71A0CF.jpeg

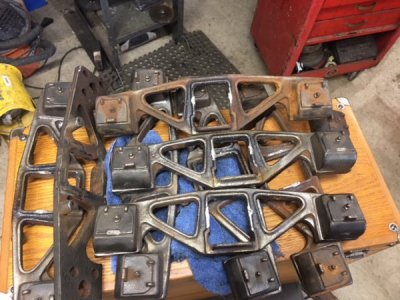
Picture of the finished 2.5” scale trucks.
DACE08EA-4727-42F6-A0B7-3F7BE4E449E6.jpeg

These show some milling marks where I faced off stubs of welded bolsters that some previous owner fab’d up out of 3” ship channel (cross pieces). I cut the bolsters off the frames with a plasma cutter and had to clean up the blobs of melted steel and stub ends. A lot more machining on the back side of these frames. The bolsters are supposed to be loose in the sideframes to allow a certain degree of vertical and lateral movement to accommodate unevenness in the track bed. Not supposed to be welded into a rigid box frame shape, as these were. But now, good enuf for workin on the railroad!

Glenn
242301E1-AAB2-4214-A817-E699752E04F4.jpeg

E318AB68-A6B4-40F2-A9B4-990536A6A77C.jpeg
 
Last edited:
Carrying on with this project (https://www.hobby-machinist.com/thr...you-make-in-your-shop-today.67833/post-577199)

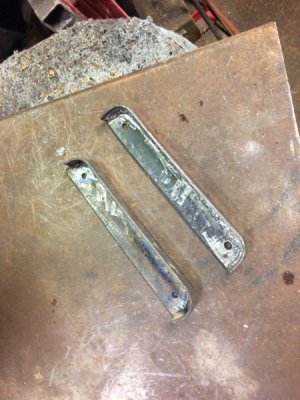
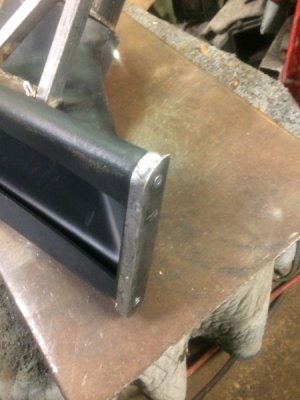
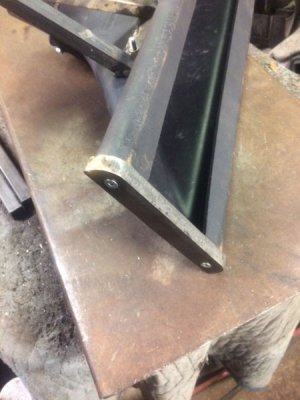
Made the two nozzle wear plates out of a strip of 1/8 x 1/2" flat iron, and the side from the 14 gauge sheet metal. I had bought regular bolts to hold them on, but after seeing the Little Wonder wear plates, I decided to use the same style stove bolts as well, to minimize catching them on things (patio stones, borders on flower gardens, that kind of stuff):
IMG_1141.jpg
IMG_1142.jpg
IMG_1143.jpg

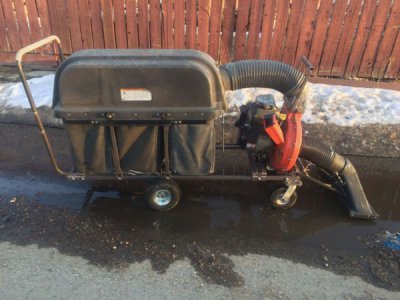
And here's a picture of the overall unit. It's a big boy.
IMG_1145.jpg

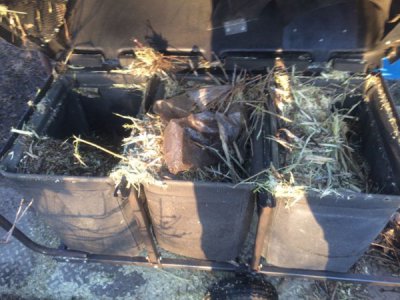
It's too wet to try vacuuming stuff, but I used the chipper to chop up a bunch of branches I cut last fall and just put in a pile in my yard. It didn't do too bad spreading the bits between the three bags. The front one has a bunch of extra stuff from when I had to clear some tube jams (some smaller branches wouldn't get chipped, but would just go in and then get blown out through the tube, and then catch on the bagger inlet, then chipped material would catch on the branches, and then it plugs pretty fast).
IMG_1144.jpg

I think I'm going to shorten it a little bit, to get the bagger closer to the engine, as space is a premium on the truck/trailer I use.
 
Built up a 20 gal electrolysis tank ...

View attachment 265495

Glenn

That's pretty cool. In the past (not having an electrolysis setup) I used vinegar (or lemon juice)+salt to remove rust and it blew me away how a rusted part can come out looking like new. I don't know the science behind it but I always thought rust meant permanently damaged metal which may be true for softer metal but at least the axle nuts and bolts that I derusted looked just like new.
 
Stoic, I’ve heard of using vinegar, but didn’t know about the salt additive. Very interesting. Some folk also use molasses. I thought about the molasses bath, but then what to do with 20 gal of water, rust and molasses? :eek:

I think the surface does get pitted slightly with say, flash rusting. It’s just microscopic and not all that noticeable to the eye. I’ve heard it said one part metal makes 9 parts rust. So the iron oxide molecules must be substanstially larger than the parent ferrous atoms. Advanced stages, I’ve seen steel plate and things like 1-2” galvanized cable on the beach up in Alaska in the old days, completely rusted and crumbling apart in large sheets of rust by the salt water. Pretty amazing.

Glenn
 
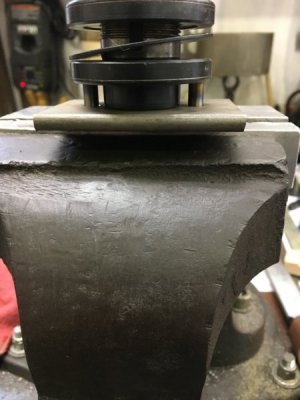
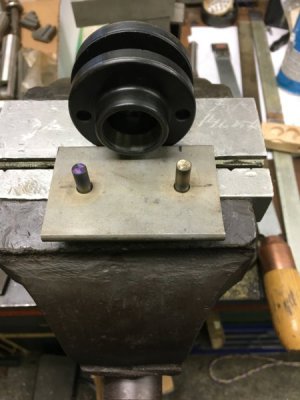
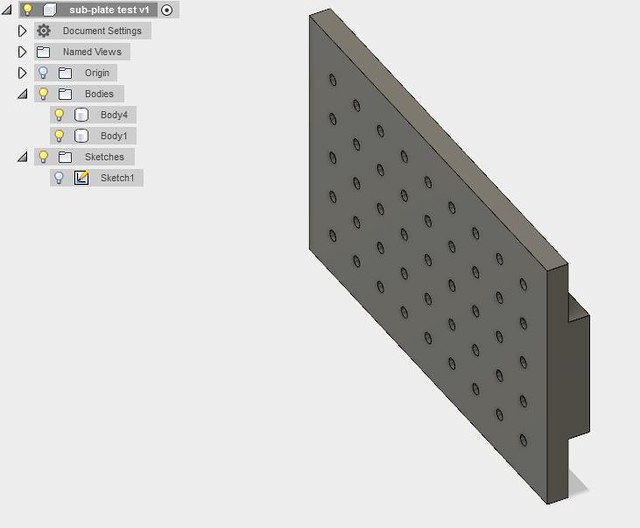
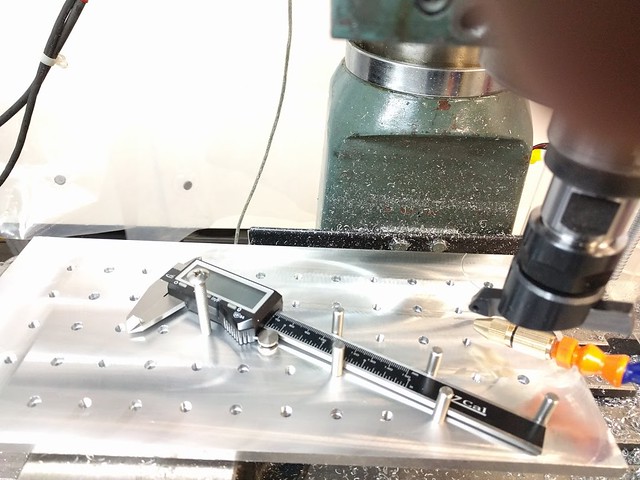
Small fixture plate with dowel-pin holes as well as threaded screw holes. The plate can be mounted in the vise or directly to the table.

Ran into a couple of challenges that were great learning opportunities, I've added the details to my CNC build thread:
https://www.hobby-machinist.com/thr...-to-cnc-conversion-the-cheap-way.67434/page-2

39447683610_d681efb07a_z.jpg


40721760445_6c350b0fc3_z.jpg
 
Last edited:
Nice Shawn, a piece of advice, move the shelf above the pump higher, the head gets pretty hot, you don't want to trap hot air near it. It needs to breathe. Especially since you now have 2 tanks to fill it will run longer to fill.
Hey, didn’t even see this reply till now.

The pump and motor are self cooling/have fans. I put my head in front of the pump or the motor, it blows my (short) hair.
Today I ran a good test. I had the 6” pneumatic DA sander going for about 15 mins x2 with about 45 seconds in beteeen while I switch table tops and sanding pads. Compressor ran only twice in that half hour, and only ran as long as it’s refill time. It was about 10 mins from the time I started to the time the motor kicked on the first time. Impressive! There’s the 120 gallons. I knew it kicked on cause my lights dimmed downstairs, lol. I went outside after to check on things when I was done, it was just finishing it’s second fill. Things were warm, but normal warm. I’m almost always paranoid about heat and mechanics. I can smell heat from across a factory when a piece of machinery is getting too hot. I was not uncomfortable with the amount of heat here. But, if all else fails, I have some enclosure fans I can rig up since that shelf is perminent. However, that is likely the hardest the compressor will work. Those were very large table tops, I don’t generally build that big anymore and when I do I generally use the stroke sander, but I wanted to try the pneumatics to see how it went. I was happy. For once.
 
I could really use a timer like that, for my compressor also. Please post more info (Manufacturer?, Model #?, etc.) so I know what to look for.

That exterior receiver is going to be an excellent heat exchanger in the cold weather. The moisture in the warm compressed air should condense on the cold receiver wall(s). You might have to implement a heater system to melt the ice in the receiver (and drain the water) if the temperature stays low enough long enough that the ice builds up and becomes a problem. Maybe just insulating the receiver would prevent ice build up.

Nice project. Thanks for posting.
We are well above freezing now. There is a truck air dump on the bottom of that tank attached to a cord tied off to near the top of the tank, I just walk by and give it a tug and it blows the water out. No more crawling under the tank. I did that today and no moisture came out. Eventually my goal is to build a shop in the back yard where I built the shed last year so I can move the wood shop out there so I can finish the basement for my son to play in. I would keep the tank in there which would be heated. For now, I’ll risk it. There is enough air line in the garage that the air should cool to room temp before going outside where it will cool more, I don’t think I’d have too much of an ice issue. But if I do, it is only pex, it can be beat with a stick to break any build up in the pipe, and if the tank freezes up, I have a shut off where the pipe exists the garage tank, I’ll just isolate the outside tank until things thaw out. The outside tank really is only temporary. Which for me, usually means a year or two. Lol

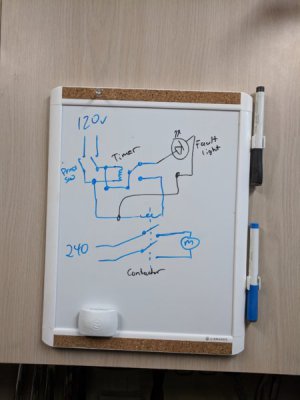
As far as the timer. It’s just a contractor and a delay on timer. The contractor I had, the timer was $20 on fleabay.
I took the motor leads out of the pressure switch, changed that voltage to 110 and just a plug that plugs in the wall. The pressure switch powers the timer. Timer turns on with the pressure switch which powers the contactor and the normally open closes. The 220v is wired into the contactor then out to the motor. I timed how long it took for the tank to fill from dry to cut off and added 10 mins. In my case, it’s set for 20 mins. Then the indicator is just on the normally closed side of the timer. So, when the timer is powered it closes the normally open which powers the contactor, then if the compressor fills as per normal, the pressure switch cuts out and the power is cut to everything, and it repeats when it reaches the cut in pressure again. Rinse and repeat. If something happens and the pump runs long, the timer runs out, switches the normally open back to open and cuts the contactor which cuts the motor, and it closes the normally closed, which just turns on the red indicator lamp to show me it faulted. It all still has power because the pressure switch never hit the cut off pressure and shut off. To reset, I just shut off the pressure switch and fix the problem, then turn it back on.

Here's a quick and dirty schematic.
IMG_20180414_100209.jpg
 
Last edited by a moderator:
We are well above freezing now. There is a truck air dump on the bottom of that tank attached to a cord tied off to near the top of the tank, I just walk by and give it a tug and it blows the water out. No more crawling under the tank. I did that today and no moisture came out. Eventually my goal is to build a shop in the back yard where I built the shed last year so I can move the wood shop out there so I can finish the basement for my son to play in. I would keep the tank in there which would be heated. For now, I’ll risk it. There is enough air line in the garage that the air should cool to room temp before going outside where it will cool more, I don’t think I’d have too much of an ice issue. But if I do, it is only pex, it can be beat with a stick to break any build up in the pipe, and if the tank freezes up, I have a shut off where the pipe exists the garage tank, I’ll just isolate the outside tank until things thaw out. The outside tank really is only temporary. Which for me, usually means a year or two. Lol

As far as the timer. It’s just a contractor and a delay on timer. The contractor I had, the timer was $20 on fleabay.
I took the motor leads out of the pressure switch, changed that voltage to 110 and just a plug that plugs in the wall. The pressure switch powers the timer. Timer turns on with the pressure switch which powers the contactor and the normally open closes. The 220v is wired into the contactor then out to the motor. I timed how long it took for the tank to fill from dry to cut off and added 10 mins. In my case, it’s set for 20 mins. Then the indicator is just on the normally closed side of the timer. So, when the timer is powered it closes the normally open which powers the contactor, then if the compressor fills as per normal, the pressure switch cuts out and the power is cut to everything, and it repeats when it reaches the cut in pressure again. Rinse and repeat. If something happens and the pump runs long, the timer runs out, switches the normally open back to open and cuts the contactor which cuts the motor, and it closes the normally closed, which just turns on the red indicator lamp to show me it faulted. It all still has power because the pressure switch never hit the cut off pressure and shut off. To reset, I just shut off the pressure switch and fix the problem, then turn it back on.

Here's a quick and dirty schematic.
View attachment 265763

Thank you Shawn. Your explanation of the timer is clear enough for me to build one.
 
Back
Top