Power Drive Not Driving All The Way

Threadkiller

Registered
Registered
Joined
Feb 19, 2014
Messages
112
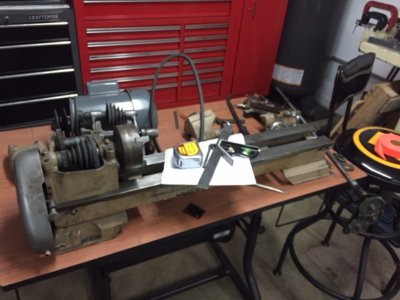
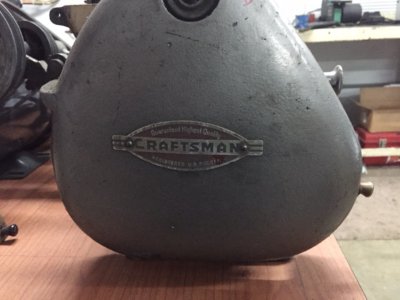
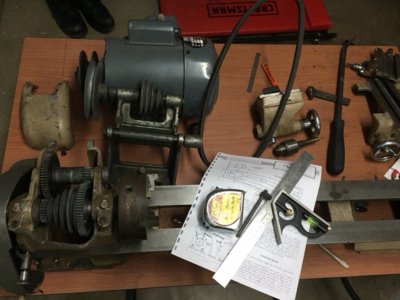
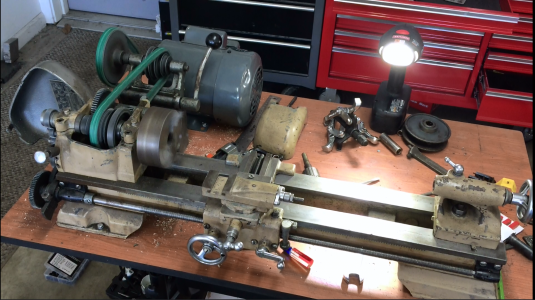
Hey all, I have an old craftsman 101 6" lathe that a buddy of mine generously gifted to me when he got his bigger south bend. It was out of commission for a while because of a few little hiccups and motor problems. I got it running the other day and to my dismay I found that the lead screw power drive (I think thats what you call it im a total lathe noob) doesnt work all the way. The carriage/apron? The part with the cross slide doesnt continue all the way on the lead screw. The threads of the lead screw all galled up in a few spots but not where it stops. Would a new lead screw solve this problem? Also I want to get a new quick change tool post for it, it has a lantern style post right now. From what Ive found as options for tool posts online are very vague. Can anyone point me in the right direction for a quick change tool post for a lathe like this? Thank you in advance.
 
Ive attached some pictures of the lathe from a while ago before I got it running just so you guys know what lathe im talking about.

image1.JPG image3.JPG image4.JPG
 

Check the lead screw for wear. Chances are on an okd lathe, both the lead screw and the half nuts are worn to the point where they will no longer engage. The wear will be closest nearest the head stock and if you compare the thread profile in that region to the threads at the far end of the lead screw, you shoulde be able to see the difference.

The half nuts are located on the right side of the apron behind the engagement lever. They are made of Zamak or white metal and wear easily, particularly if the lead screw is not kept clean. I have replaced both the lead screw and the half nuts on my 6" Craftsman decades ago. I don't know if you can still get those parts from Clausing; I would expect not.

If the lead screw/half nut assembly is not repairable, you still have a usable lathe, just no power feed or threading capability. A watch on eBay should eventually turn up some used parts.

Good luck!

Bob
 
Thank you Bob! I will take a closer look this evening. Anyone else have any input or know if theres a place online that sells parts for these little hobby lathes aside from ebay ?
 
Do the following with care.
1) remove the tailstock, slide it to the right until it's off the ways, then set it down on a clean piece of paper or rag.
2) remove the two screws that hold the right tend of the feed screw support and slide the support to the right, off the screw and set it aside.
3) in theory, you can now crank the entire saddle to the right until it runs out of rack for the teeth on the crank wheel. (Half nut disengaged)
4) slide it to the right until it is off the ways.
5) carefully set it down upside down and locate the half nut. It can be removed by taking it's crank off its shaft and sliding the half nut from the saddle.

You will then be able to see the condition of the threads in the half nut.

It goes back together just the reverse.
 
I had a 101 6" and I bought my QCTP from Little Machine Shop. It was pretty cheap and the handle broke. I let the guy who bought the lathe have all of the tooling when I moved on to my Grizzly G0602. I think that an AXA size would be tool tall for it, that's what I have on my 10X22". The guy I bought my 101 from "inconspicuously" brazed the threading gear to the shaft, gave me all of the change gears and didn't tell me. Dick...

I, in turn, sold it to a guy who just wanted it for polishing stuff and no threading.
 
Do the following with care.
1) remove the tailstock, slide it to the right until it's off the ways, then set it down on a clean piece of paper or rag.
2) remove the two screws that hold the right tend of the feed screw support and slide the support to the right, off the screw and set it aside.
3) in theory, you can now crank the entire saddle to the right until it runs out of rack for the teeth on the crank wheel. (Half nut disengaged)
4) slide it to the right until it is off the ways.
5) carefully set it down upside down and locate the half nut. It can be removed by taking it's crank off its shaft and sliding the half nut from the saddle.

You will then be able to see the condition of the threads in the half nut.

It goes back together just the reverse.

Thank you, Ive already had this lathe in pieces I just never looked too closely at the lead screw or those clamping nuts. Didnt know it wouldnt feed all the way until i ran it for the first time. Thank you for the tutorial. Another question actually. My tailstock seems to wobble unless I tighten it down all the way but then it doesnt slide on the bed. Is there any way to get it solid to the bed and having it still be able to move freely? Another question. The lathe is level but when I tried to drill out some round stock the other day, the drill bit wouldnt line up with center from the tail stock. Sorry for the million questions but I just want to see if theres any little tricks or tips that you experienced guys have. Thanks again.

I had a 101 6" and I bought my QCTP from Little Machine Shop. It was pretty cheap and the handle broke. I let the guy who bought the lathe have all of the tooling when I moved on to my Grizzly G0602. I think that an AXA size would be tool tall for it, that's what I have on my 10X22". The guy I bought my 101 from "inconspicuously" brazed the threading gear to the shaft, gave me all of the change gears and didn't tell me. Dick...

I, in turn, sold it to a guy who just wanted it for polishing stuff and no threading.

Its a shame when someone sells something under the "buyer beward dick clause" and they dont disclose flaws. How did you like the 6" otherwise? I literally have 0 experience when it comes to machining anything. I am more into welding and cars, but when my buddy offered me the lathe I figured it would be a cheap way to try and expand my skill set a little. Just needs some TLC before I can make full use.
 
It was OK, but I outgrew it quickly and with no means to thread, that was it for me. I worked in several "real" machine shops 20+ years ago and was out of the sport only for a lack of space to put machinery.

Sounds like you need to align your tail stock. Jack those screws (loosen one/tighten the other) at the base to budge it right or left. Do you have the manual for it? I found one online for my model (not the same as yours).
 
Thank you, Ive already had this lathe in pieces I just never looked too closely at the lead screw or those clamping nuts. Didnt know it wouldnt feed all the way until i ran it for the first time. Thank you for the tutorial. Another question actually. My tailstock seems to wobble unless I tighten it down all the way but then it doesnt slide on the bed. Is there any way to get it solid to the bed and having it still be able to move freely? Another question. The lathe is level but when I tried to drill out some round stock the other day, the drill bit wouldnt line up with center from the tail stock. Thanks again.
You should be able to remove the half nuts by removing the two screws on either side of the engagement lever. The tailstock has an adjustable gib. Remove the tailstock and slightly loosen the two screws holding the gib. You want them lightly snug. The gib adjustments are the two screws at the bottom front and rear of the tailstock. Adjust them for the desired fit and tighten the retaining screws. On a lathe that has seen much use, you will undoubtedly have more clearance in the "working region"of the bed so check to make sure the tailstock slides freely over its entire range.
To adjust your tailstock laterally, there are two setscrews which move the upper part relative to the base. Loosen the clamp and loosen one of the setscrews and tighten the other to move the tailstock from side to side. Use a center in the spindle and one in the tailstock for alignment. The two points should be directly opposite each other. For a more exact alignment, you can mount a shaft on the two centers and turn two cylindrical sections, one near the headstock center and on near the tailstock center. If the tailstock is properly aligned, the measured diameters will be the same. If they aren't, adjust the tailstock lateral position to bring into alignment. There are a number of posts on this and other websites describing the procedure in more detail.

Bob
 
Back
Top