Question about horizontal drive and motor oil holes

Thanks, everyone. The problem with the start switch is that it sometimes does not click when the motor slows/stops. Sometimes it does after 5 or 10 seconds; sometimes it clicks if I pull the belt some. For the time being it is more aggravation than a show stopper.
I'm not keen on rotating the end bells mostly because I've been into motors before and sometimes the wiring can be a mess. I'm thinking I will make a new bracket. That seems the simplest. Other than the start switch issue, it is a good motor. It's wired for 220 and that's okay with me.
I especially appreciate the guidance on the power of the motor required.
 
If the start switch is already acting a bit flakey you may be getting into the motor sooner than you planned :)
Hopefully it only needs a bit of oil on the mechanism
-M
 
100% with Jim, buy some 90deg oilers and you're good to go!
 
I've got what I believe to be the original motor on my 9A, and it also has the horizontal oil hole issue... I ordered from eBay what I believe to be suitable 90 degree replacements, that visually appear identical to what's on the lathe. We'll see.... One day. But I believe that is the way to go. Taking apart an old motor is a gamble. Everything's fixable, but at the age of these things, it's usually best to let sleeping dogs lie. When the motor needs repair to function, that's the time for you to (or to have a motor shop) take the risk of opening it up, and move the end caps. If you want to go back to the original oilers. But I'd recommend the 90 degree ones for sure. I just can't see any sense putting all the planning and work into making a frankenstein machine over something that small.

I know you said it's rough, but check the motor tag(s) and check for a "washer" pinned under the oil cup that might have quantity and frequency of oiling. Mine is 30 drops of (20w?) annually. Others might be two or three drops daily (which means 8 hours of use, not calander days). That's good stuff to know. If it calls for motor oil, I'd pass. You'd be better served with the ISO hydraulic oil. If you happened to get a "South Bend Oil Kit", the type B would be ideal. The one South bends uses for gears. Motor oil today is nothing near what it was then. In short, it's got too much "extras" for something like that.

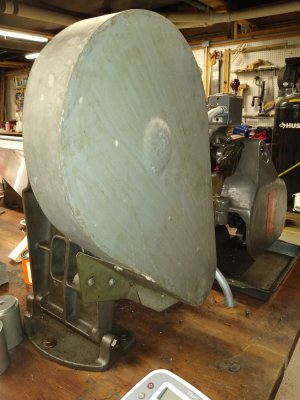
The motors that were shipped with these lathes (if the buyer so chose) were a quarter horse, or you could upgrade to a half horse. (and 1800 RPM, slightly lower nominal). Given the design of the spindle bearings in particular, the clearances allowed (they are tight, with good reason), you really don't want more than half a horse going through there anyhow. Higher horsepower and higher RPMs are quite possible for VERY SHORT times, but the hydrodynamic wedge (the oiling method) is, by necessity, not ideal. Perfectly sufficient, no worries, no issues, just not ideal. If that were redesigned (wouldn't really work for this lathe any more....), yeah, that size bearing could do a lot more. But that ship's sailed. I wouldn't try to upgrade beyond what you have. Besides all that, the lathe just doesn't want any more than that. Even with a half horse, you can flex things a lot that shouldn't flex as much as they will. Half horse is a good size.

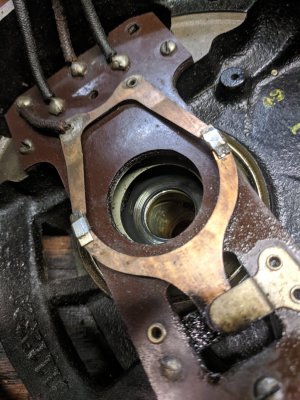
No idea what those extra holes are in the countershaft bracket. The original owner of my lathe used them to mount a shop made belt guard. Clearly he didn't need those holes for anything either... Even had a finger guard for the other side of the countershaft pulley, but the copper wire ties started working loose, so I took it off. I might put it back one day.
 

Attachments

  • IMG_20220802_200519920.jpg
    IMG_20220802_200519920.jpg
    249.2 KB · Views: 5
  • IMG_20220802_200952406.jpg
    IMG_20220802_200952406.jpg
    272.6 KB · Views: 4
Well, I've done it now. I've got the end bells off and looking at the start switch. The switch makes the connection of voltage to the capacitor when the fiber plunger pushes against it. When I pulled off the switch end bell the plunger jumped out and now I'm unsure about how it is supposed to fit back. Is it #1 or #2 or something else. I'm pretty good at visualizing how things work and the centrifugal assembly puzzles me a little. I can see how the arms would swing out when up to speed, but why are the arms offset the way they are. It seems as though it is a recipe for the plunger getting stuck. But of course I can't see the thing when it is assembled and the dimensions may be such as to prevent that. At any rate, what would cause the thing to stick upon slowing down and should I try to lube the points of the sheet metal where it rubs?? The shaft that the plunger slides on was wet with oil. In the pic it is dry because I wiped it off.
By the way, this is a very well built GE motor. It is quite heavy. I did finally get enough from the nameplate to know it is a 230V motor and 1/2HP. The wiring between the forward-off-reverse switch and motor is shown in the drawing. I realize there is an error/incompleteness because the cap doesn't really go across those terminals but through the switch and start winding and cap.
I did later find a centrifugal assembly for a GE motor that is shown in the last picture.
 

Attachments

  • switch.jpg
    switch.jpg
    318.4 KB · Views: 6
  • number1.jpg
    number1.jpg
    277.7 KB · Views: 6
  • number2.jpg
    number2.jpg
    257.5 KB · Views: 5
  • motor-wiring-9A.jpg
    motor-wiring-9A.jpg
    63.9 KB · Views: 5
  • s-l500.jpg
    s-l500.jpg
    19.4 KB · Views: 5
Last edited:
The start switch should never be lubricated. If it's dragging on something, get that something out of the way. Since you've taken it down, I stand aside. Most every one I work on is different, if I take it apart I know how it goes back together. Sorry. . .

.
 
Okay, thanks. The problem is that when I took the end bell off, the plunger jumped so I didn't get to see how it was before. There wasn't any dirt or gunk in the switch itself. I'll put it back together the way I think it should go and try it.
Later this morning......
Believe it or don't. I studied the plunger some more, and put it back the way I thought and lo and behold, it runs!! Turned it on and off several times and could hear the switch clicking as it slowed to a stop.
Many thanks to everyone for the info and guidance.
 
Last edited:
Back
Top