Rd14x40 Bed Twist

Hermetic,
Yes, I did notice the outer edge clean up before the center. If I re-chuck the piece, would I get that affect again?

Again, thank you for your help.
You and Ken have been very helpful.


Sent from my iPhone using Tapatalk
 
By the way, I purchased some material to do a true two collar test. Will do that today.


Sent from my iPhone using Tapatalk
 
Yes, you pobably would. if you think about the spindle pointing towards the rear of the bed, away from the operator, that is why you have to take more from the outer edge before the centre cleans up You have to sit down and carefully visualise the error, and it someimes is not easy! So far you seem to have confirmed that the error is the headstock alignment. Have you tried loosening the headstock bolts, giving the headstock a good wriggle about with a bar in the chuck, then tighten them down again. You should not neet to scrape anything, unless the lathe came out of the factory with this fault. It is "JUST" possible that the headstock has been used to lift the lathe at some time, and has shifted, and/or got swarf under it, or rust started by cutting fluid, just possible, but unlikely! If it were mine I would now be considering an engine crane to lift the headstock and inspect under it, just to be sure, then put it back on and see if it is any different. Also check the underside of the headstock! Have you checked the holding down bolts on the headstock for tightness?
Phil
 
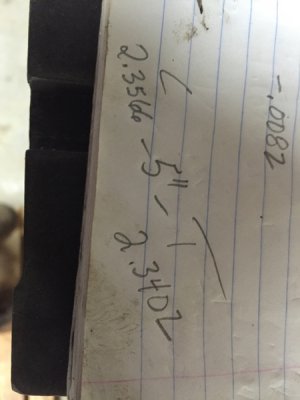
The two collar test with collars 5" apart.

d944eda047707e44633b393af1129c7e.jpg


Sent from my iPhone using Tapatalk

d944eda047707e44633b393af1129c7e.jpg

d944eda047707e44633b393af1129c7e.jpg

d944eda047707e44633b393af1129c7e.jpg

d944eda047707e44633b393af1129c7e.jpg

d944eda047707e44633b393af1129c7e.jpg
 
Hermetic, I re-chucked and got the same affect as you described. I do see your point concerning the outer edge.
I have never touched the HS bolts. It's possible the previous owner did lift by the HS. I know they moved the machine three times in its history before I bought it. I agree, you suggestions to try and reseat the HS would be prudent.


Sent from my iPhone using Tapatalk
 
Hermetic,

No, think about it. If you could rotate the headstock 45 deg. CCW so that it was pointed out over the back of the lathe, and did a facing cut enough times that you were cutting all the way to the center, you would end up with a 90 deg. cone. But unfortunately, the fact that a facing cut made a flat disk is not absolute proof that the headstock is parallel with the longitudinal axis. If you were to set the compound around 45 deg. toward the headstock, and face using only the compound, you would get a flat cut.
 
which is in effect what he has got, but because the error is only 012" in 10" the cone would be measured in the difference between the front and back faces of the 12" disc, which would not be parralell
 
it made a disc with two faces that will not be parralell, I was not saying the fact that the disc was flat was proof of anything. if you face from the edge of the work to the centre, and remove enough metal to clean up, you will have a face perpendicular to the bed, less any errors in the cross slide, regardless of whether it is parralell with the chuck face or not. you getting me?
 
Hermetic,

" If you were to set the compound around 45 deg. toward the headstock, and face using only the compound, you would get a flat cut."

WA5CAB,

Please re-state to explain differently. I am thinking this is how a compound is used to cut tapers?


Sent from my iPhone using Tapatalk
 
Yep. But the assumption is always that the spindle axis is parallel to the bed axis, and that the cross feed axis is always perpendicular to both. I started off by saying that IF the headstock spindle was not parallel to the bed axis by an extreme amount and you faced a part (using the cross feed) you would get an obvious cone. And that if you then set the compound off of perpendicular around to the same number of degrees as the headstock axis error (remember that on the Atlas machines, the "0" on the compound base scale is at the point where the compound is at right angles to the NORMAL or normally assumed, anyway, spindle axis), you would turn the cone back into a flat. I was just using an extreme error case (45 degree spindle axis error) to show that a facing cut is flat all the way across IFF (if and only if) the cutter path is perpendicular to the spindle axis. So if one assumes that the cross feed dovetail is perpendicular to the bed axis (not yet proven), and you take a facing cut on a part as he did (from the near edge to the center of course), lay a straight edge across the end of the part, and find that it is perfectly flat, then that would prove that the spindle axis was parallel to the bed axis. What it actually proves, of course, is that the spindle axis is perpendicular to the cross feed axis.
 
Back
Top