Reading Micrometers: Our return to this website...

I think some pictorial training and how to threads would be great. Since I am untrained in this area it would be very nice to get some good basic fundamentals under my belt to improve the quality of my finished work. I can get pretty close, but my consistency and repeatability need improvement the most.
Bob

Bob,

Do you mean how to measure threads or to cut them? ...Or how to read the L, B and H ratings of taps & dies?

Ray

I not sure what Bob is asking either but I would like to learn about using micrometers to measure lathe cut threads. I have a project coming up were I need to duplicate a 2 1/4 - 4 male thread (lathe spindle) and then make a female thread (chuck back plate) to fit. Currently trying to decide what I need to get to do this properly. Choices appear to be get a regular 2 to 3 inch micrometer with thread wires, with a set of triangle bars, or with slip-over thread anvils, or get a dedicated thread micrometer. And then learn how to use them.

Benny
The Orphanage Never Closes
 
Ok, so what Billy G is pointing out is that if a mic zeros when closed then, when a known proof bar (or ball) of 1 inch is measured, it better read as 1 inch -and if it doesn't the mic is probably toast (maybe). There are other factors to consider. If the mic has been in the cold garage and the test bar has been in your pocket, nice and toasty, it has probably expanded a bit. Let them sit together long enough to be the same temperature and believe it or not, a specific temperature is ideal. I believe 68 degrees F. is the correct temperature -but I might be wrong on that. We'll need to find out and chime-in if you know the answer.

Here's some steps and a few pics to show the points.

1) Clean the contact surfaces, visually check for swarf etc and close the mic with enough finger pressure to make contact without too much force. This just takes practice -and some folks use the ratchet feature at the end of the spindle. Being consistent is the key.

2) Read the mic. It should read zero and we'll assume for now that it does. If it doesn't it needs calibration and we'll get to that.

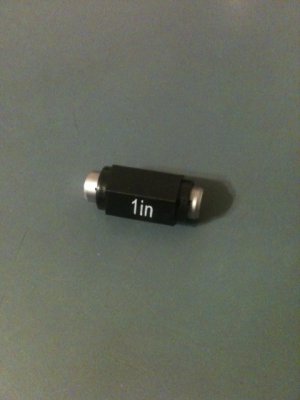
3) Open the mic all the way, insert the 1" test bar, close down with the same technique as before and read the mic. It should read 1 inch. If it does, you're set to go unless of course, you check with a 1/2" standard bar and it doesn't read 1/2" when it's supposed to. Again, we'll get to that later.

If the mic zeroed when closed as in steps 1 & 2 then doesn't read 1" as in step 3, there's probably a problem if both were at the same, correct temperature. There's always a possibility the 1" test bar is inaccurate -so you need to use a good, known standard.

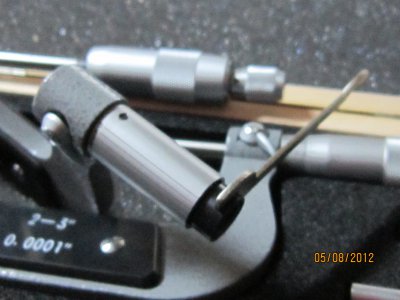
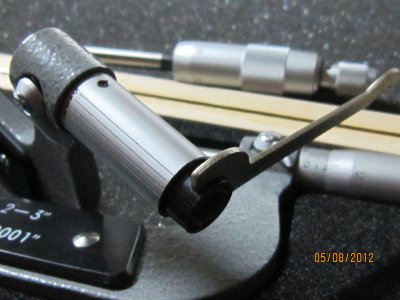
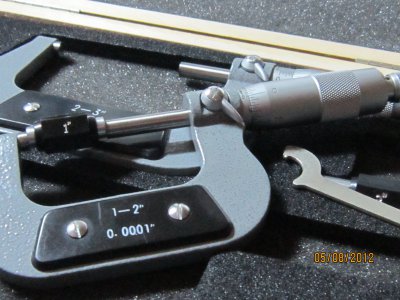
Now what if your mic didn't zero as in steps 1 & 2? ...The sleeve on a mic is adjustable with a small spanner wrench The spanner hole (or holes) are on the backside of the sleeve. See the picture. It doesn't take much of a turn but, twist the sleeve with the wrench until the mic reads zero when closed (as in steps 1 & 2). It usually takes a few shots at adjusting the sleeve to get it dead on. Now repeat the 3 steps above. If it still doesn't read properly at both ends of the calibration process, it likely means the frame is bent. -Probably time to retire that mic.

... And what happens when you have a mic that reads zero and 1" when it's supposed to but, doesn't read properly at intermediate sizes? Again, if the temperatures are correct and normalized and you're using a true test standard, it means the mic is shot and most likely the threads in the spindle are worn unevenly or were never right in the first place.

Ok, there's a shot at this process. Please comment, check the spelling and punctuation errors and we'll add, delete or make corrections as necessary. Also, we should hit on a review of reading a mic and also how to read ten-thousandths if the mic support it. And finally, we can talk about what that sleeve with the spanner hole is for if you unscrew the thimble out of the sleeve...

Thanks for hanging in there with this and we'll hit more topics soon. And in the mean time, don't wait for me to start-up new conversations.

Ray
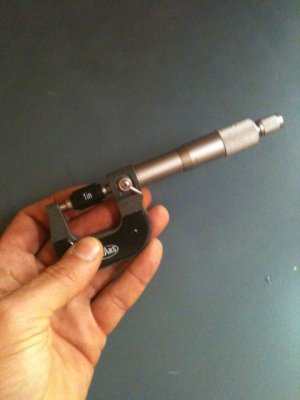
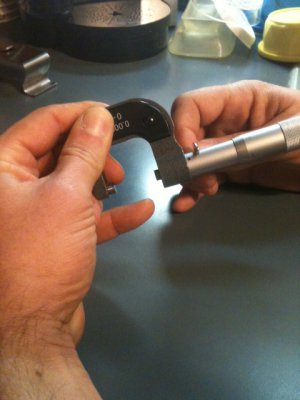
OneInch.jpg 1InchTest.JPG SleeveAdjustment.JPG
 
In a perfect world, a mic will be zero at its minimum measure, and also at the high limit of its capacity, and everywhere in between. However, this isn't a perfect world, and this is one area that separates good mics from better mics, and from those you shouldn't use. It's properly called lead screw error, just like it would be on a machine, which technically is what a mic is - a measuring machine. It is pretty rare even for a high end mic to be absolutely dead on at both ends, and most aren't guaranteed to be.

And yes, 68° @ 50% RH is standard lab temp where things are calibrated. In the cal lab, standard practice is to allow temperature equalization over a 24 hours period.

If a mic is bad, you can set a zero at the bottom, get acceptable deviation at the top, and be completely wrong somewhere in the middle . Nothing you can do to correct that. Also they can vary in accuracy during one revolution, a "drunken thread". Again, nothing you can do with it. That's one reason to be wary of pawn shop purchases. If you do go that route, you should learn about the possible flaws, and have and take with you, the means to verify the accuracy of any possible purchase.
 
Where are all these variables comming from? They were not in your original question? I have been a machinist for quite some time now and Temps have never been a problem. Try circular all steel masters or even gage blocks and you will not have half the problems you have with those you are using. Also in my short time as a machinist I have yet to see anyone carry masters in their pockets.

I answered the question with the info you first gave. I believe it was correct, now you throw in this other stuff and say I am wrong. If thats how this is gonna go I will make it easy. Have a nice day.

"Bill Gruby"
 
As an 'aide-mémoire' in using a mic many years ago, I would just measure a 25 thou feeler gauge then look at the barrel to see what was indicated, then I'd add say another 3 thou gauge and see how the reading changed.

It would then immediately become clear what the scale was indicating and my brain would kick back into gear for another couple of months. :))

Of course, if you're using a mic almost daily you won't have that problem until Alzheimer's sets in. ;)


M
 
All,

As noted, the proof bars (or standards) shouldn't be kept in your pocket but rather, kept safe and clean until ready for use. I was trying to get a point across so, sorry for the misleading statement. Also, Tony correctly pointed-out, a small amount of error in a mic is common. I was planning to get to that when we hit on reading ten-thousandths (often nicknamed "tenths", which is misleading).

BTW: I had a bunch of rag-tag mics and decided to pick up a few on eBay. Turns-out those had more error than the ones I was using so I got some new ones (quite inexpensive) and happily, they all are within 1 to 2 ten thousandths (0.0001, 0.0002) at the extreme ranges and some are dead on. And of course, it all depends on the quality of the standard. I'm using the ones that came with the set.

BTW: We should also talk about what to look for in a used mic and also how to read tolerances like: +0.0000 / -0.0005. We'll get there.

Ray
 
Gotcha Benny... We get to something soon.

But in the mean time, I've found that the best medicine for cutting threads is A) using a good bit that's properly shaped and perpendicular to the workpiece B) make sure the piece is mounted straight in the chuck.
If the bit is mis-shaped, the threads won't be compatible. If the bit is not perpendicular to the work, they'll have an angle and won't be compatible. If the piece is cocked in the chuck, they will be at an angle and nothing will screw in straight.

Also, people generally get most concerned about proper thread formation when the threads will be used for measuring or some other sensitive purpose. With chucks, the threads are a pretty loose fit (thank heavens for that). The important factors are to get them them straight and with the right length so the seating/mating parts of the spindle and chuck come into flat contact. That contact area is the important part.

Feel free to start-up another thread on this if you wish.

Ray


I not sure what Bob is asking either but I would like to learn about using micrometers to measure lathe cut threads. I have a project coming up were I need to duplicate a 2 1/4 - 4 male thread (lathe spindle) and then make a female thread (chuck back plate) to fit. Currently trying to decide what I need to get to do this properly. Choices appear to be get a regular 2 to 3 inch micrometer with thread wires, with a set of triangle bars, or with slip-over thread anvils, or get a dedicated thread micrometer. And then learn how to use them.

Benny
The Orphanage Never Closes
 
I haven't seen this mentioned yet, so here goes.

Take the spindle off and snug up this nut, to eliminate any false readings you may encounter.

Even takes out all the "slop" on these cheaper micrometers.


I did not change the date, I took these 1 hour ago.

Micrometers--Various pics 041.JPG Micrometers--Various pics 040.JPG Micrometers--Various pics 043.JPG
 
Yep. Takes a little slack out of the threads!

I haven't seen this mentioned yet, so here goes.

Take the spindle off and snug up this nut, to eliminate any false readings you may encounter.

Even takes out all the "slop" on these cheaper micrometers.


I did not change the date, I took these 1 hour ago.
 
A complete example including 1/10 of 1/1000 readings...

One ten thousandth of an inch is not much and most hobby machinist work doesn't call for that kind of accuracy but very often, you need to consider 5-ten thousandths (which is 1/2 of 1/1000 of an inch) so it's good to know how to read ten-thousands. Many micrometers can handle the situation because they have additional graduations on the top of the sleeve.

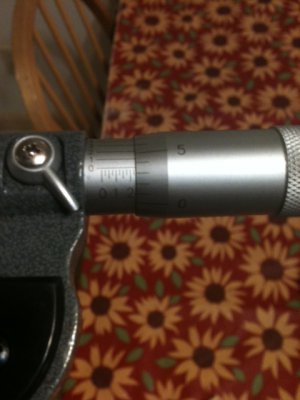
In the 1st picture, the mic is reading somewhere between 0.228 and 0.229. Reading from left to right, of the main horizontal scale, the tapered edge of the sleeve is past the 2 mark on the sleeve (which is 0.2) and slightly past .025. So far we're at 0.2 + 0.025 = 0.225.

In the shadow of the thimble, you can see the 0 graduation so begin counting the tics on the tapered part. The main horizontal line is beyond the 3rd but not yet at the 4th tic. We have to add smaller number which is 0.003. Adding the numbers, we are at 0.225 + 0.003 = 0.228"

To read the ten-thousandths part:

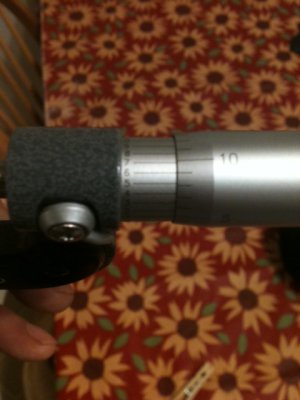
Now notice on the sleeve, right next to the grey frame the very small vertical numbers 0, 1, 2, 3.... Each one of those numbers has a horizontal line down the length of the sleeve. Just follow those numbers and look to see which one of those long horizontal lines, lines up exactly with any one of the short lines on the tapered part of the sleeve.

InBetweenGraduationMarks.JPG


See the second picture because in this case, I had to look at the top of the mic to find the lines that matched up and it is 6 because it lines-up perfectly with one of the short graduation marks. Therefore the mic is set to read 0.228 + 0.0006 = 0.2286".


6TenThousandths.JPG

Make sense? Let me know if this could be clarified a little more...

Ray


EDIT: And now that you now how to read ten-thousandths, think back at the calibration process from earlier. If your mic zeroed when closed, how much do allow it to be off when reading 1" ?.

InBetweenGraduationMarks.JPG 6TenThousandths.JPG
 
Back
Top