- Joined
- Jan 16, 2020
- Messages
- 8
This is a bit of a long story, but an interesting one none the less. Please excuse the blurriness of some of the photos: I was too close with the camera and did not realize it at the time. They should be good enough for illustrative purposes, however.
I recently came into the possession of a used Scherr-Tumico 12" dial caliper. I don't often need a caliper of such proportions, but I can see where it might come in handy from time to time.
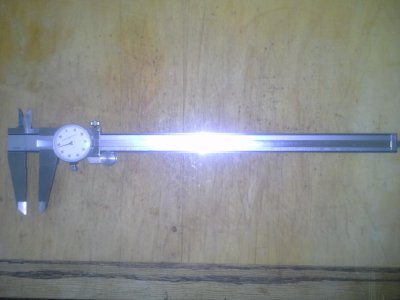
I checked it over completely only to find that it had a rough spot - REALLY rough. So rough that it would jamb up and make clicking noises as the teeth jumped the rack!! Ughhh!!! A quick inspection with a good magnifying glass revealed that a number of teeth on the rack were damaged in one spot.
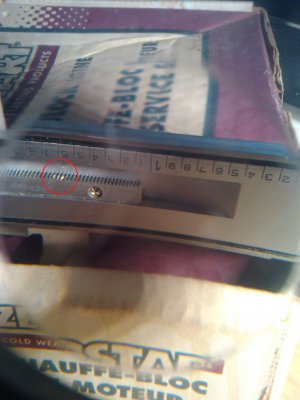
I initially figured the caliper was junk, but figured that it might be worth while to contact the manufacturer. Scherr-Tumico is a Minnesota company, specifically known as S-T Industries, located in St. James, Minnesota, not quite a hundred miles or so from where I live. I looked up their web site and contacted them to inquire about the possibility of repair. Initially I did not hear back from them, but this morning, as I was travelling down to Sioux Falls, South Dakota, I received an email from them. They requested photos of the caliper, as I could not identify it by model number, as there was none on the tool, only a serial number stamped into the frame. My son was at home, so I had him send me a couple of photos, which I then forwarded to the repair team at S-T. A short time later, I received an email requesting that I call them, which I did. As it turns out, they had new racks for this caliper that were no longer part of their inventory, as they no longer carry or sell this caliper. They offered me a new rack for FREE, they only needed to know where to send it if I was willing to pay postage. I offered one better: how about I pick it up in person on my return trip home? It seemed a little strange, stopping by with a semi-truck just to pick up a rack for a dial caliper, but, what the heck, I was going right through there anyway!
When I arrived, I was greeted by a friendly receptionist, and of course the talk turned to the weather as it was in the low 50's here today, a temperature not seen around these parts since at least last November! Eventually the man from the repair bench came out with a new rack in hand, as well as a brand new mechanism for the dial!! He figured that if the rack was damaged, the pinions on the dial probably were also. I expressed my profound thanks and we exchanged some idle chit-chat and I was eventually on my way with new parts in hand.
Upon arrival home, I set about the task of disassembling the caliper. I first laid out a dish towel to work on, as this prevents tiny screws from bouncing off of the bench if dropped. I next removed the end stop and the depth rod, and was ready to slide the head off of the frame. I removed the dial lock, then started looking for a way to remove the bezel. I had read that many dial calipers had the bezel held on by an o-ring, and that the bezel could simply be pried off with a couple of screwdrivers. I tried pulling up on the bezel by hand, and if felt VERY solid, not like an o-ring at all. Closer investigation revealed that there was an opening on the rear of the dial, and through that opening I could see a wire.
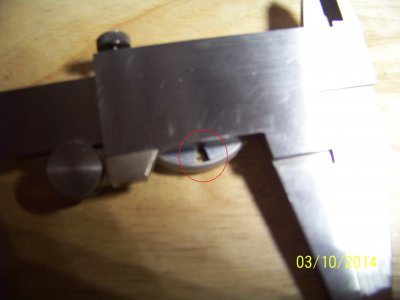
I rotated the bezel while watching through the opening, and soon realized that this was the retainer wire for the bezel. I located an end of the retainer wire, then gently pried it out through the opening, pulling it out as I rotated the bezel further. Within a few seconds, I had the retainer wire out, and the bezel was off. From there it was a simple matter to slide the head off of the frame.
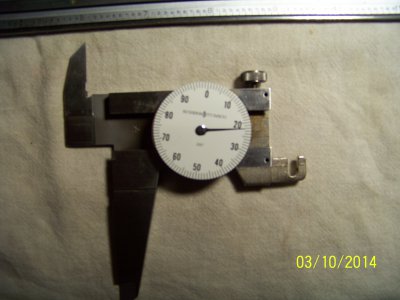
The next step was to pry or pull the pointer off of its spindle. It was a bit stubborn, but I proved to be more stubborn that it was! Once the the pointer was removed, it was a simple matter to lift off the dial and the Belleville spring that sat behind it. The removal of two screws was all that was required to remove the dial mechanism from the caliper head. At this point, a comparison of the two dial mechanisms revealed that there was a new problem: the new mechanism was set up for three mounting holes, where the original had only two. Luckily, it appeared that the rest of the mechanism was the same for both units.
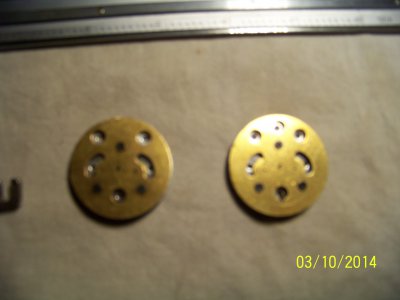
I disassembled both of the dial mechanisms, took the new gears from the new frame, and placed them into the original frame, putting the old gears into the new frame. I then installed the original frame and new gears back onto the sliding head of the caliper. During this process I realized that there are two pinions that mesh with the rack, one of them spring loaded. Initially I did not understand the reason for being constructed in this manner, but I soon found out.
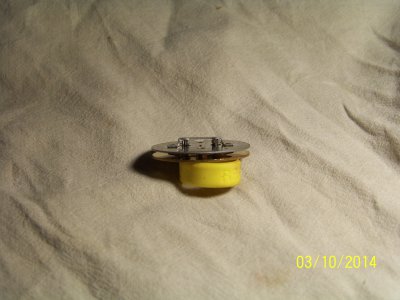
The next step was to remove the old rack and install the new one. After removing the old rack, a thorough cleaning of the caliper frame was in order, I didn't want any little chips getting in between them. The rack is held to the caliper frame by seven tiny screws. Switching the racks was pretty straight forward.
Once the new rack was installed, I slid the caliper head onto the caliper frame, then adjusted the dial mechanism to that it would mesh properly with the rack. I placed the Belleville spring and dial face onto the mechanism, then lightly pressed the pointer onto its spindle. Moving the head back and forth I now realized the reason for the spring loaded gear: It takes up any backlash in the mechanism. I had about .004" of backlash showing up on the dial, so I moved the head to the end of the frame, just far enough to get one of the pinions to lose mesh with the rack, while the other remained in mesh. Using a very small screwdriver, I managed to impart some preload onto the now 'loose' gear, then slid the head back on until the preloaded gear engaged the rack. Moving the head back and forth, there is now no backlash appearing.
I cleaned both halves of the caliper, then pushed the head up to the 'zero' position (caliper closed) then pressed the pointer firmly onto its spindle at the twelve-o-clock position. I installed the bezel and the retainer wire, then the depth rod and the end retainer and the job was done! The movement is now very smooth, and best of all, testing with a 1" standard gave me just the results I was looking for!
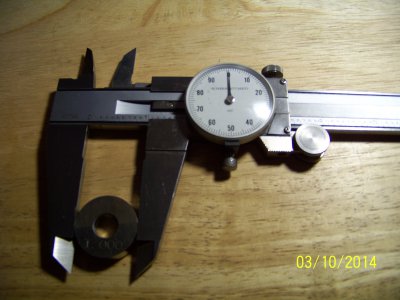
So, the job that I was a bit reluctant to try at first anic: turned out to be a great learning experience with fantastic results. What more could a guy ask for??
Before closing, I would like to extend a heartfelt :thanks: to the folks at S-T Industries for their help and generosity! Without their help I could not have created this little write-up, which I hope will be helpful to someone else someday.


I recently came into the possession of a used Scherr-Tumico 12" dial caliper. I don't often need a caliper of such proportions, but I can see where it might come in handy from time to time.

I checked it over completely only to find that it had a rough spot - REALLY rough. So rough that it would jamb up and make clicking noises as the teeth jumped the rack!! Ughhh!!! A quick inspection with a good magnifying glass revealed that a number of teeth on the rack were damaged in one spot.

I initially figured the caliper was junk, but figured that it might be worth while to contact the manufacturer. Scherr-Tumico is a Minnesota company, specifically known as S-T Industries, located in St. James, Minnesota, not quite a hundred miles or so from where I live. I looked up their web site and contacted them to inquire about the possibility of repair. Initially I did not hear back from them, but this morning, as I was travelling down to Sioux Falls, South Dakota, I received an email from them. They requested photos of the caliper, as I could not identify it by model number, as there was none on the tool, only a serial number stamped into the frame. My son was at home, so I had him send me a couple of photos, which I then forwarded to the repair team at S-T. A short time later, I received an email requesting that I call them, which I did. As it turns out, they had new racks for this caliper that were no longer part of their inventory, as they no longer carry or sell this caliper. They offered me a new rack for FREE, they only needed to know where to send it if I was willing to pay postage. I offered one better: how about I pick it up in person on my return trip home? It seemed a little strange, stopping by with a semi-truck just to pick up a rack for a dial caliper, but, what the heck, I was going right through there anyway!
When I arrived, I was greeted by a friendly receptionist, and of course the talk turned to the weather as it was in the low 50's here today, a temperature not seen around these parts since at least last November! Eventually the man from the repair bench came out with a new rack in hand, as well as a brand new mechanism for the dial!! He figured that if the rack was damaged, the pinions on the dial probably were also. I expressed my profound thanks and we exchanged some idle chit-chat and I was eventually on my way with new parts in hand.
Upon arrival home, I set about the task of disassembling the caliper. I first laid out a dish towel to work on, as this prevents tiny screws from bouncing off of the bench if dropped. I next removed the end stop and the depth rod, and was ready to slide the head off of the frame. I removed the dial lock, then started looking for a way to remove the bezel. I had read that many dial calipers had the bezel held on by an o-ring, and that the bezel could simply be pried off with a couple of screwdrivers. I tried pulling up on the bezel by hand, and if felt VERY solid, not like an o-ring at all. Closer investigation revealed that there was an opening on the rear of the dial, and through that opening I could see a wire.

I rotated the bezel while watching through the opening, and soon realized that this was the retainer wire for the bezel. I located an end of the retainer wire, then gently pried it out through the opening, pulling it out as I rotated the bezel further. Within a few seconds, I had the retainer wire out, and the bezel was off. From there it was a simple matter to slide the head off of the frame.

The next step was to pry or pull the pointer off of its spindle. It was a bit stubborn, but I proved to be more stubborn that it was! Once the the pointer was removed, it was a simple matter to lift off the dial and the Belleville spring that sat behind it. The removal of two screws was all that was required to remove the dial mechanism from the caliper head. At this point, a comparison of the two dial mechanisms revealed that there was a new problem: the new mechanism was set up for three mounting holes, where the original had only two. Luckily, it appeared that the rest of the mechanism was the same for both units.

I disassembled both of the dial mechanisms, took the new gears from the new frame, and placed them into the original frame, putting the old gears into the new frame. I then installed the original frame and new gears back onto the sliding head of the caliper. During this process I realized that there are two pinions that mesh with the rack, one of them spring loaded. Initially I did not understand the reason for being constructed in this manner, but I soon found out.

The next step was to remove the old rack and install the new one. After removing the old rack, a thorough cleaning of the caliper frame was in order, I didn't want any little chips getting in between them. The rack is held to the caliper frame by seven tiny screws. Switching the racks was pretty straight forward.
Once the new rack was installed, I slid the caliper head onto the caliper frame, then adjusted the dial mechanism to that it would mesh properly with the rack. I placed the Belleville spring and dial face onto the mechanism, then lightly pressed the pointer onto its spindle. Moving the head back and forth I now realized the reason for the spring loaded gear: It takes up any backlash in the mechanism. I had about .004" of backlash showing up on the dial, so I moved the head to the end of the frame, just far enough to get one of the pinions to lose mesh with the rack, while the other remained in mesh. Using a very small screwdriver, I managed to impart some preload onto the now 'loose' gear, then slid the head back on until the preloaded gear engaged the rack. Moving the head back and forth, there is now no backlash appearing.
I cleaned both halves of the caliper, then pushed the head up to the 'zero' position (caliper closed) then pressed the pointer firmly onto its spindle at the twelve-o-clock position. I installed the bezel and the retainer wire, then the depth rod and the end retainer and the job was done! The movement is now very smooth, and best of all, testing with a 1" standard gave me just the results I was looking for!

So, the job that I was a bit reluctant to try at first
Before closing, I would like to extend a heartfelt :thanks: to the folks at S-T Industries for their help and generosity! Without their help I could not have created this little write-up, which I hope will be helpful to someone else someday.


