Simple tool I made for the drill press

ScrapMetal

Active User
Registered
Joined
Apr 6, 2011
Messages
2,082
I have some offset holes to drill in some SS disks that I've made for a project. I've got the pieces blued and a very nice, accurate little "X" where the holes should be. It's just a simple drill press and I don't have an X-Y table on it so I needed a way to center the drill bit on my "X"s.

Grabbed a coffee can and pulled out a socket head bolt that looked stainless (mystery metal), threw it on the bandsaw and cut the head off. I then chucked it up in the lathe and faced where the "head" used to be. That end was then put into the chuck. I reset my slide and compound and proceeded to cut a taper using only the compound. First time doing that! :eek: I think it came out fairy well.


To give you some idea of scale, it's sitting on a standard size stack of post-it notes. I figure that I can put this in the drill press chuck and position the work underneath it. Once I have the work secured swap it out with a center drill and I'm on my way to making holes.

I'm still open for suggestions if there's a better way do get it done though. :)

-Ron
 
Hi,

I face the same problem quite often; me too, I have a drill press and no xy table. The way I usually go about it, after marking the piece, is to chuck a center drill in the drill press and lower this on to the mark with the drill press stopped; after the piece is located it is clamped in place, the drill press is started and a small center mark is drilled with the center drill. The center drill is then replaced with the drill bit and nor mal drilling can proceed.

José
 
Good idea Ron. Think I'll make one (or two or more in different lengths) for when there isn't enough room for a wiggler
 
How about just using a center punch and make the mark with it. You can always get one of the spring loaded ones to make the first mark then use a regular punch.


Paul
 
How about just using a center punch and make the mark with it. You can always get one of the spring loaded ones to make the first mark then use a regular punch.


Paul

I find it very difficult to punch on a cross mark; usually the punch is slightly offset to the mark I have carefully made.

José
 
I find it very difficult to punch on a cross mark; usually the punch is slightly offset to the mark I have carefully made.

José

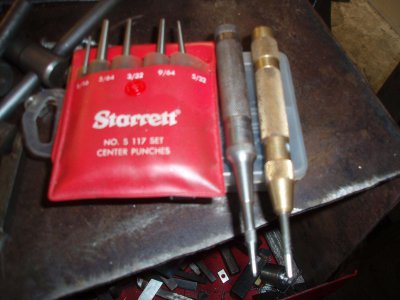
Thats why I suggested Spring loaded one it has a small point you just push it down and it pops a small mark. Thenuse bigger ones to set it deep enough.

Punch.JPG
 
The old rules said you use a prick-punch and felt the crossing lines and lightly marked it, then went for the center punch. Optical punches are great. I have an older one that I get out now and then. Mostly I just go by feel, though. Larger work that won't go across the mill usually doesn't need much better accuracy than I get with a couple of select punches.
 
I've found that even when I center punch I still have a difficult time getting the center drill on the exact spot. I can easily be off by a number of thousandths and when I'm working with smaller pieces that is unacceptable.

The problem, as I see it, is that once you have a center punch mark on the piece you still need to somehow center the drill bit on the mark. You could start out with a bit that is small enough to fit within the punch mark but I think you run the chance of the bit deflecting on the side of the mark itself. You could just use the tiny bit to position the piece but with a bit that small in a larger chuck the accuracy could suffer. Basically that's what this little tool helps you do anyway but with a more positive seat in the chuck.

It's probably pretty humorous to watch as I'll actually sit there hunched over with a magnifying glass, and some extra light, in order to line this stuff up. :nuts: :biggrin:

-Ron
 
Getting the drill to stay centered usually depends on the angle ground on the center punch. It sure can walk out if the angle doesn't match the drill. I have some for 118 and 135 degree drills.
 
Back
Top