

-
Welcome back Guest! Did you know you can mentor other members here at H-M? If not, please check out our Relaunch of Hobby Machinist Mentoring Program!
You are using an out of date browser. It may not display this or other websites correctly.
You should upgrade or use an alternative browser.
You should upgrade or use an alternative browser.
So what projects have you completed on your 3 in one mill? Pics??
- Thread starter Chris_V
- Start date
- Joined
- Feb 24, 2019
- Messages
- 924
This looks like an older thread but, well, it's a thread.
Today I was cleaning up the signal cannon I made a while back so I thought I'd share it here.
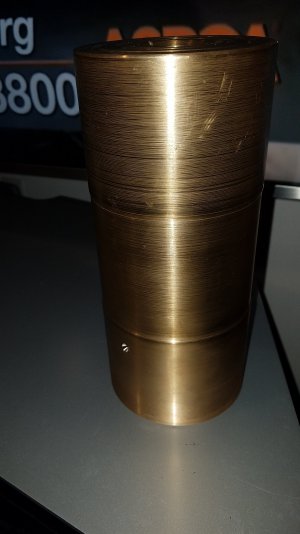
I started with a failed project from someone else. I don't know what he was making but he said he messed it up. It was a 4.5" solid brass slug about 10.5" long. He had tried to drill a 1.25" hole through the center but he missed going straight through and ended up with a hole that was .060 off center. I guess that was too much.
I saw the piece and immediately thought CANNON. All I would need to do is close off one end and it would work. But I wanted it pretty too.
The first pic is of it turning on my Smithy. The slug weighs about 20-25 pounds and I didn't know if the Smithy could handle it. I was quite surprised that it did.
I started off by making an aluminum piece to use as a (forgot the term) tail center mount. That allowed me to hold it with a dead center while I turned off the outer crust. It was pretty grody.
I had to turn it around to get the other end and that's when I found out just how off-center the holes really were. I ended up just holding the entire mass in the jaws of the chuck. It was a little nerve wracking because I hadn't turned anything that heavy since High School. It went fine though.
Next I had to make a plug for the end.
I purchases a 1.5" tap and went to town, going by hand while I held the cannon in a vise. It took a while and I was sore the next day. I only had a large crescent wrench to turn the tap. Still, it was done.
Next up was making the plug for the back.
I purchased a slug of brass and turned it down to the correct diameter. Next I set the Smithy up for threading. I hadn't cut any threads on a lathe since High School either. I realized a little too late that my toolpost was turning but still managed to get a decent plug. I left it in the chuck and while spinning the piece I sawed it off with a reciprocating saw. Then I faced it to make it smooth.
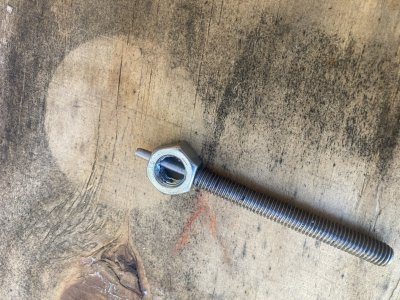
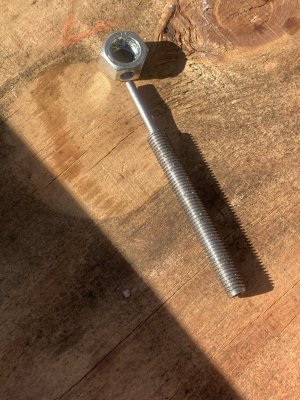
Since the plug would need to sit relatively flush in the back (bottom) of the cannon, I needed a way to snug it down. I drilled a 3/8"" hole 3/4" deep and then milled it square so I could use a ratchet to snug it down. It worked perfectly.
I knew that the firing of the cannon would bang up the bottom so I made a pad out of a scrap piece of 3/4" aluminum. The pad serves a dual purpose. It absorbs the damage from the surface that the cannon is sitting on and also has a small "lift" to sit flush against the back plug to insure the threads aren't taking all the pressure from the firing. After the first fire it was obvious that it did it's job.
Unfortunately, the first fire blew it onto it's side and one side has deep gravel marks.


Today I was cleaning up the signal cannon I made a while back so I thought I'd share it here.
I started with a failed project from someone else. I don't know what he was making but he said he messed it up. It was a 4.5" solid brass slug about 10.5" long. He had tried to drill a 1.25" hole through the center but he missed going straight through and ended up with a hole that was .060 off center. I guess that was too much.
I saw the piece and immediately thought CANNON. All I would need to do is close off one end and it would work. But I wanted it pretty too.
The first pic is of it turning on my Smithy. The slug weighs about 20-25 pounds and I didn't know if the Smithy could handle it. I was quite surprised that it did.
I started off by making an aluminum piece to use as a (forgot the term) tail center mount. That allowed me to hold it with a dead center while I turned off the outer crust. It was pretty grody.
I had to turn it around to get the other end and that's when I found out just how off-center the holes really were. I ended up just holding the entire mass in the jaws of the chuck. It was a little nerve wracking because I hadn't turned anything that heavy since High School. It went fine though.
Next I had to make a plug for the end.
I purchases a 1.5" tap and went to town, going by hand while I held the cannon in a vise. It took a while and I was sore the next day. I only had a large crescent wrench to turn the tap. Still, it was done.
Next up was making the plug for the back.
I purchased a slug of brass and turned it down to the correct diameter. Next I set the Smithy up for threading. I hadn't cut any threads on a lathe since High School either. I realized a little too late that my toolpost was turning but still managed to get a decent plug. I left it in the chuck and while spinning the piece I sawed it off with a reciprocating saw. Then I faced it to make it smooth.
Since the plug would need to sit relatively flush in the back (bottom) of the cannon, I needed a way to snug it down. I drilled a 3/8"" hole 3/4" deep and then milled it square so I could use a ratchet to snug it down. It worked perfectly.
I knew that the firing of the cannon would bang up the bottom so I made a pad out of a scrap piece of 3/4" aluminum. The pad serves a dual purpose. It absorbs the damage from the surface that the cannon is sitting on and also has a small "lift" to sit flush against the back plug to insure the threads aren't taking all the pressure from the firing. After the first fire it was obvious that it did it's job.
Unfortunately, the first fire blew it onto it's side and one side has deep gravel marks.
Attachments
Last edited:
- Joined
- Feb 24, 2019
- Messages
- 924
Today I decided to clean up the cannon. It has been fired a dozen times and left on the porch for months at a time.
I used the original dead center plug for the first pass and then chucked it up hanging for the other end.
It still looks pretty good. I'm not showing the damaged side. No way!!
I use the dead center slug as a barrel plug. It keeps the bugs out.


I used the original dead center plug for the first pass and then chucked it up hanging for the other end.
It still looks pretty good. I'm not showing the damaged side. No way!!
I use the dead center slug as a barrel plug. It keeps the bugs out.
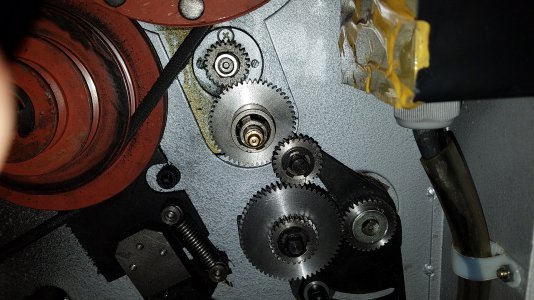
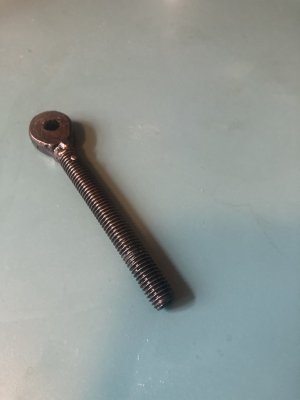
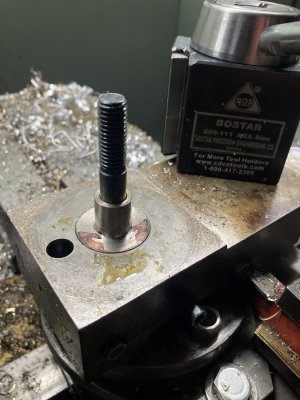
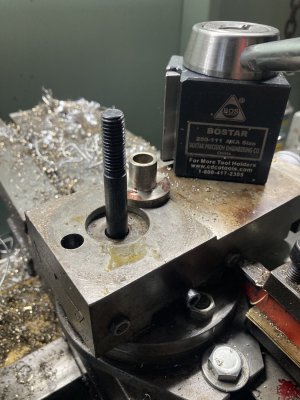
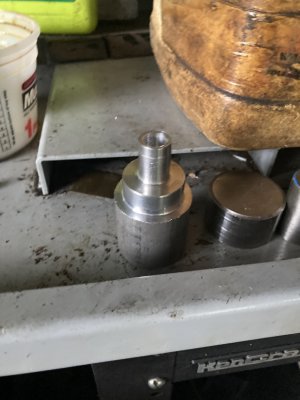
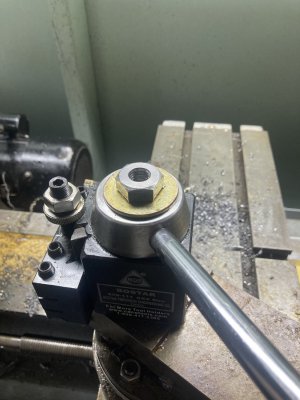
Been working my way through this 90s vintage 1220 ,
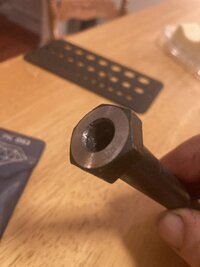
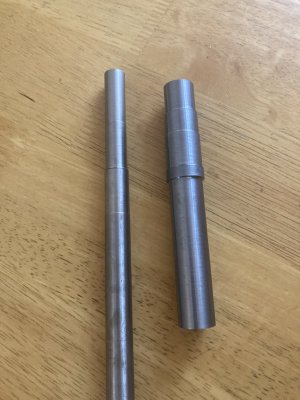
First thing I made was a left hand 8mm eye stud for the belt tensioner.
Then bushings and chicago nut for QCTP, then a guide shaft for my tiller which was a cast piece originally and it just rides along the gear selector bu means of a fork and bearing that rest on the shoulder.
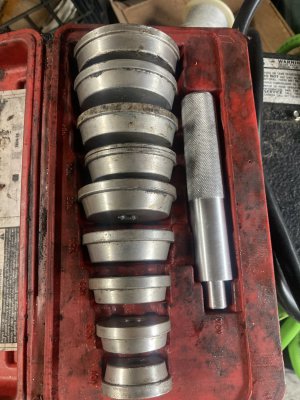
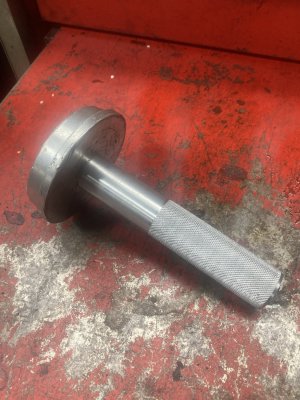
A new handle for my bearing seal tool. To cold in the shed now so Im at a stand still
First thing I made was a left hand 8mm eye stud for the belt tensioner.
Then bushings and chicago nut for QCTP, then a guide shaft for my tiller which was a cast piece originally and it just rides along the gear selector bu means of a fork and bearing that rest on the shoulder.
A new handle for my bearing seal tool. To cold in the shed now so Im at a stand still
Attachments
-
 BDD7B28C-FC2D-4CFD-87BF-27533224755D.jpeg737.3 KB · Views: 4
 -
 70100AFC-1F9A-47EF-B6BB-771B01D9F00F.jpeg437.4 KB · Views: 4
 -
 654FD206-94B4-436B-B91C-3BD97694413D.jpeg203 KB · Views: 4
 -
 5990EB94-4A1B-41E5-ABCA-9D0372CF402A.jpeg128.5 KB · Views: 4
 -
 B4F64468-C963-4A23-816B-F13342A2A42D.jpeg275.1 KB · Views: 4
 -
 6D44AEBD-E5F8-47BE-9FC2-A0C7C1CD0C50.jpeg281.3 KB · Views: 4
 -
 E78C1E66-C663-48FA-9A4C-3E024A7144A4.jpeg192.6 KB · Views: 4
 -
 C5C43FA7-5F0B-40EB-813C-8BEB144B18EC.jpeg18.1 KB · Views: 5
 -
 3BF88801-0DEF-44F9-9462-E5CB98BCF1DF.jpeg260.1 KB · Views: 5
 -
 C8DA8C94-D71F-474F-82D8-DBBB11699E89.jpeg332.5 KB · Views: 6
 -
 95C45BF6-68C6-4F47-A5FF-B0435D150BE9.jpeg341.3 KB · Views: 4
 -
 C19AD8A1-3FB9-4DC4-BA53-F72C61D0FBC6.jpeg233.7 KB · Views: 4