- Joined
- Dec 18, 2019
- Messages
- 6,447
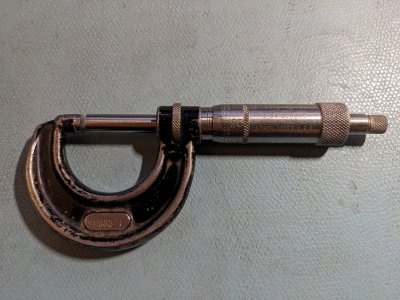
I recently found a micrometer that my father had. It may (or may not) have been used by him when he worked at the MIT Radiation Laborotory around the end of WWII. I do know he was a technician there and he had to do practically everything from machining, to making hydrogen furnaces to assemble those new fangled radar magnetrons. As I recall, they had to braze copper assemblies together. He was a jack of all trades by necessity, and a pretty clever guy. A professor noticed him, and recommended he attend MIT. He did, and spent the rest of his working career at MIT (more than 65 years).

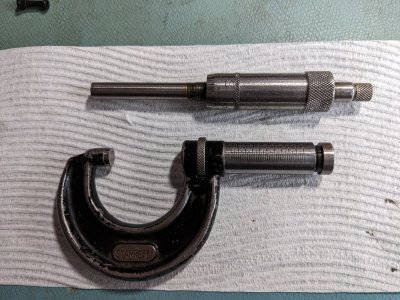
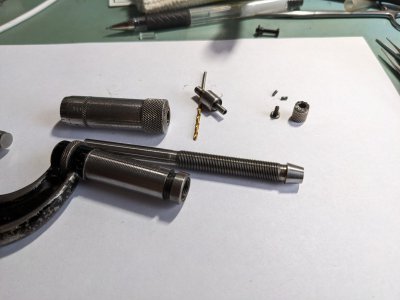
The micrometer had gummed up a bit and was stiff. Opening beyond 0.5" opening was a bear. I tried some alcohol to try to dissolve some of the gummed oil which got me a little further. Finally out of desperation, I tried some Kroil to get into the mechanism. It's better but is quite stiff after 0.8". I don't feel any periodic stiffness, like a bent shaft, it's more like its still gummed up. In a fit of stupidity, I pulled the ratchet assembly and inadvertently lost the ratchet pin for a few hours. I didn't even know it was missing for a while. It was there, and then it wasn't! Finally found it after sweeping the floor with some powerful rare earth magnets. Got that together again and the ratchet is once again functional. Phew!
Anyways, what else can I do to get this in to better shape? Anything I can soak it in that won't take off the remains of the black paint? Alcohol? I know I could send it back to Starrett for repair, but is there something that I could do? This is more sentimental than anything. I realize that 436's are not top of the line and can probably be picked up used for less than the Starrett repair cost. On the other hand, the repair location is not all that far away from my home.
I have seen some stuff online on disassembly, but I have yet to see enough detail to actually know what to do. (Feel like they were skipping some steps.) Simply don't know if there are any hidden gotchas that need to be done (yet). If someone has done this, or knows of a decent video that shows the actual disassembly, I'd appreciate it. Some mics just unscrew all the way, but this one is very stiff and I don't want to force anything. It was so stiff, I could barely turn it. Thought some mechanical empathy was in order, and I ought to ask.


