- Joined
- Dec 20, 2012
- Messages
- 9,422
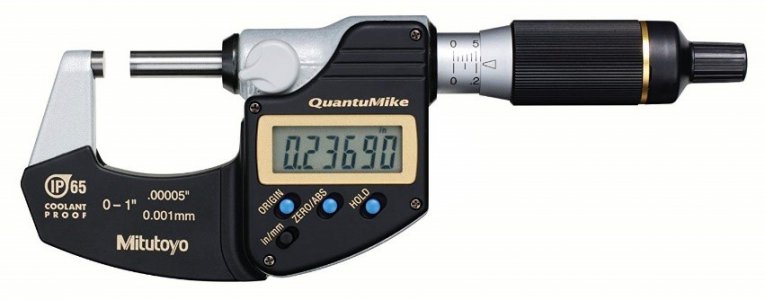
I bought this micrometer last year because I have become an old fart and wanted a digital display that I could actually see. I even posted a thread about it, whining and moaning like a little girl. Anyway, I checked the mic with my Grade B gage block set and it was as accurate as that set allowed but in the back of my mind I always wondered how this mic would stand up against a really accurate gage block set, like Grade 0 or better.
Recently, I was able to find a Grade 0 set on ebay that was in mint condition at a price that was not cheap but didn’t cause a heart attack. I will readily admit that this purchase was more of a want than a need but heck, I was curious!
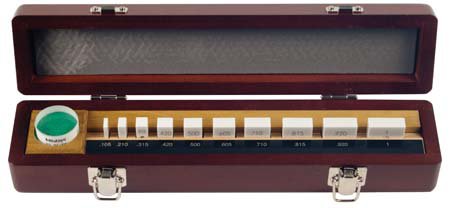
The set I got is a Mitutoyo 516-334-26, a 9-piece Cerastone set specifically intended for Micrometer calibration:
This set includes an optical flat and blocks at 0.0625”, 0.125”, 0.200”, 0.250”, 0.300”, 0.500”, 1” and 2”. The sequence of sizes is supposed to test the accuracy of a mic at max dimension, then half that, then half that and so on. There are other sets that are sized to check accuracy at different rotations of the screw but this set should work to check calibration with a high level of confidence. I am also attaching a pdf about this subject that I hope you find interesting.
Cerastone blocks are 10 times more wear-resistant than steel blocks. They do not rust and unlike steel blocks, they don’t dent if you happen to drop them. They are so hard that they do not scratch and they also wring much better than my steel blocks, which suggests their surface flatness is quite good.
Gage block accuracy varies with the block size; the larger the block, the less accurate they are. Typical Grade B (class 3 or AS-1) blocks are usually accurate to 50 millionths of an inch (0.000050")and my Grade B set from a German Metrology lab has that printed right on the case the blocks come in. In contrast, Mitutoyo certifies their blocks according to an ANSI standard that I won’t bore you with but this Cerastone set is accurate to somewhere in the 4-6 millionths of an inch range pretty much across the set, which Mitutoyo says is good enough to be used in a calibration department. My intention is not to certify anything; I simply want to see how my tools measure up to a really accurate standard and in particular, see how good the Quantumike really is.
The procedure is pretty straightforward. You clean the tool, then make sure it operates smoothly and properly throughout its range. Then you put the mic in a micrometer stand.
Step 1 is to check that the anvil and spindle faces are parallel to one another. If you have a monochromatic light you can use the provided optical flat to do this by wringing the flat to the anvil, then bring up the spindle until the ratchet makes 1-2 clicks and read the lines displayed by the flat. I don’t have this light but Mitutoyo has an alternative method, which is to use a gage block to check between the edges of the spindle and anvil at 4 points: 12, 6, 3 and 9 O’clock. If all four spots read the same, the two faces must be parallel.
Step 2 is to run through all the blocks in sequence and note any deviation from the printed size on the block. The Quantumike is supposed to be accurate to half a tenth, or 0.00005”, or 1.27 Microns. Since the blocks I have are mint (I think they were used once) and have no wear I chose to read the center of each block. I cleaned each block with alcohol and then held the blocks with a pair of plastic tweezers to avoid any expansion of the blocks from my hands.
You are supposed to check 5 points – 1”, 0.500”, 0.250”, 0.125” and 0.0625”. Zero is repeatedly checked but not reported. I did all these checks plus added the 0.200” and 0.300” blocks and the Quantumike read dead on for each of these blocks.
Just out of curiosity, I checked my Mitutoyo 500-752-20 digital calipers and my Etalon analog dial calipers and both read dead on with these blocks. This is in keeping with the quality of both of these devices. I also checked a cheap Chinese digital caliper that I used for marking layouts and that one read a consistent -0.0005” undersize but still fell within the 0.001” calibration standard for calipers.
Summary
The Mitutoyo 0-1” Quantumike is extremely accurate and consistent. It is coolant proof, smooth as silk in use and the large digital display is easy to read with aging eyes. The Mitutoyo 500-752-20 digital 6” caliper is also extremely accurate and easily readable and I can recommend both.
I simply wanted to share this information and make you aware of the calibration procedure above. I would not recommend buying a Class 0 calibration set unless you are crazy curious like me. I think that a typical cheap Class B gauge block set will be accurate enough to check your shop tools and earn your trust.
Mikey
April 2020
Attachments
Last edited:


