- Joined
- Jun 17, 2011
- Messages
- 2,062
There was a posting last year for a welding stand that could be adjusted to almost any angle to weld tricky joints on parts. It used a bowling ball and was clamped using a hydraulic jack to apply pressure. A few days later, I found an old bowling ball at a thrift shop. Since I was still out of my house after the fire, I just set it aside. Some months later, my friend, Frank, suggested using a Harley rear spring (complete with chrome cover sleeve) for the clamping pressure. Frank donated the parts. I already had a couple of old brake disks.
I have most of my shop up and running, so I feel the urge to work on the odd project now, not just rebuilding the shop. Time to get out the pieces and build the stand. I had started to build a small heat treating oven before the fire. The fire bricks were all thrown out by the 'restoration' company, so the wheeled stand from that was available. The first step was to prepare the brake disks to clamp the bowling ball. A big lathe is an asset for that. The top disk needs to have the hub cut off.
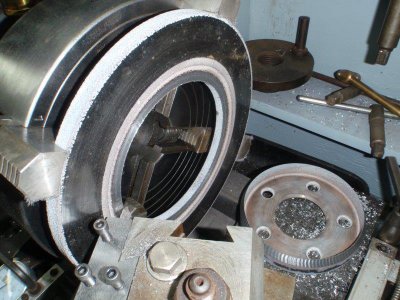
To get the best clamping action, the disk needs to be beveled, but with a curve to match the ball. In this case, it required a radius of 4.3". I don't have a ball turner that big, but the Storebro lathe has a unique tool post that allowed me to set that radius from the centre of the toolpost to the tip of the cutter, and then swivel the QCTP by hand to cut the curve.
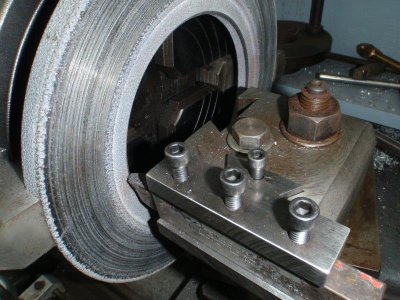
A perfect fit.
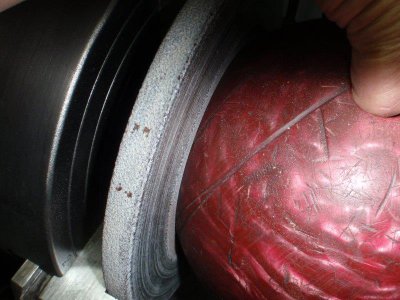
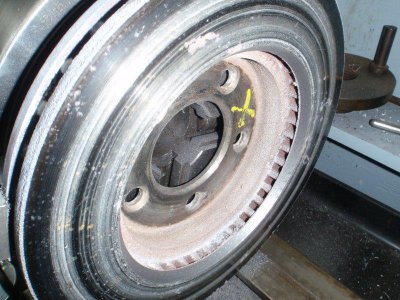
The lower disk gets to keep its hub. Just needs the curved bevel.
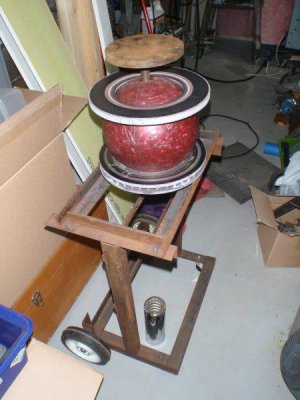
Here's the wheeled stand with the ball and disks on top and the Harley spring and cover underneath.
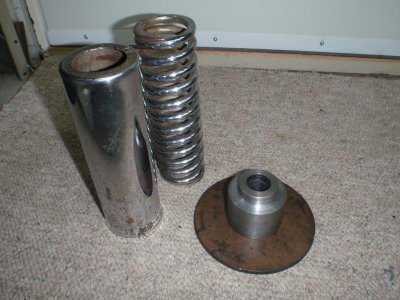
In order to compress the spring, which is the same length as the cover, I turned a steel insert to fit between the spring and a 5 1/2" disk. Drilled through to allow a rod to pass to link the lower ball disk to the foot pedal.
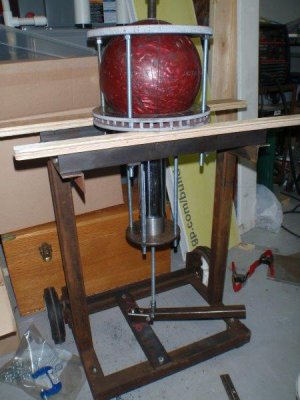
Moving right along, here's the whole thing coming together. The upper disk is supported from the cart frame using four threaded rods, which pass through clearance holes in the lower disk (which is on 3/4" shims for setup purposes). The compression disk is also tied to the frame with threaded rods, allowing adjustment of the pressure as needed. Another threaded rod ties the lower disk to the foot pedal, giving a 20 to 1 mechanical advantage. With a 2" movement at the end of the pedal, the rod moves about 0.1", plenty to free the ball.
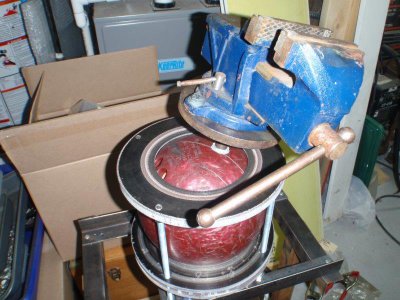
There is a piece of 3/4" threaded rod epoxied into the thumb hole in the ball, which screws into a nut welded onto a 6" disk, drilled and tapped to bolt on a small vise. The top of the ball can swing through about 66 degrees of angle and rotate as needed. Any arrangement of top plate can be easily screwed onto the top shaft, should the need arise.
I have most of my shop up and running, so I feel the urge to work on the odd project now, not just rebuilding the shop. Time to get out the pieces and build the stand. I had started to build a small heat treating oven before the fire. The fire bricks were all thrown out by the 'restoration' company, so the wheeled stand from that was available. The first step was to prepare the brake disks to clamp the bowling ball. A big lathe is an asset for that. The top disk needs to have the hub cut off.

To get the best clamping action, the disk needs to be beveled, but with a curve to match the ball. In this case, it required a radius of 4.3". I don't have a ball turner that big, but the Storebro lathe has a unique tool post that allowed me to set that radius from the centre of the toolpost to the tip of the cutter, and then swivel the QCTP by hand to cut the curve.

A perfect fit.

The lower disk gets to keep its hub. Just needs the curved bevel.

Here's the wheeled stand with the ball and disks on top and the Harley spring and cover underneath.

In order to compress the spring, which is the same length as the cover, I turned a steel insert to fit between the spring and a 5 1/2" disk. Drilled through to allow a rod to pass to link the lower ball disk to the foot pedal.

Moving right along, here's the whole thing coming together. The upper disk is supported from the cart frame using four threaded rods, which pass through clearance holes in the lower disk (which is on 3/4" shims for setup purposes). The compression disk is also tied to the frame with threaded rods, allowing adjustment of the pressure as needed. Another threaded rod ties the lower disk to the foot pedal, giving a 20 to 1 mechanical advantage. With a 2" movement at the end of the pedal, the rod moves about 0.1", plenty to free the ball.

There is a piece of 3/4" threaded rod epoxied into the thumb hole in the ball, which screws into a nut welded onto a 6" disk, drilled and tapped to bolt on a small vise. The top of the ball can swing through about 66 degrees of angle and rotate as needed. Any arrangement of top plate can be easily screwed onto the top shaft, should the need arise.


