- Joined
- Aug 3, 2017
- Messages
- 2,437
I'd mentioned this before (in a thread about how projects cause projects cause projects, I ended up needing to make a steady rest and a Jarno 15 dead center to get here...), but I was finally able to start this!
Basically, my Woodmaster planer rollers are rubber, and got covered in sap at one point (then sawdust), then started slipping. I'd cleaned them, but I've still got some slipping issues. Upon taking the planer apart, I found that the rollers are in 'meh' shape, plus seem to have a little bit of a bow to them. SO, I decided to look at replacements, since these are likely ~30 years old. A rubber roller is a reasonable $75, so I considered buying two new ones.
However, I noticed that the factory has a serrated steel at a lofty $154 (https://www.woodmastertools.com/sho...18-serrated-steel-feed-roller-2/#&gid=1&pid=1). I considered buying that since I figured it would go a long way to solving my problems, but reviews showed that the serrations are perhaps a bit harsh and mark up the wood on finer cuts. Additionally $154 seemed pretty steep! PLUS, I've got a lathe! I decided I'd try a less aggressive version by just diamond knurling instead.
The 26-27" length is RIGHT at the end of my envelope. My tailstock ends up overhanging the bed by ~3/4" with this setup, but I've still got another ~14", so i figure I'm fine. The material goes a bit into the taper in the spindle head, but is big enough to not go through the spindle itself. I have a 1 9/16" spindle (and am aiming for 1 1/2"), but unfortunately I couldn't get 1 9/16" material. Here's the build!
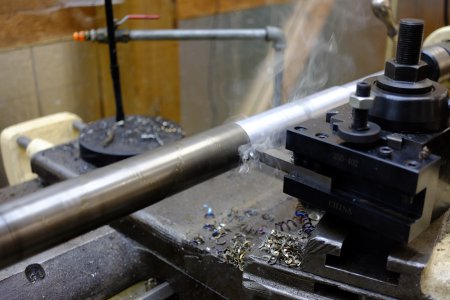
I need to face/center drill both sides so that I can use a live-center. Since it doesn't go through spindle, out comes the new stead rest!


After that, I can put it between centers and get to work. The roller is 18 1/2" of roller in the middle that goes into some 2" long 3/4" diameter bronze bushings. Going longer than that is no problem, since it goes into space. The 'short' end is only those 2", the other end continues on into a pulley (new ones have a key, my old one doesn't, but I'll probably cut it anyway), then into space again, so the dimensions for that aren't critical either.
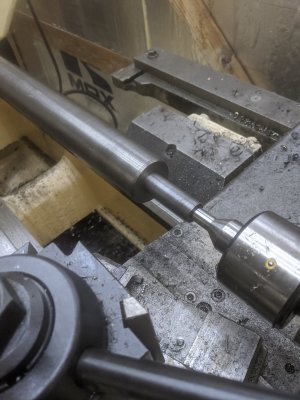
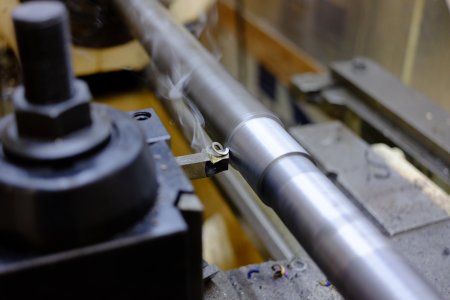
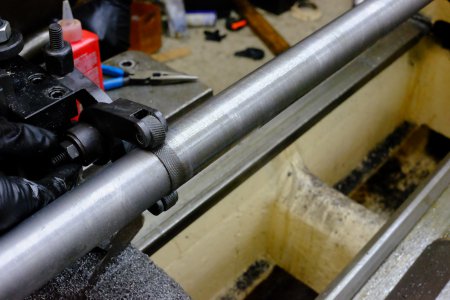
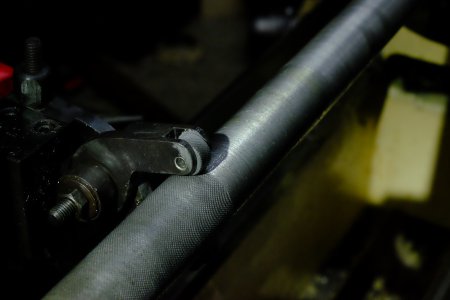
I start with the 'short' end. I ground some HSS in a few configs (plus used a brazed carbide cutter), and finally found something I like. I did just about 2" (measured with a ruler, so not particularly accurate, but good enough for this job). This is also my first time turning between centers! I used a Mcmaster Lathe Dog (cheapest I could find believe it or not) that hit a bolt in the faceplate:

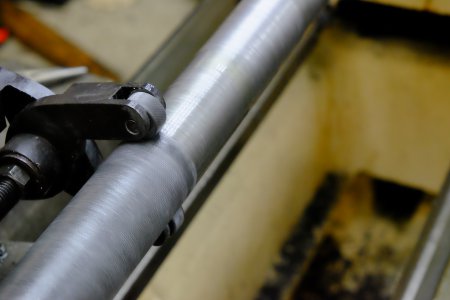
Turned, plus a chamfer on both points. I did an aggressive one on the to-be knurled side since I'll likely be taking a bunch of material there anyway:

The inside diameter of the bushing is just about .750 on the dot, the previous part was .7493. I ended up at .7491. I consider that a win")
UNFORTUNATELY, When I bought a few lathe dogs, I only picked up a 1", 1.5", and 2" version. Not very useful for gripping my new .75" diameter I quit for the night, and ordered the .5" and .75" lathe dog on mcmaster, so progress hopefully continues tomorrow!
Basically, my Woodmaster planer rollers are rubber, and got covered in sap at one point (then sawdust), then started slipping. I'd cleaned them, but I've still got some slipping issues. Upon taking the planer apart, I found that the rollers are in 'meh' shape, plus seem to have a little bit of a bow to them. SO, I decided to look at replacements, since these are likely ~30 years old. A rubber roller is a reasonable $75, so I considered buying two new ones.
However, I noticed that the factory has a serrated steel at a lofty $154 (https://www.woodmastertools.com/sho...18-serrated-steel-feed-roller-2/#&gid=1&pid=1). I considered buying that since I figured it would go a long way to solving my problems, but reviews showed that the serrations are perhaps a bit harsh and mark up the wood on finer cuts. Additionally $154 seemed pretty steep! PLUS, I've got a lathe! I decided I'd try a less aggressive version by just diamond knurling instead.
The 26-27" length is RIGHT at the end of my envelope. My tailstock ends up overhanging the bed by ~3/4" with this setup, but I've still got another ~14", so i figure I'm fine. The material goes a bit into the taper in the spindle head, but is big enough to not go through the spindle itself. I have a 1 9/16" spindle (and am aiming for 1 1/2"), but unfortunately I couldn't get 1 9/16" material. Here's the build!
I need to face/center drill both sides so that I can use a live-center. Since it doesn't go through spindle, out comes the new stead rest!
After that, I can put it between centers and get to work. The roller is 18 1/2" of roller in the middle that goes into some 2" long 3/4" diameter bronze bushings. Going longer than that is no problem, since it goes into space. The 'short' end is only those 2", the other end continues on into a pulley (new ones have a key, my old one doesn't, but I'll probably cut it anyway), then into space again, so the dimensions for that aren't critical either.
I start with the 'short' end. I ground some HSS in a few configs (plus used a brazed carbide cutter), and finally found something I like. I did just about 2" (measured with a ruler, so not particularly accurate, but good enough for this job). This is also my first time turning between centers! I used a Mcmaster Lathe Dog (cheapest I could find believe it or not) that hit a bolt in the faceplate:
Turned, plus a chamfer on both points. I did an aggressive one on the to-be knurled side since I'll likely be taking a bunch of material there anyway:
The inside diameter of the bushing is just about .750 on the dot, the previous part was .7493. I ended up at .7491. I consider that a win
UNFORTUNATELY, When I bought a few lathe dogs, I only picked up a 1", 1.5", and 2" version. Not very useful for gripping my new .75" diameter
I quit for the night, and ordered the .5" and .75" lathe dog on mcmaster, so progress hopefully continues tomorrow!