2013 POTD Thread Archive

I bought an I Gauging 24" DRO scale & reader off of a forum member who is set up to be a dealer to put on my height gauge. I did do that but decided it would be of better use on my x axis of my Bridgeport so I did that tonight. I can't believe I haven't added a DRO to everything after just one cut with it.

I was easily able to cut a 10" slot in a project without counting revolutions and it was dead nuts.
Soon as I get a couple spare dollars I will put them on all axis

Charlie I bought the same ones, and I'll tell ya its right on with the dials. I'm sure you saw my old post that I epoxied them, cause I have no
room for a drill My feed motors in the way. It does the job. If we need bolt holes etc. we have a shop pc and just print it.
sam
 
Just about finished the drill grinding gauge. Have a bit more clean up to do and some stamping and maybe a scale to do. I decided not to do the portion of the exercise regarding drilling and tapping. I don't know what I want in that space but the random threaded holes isn't what I want. I did forego the hacksawing and roughed it out on the bandsaw. I have spent enough quality time with a hacksaw in my life. The radii on the ends could do with a bit more fussing. Also the radiused edges need a bit more evening out. It was a fun project and I recommend doing one hand sometime. It wouldn't have taken quite so much time to finish up if I had not used 1/8" stock. Keeping the edges square was quite a bit of trouble.

IMG_0265.JPG

Nice gauge what are the little dots along the edge?

Jeff

IMG_0265.JPG
 
Nice gauge what are the little dots along the edge?

Jeff

Guidelines for when the sharpie rubs off while handling.

Was suggested in the instructions. Not sure I like them. I would have been better off making a deeper scribe.
 
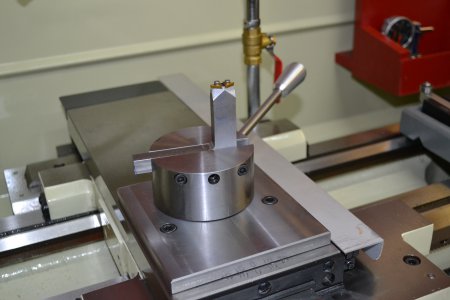
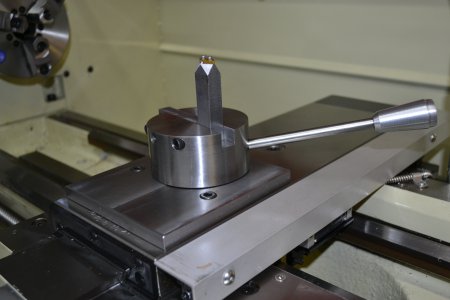
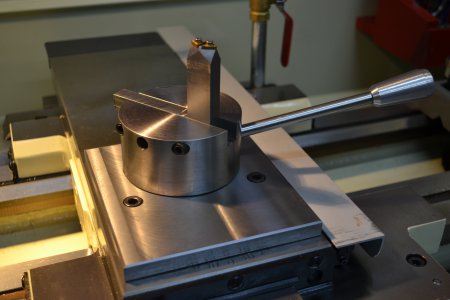
Here's a side view of the tool so you can see how the screw works, Like I said before I need to use a hardened washer as you can see how the washer bent.

That clears it up, thanks Charley! I couldn't see the step in the other photos. Nice work!
 
Charlie D
Can you please tell me where you found the print or dimensional info for the tool holder?

Nice work !!!

tks

I didn't really use the plans for anything other than the degrees & the sharpening fixture, I kinda did a hybrid of 3 that I saw. The actual plans I have are for a complete QCTP tool holder and I wasn't that ambitious. I'll post the PDF.

Charlie I bought the same ones, and I'll tell ya its right on with the dials. I'm sure you saw my old post that I epoxied them, cause I have no
room for a drill My feed motors in the way. It does the job. If we need bolt holes etc. we have a shop pc and just print it.
sam

Yea I seen your post, I thought about just using some really strong rare earth magnets but decided against that because of metal chips getting stuck on them. The 1" dia. magnets I have will hurt you :eek:uch:

That clears it up, thanks Charley! I couldn't see the step in the other photos. Nice work!

Thanks, I had actually forgot exactly what I had done:nuts: I may make that flat a little wider so the washer sits flat on that side.
 
Here are a couple of pictures of the ball turner I finished today. Turned out pretty good and seems to work okay. Have not had an opportunity to use it much yet.DSC_0197.JPGDSC_0198.JPGDSC_0194.JPG

DSC_0197.JPG DSC_0198.JPG DSC_0194.JPG
 
Here are a couple of pictures of the ball turner I finished today. Turned out pretty good and seems to work okay. Have not had an opportunity to use it much yet.


Looks great. I stalled working on mine. I wasn't happy how it was coming out and put it on the back burner to think about for a while. It took up too much room and didn't leave much room for a workpiece. (Small lathe)
 
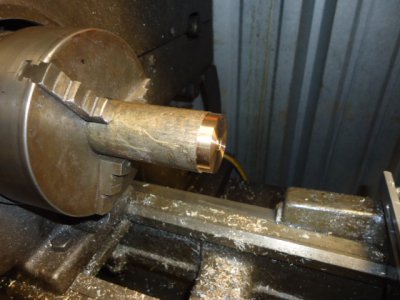
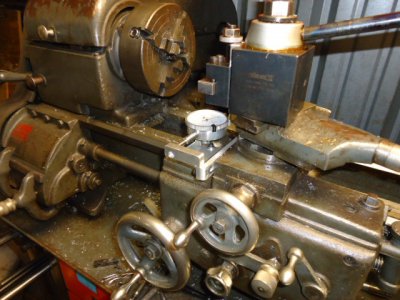
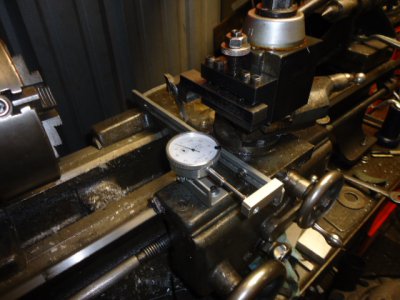
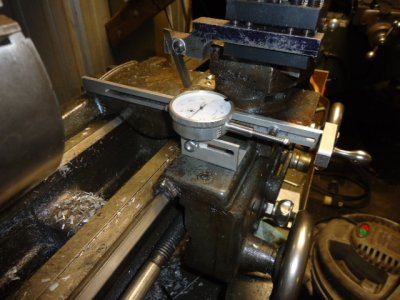
Made a poor mans DRO for the cross slide on my Logan lathe. Saw the idea a couple times in Home Shop Machinist and was displeased with a couple things on both of them so I devised my own plan. The first one had the indicator all the way to the rear making it hard to read, the second one had a rod going across the ways that would get in the way at some point. I made a sliding piece that attached to the cross slide that the indicator reads off of. I then made a mount for the indicator that mounts on the carriage, it has a slot in it where the indicator mounts that allows me to adjust the indicator 1 1/2" I tested it on a piece of brass rod I had and it is dead nuts. The indicator is a 1" travel which in reality gives me 2" capacity. Gonna mount another indicator on the ways (actually already have a mount made I think)

Facing off the 2" piece of brass I found that my locking screw head on my tangential tool holder protrudes out past the cutter and rubbed so I couldn't finish facing the part. I'll tackle that issue tomorrow.

Brass test bar.JPG Dro Poor Man style (1).JPG Dro Poor Man style (2).JPG Dro Poor Man style (3).JPG
 
Back
Top