-
Welcome back Guest! Did you know you can mentor other members here at H-M? If not, please check out our Relaunch of Hobby Machinist Mentoring Program!
- Forums
- THE PROJECTS AREA
- PROJECT OF THE DAY --- WHAT DID YOU DO IN YOUR SHOP TODAY?
- Project of the Day Mega-Thread Archives
You are using an out of date browser. It may not display this or other websites correctly.
You should upgrade or use an alternative browser.
You should upgrade or use an alternative browser.
2017 POTD Thread Archive
- Thread starter jpfabricator
- Start date
- Joined
- Nov 24, 2014
- Messages
- 3,179
snip
Since I was a kid, I always put my signature on projects. Not really special, but you hit the nail on the head when you mentioned pride. The last step after assembly and prior to crating, each cart get a sticker of a US flag (made is the USA). When I signed up for the FD, I was 32 and had 10 of prior service behind me. Most folks I work with are squared away but they think I a little anal. Thanks for the nice words.
I'm interpreting that to mean you were born with a dominant 'squared away' gene (rather than learned the practice).
My excuse is I wasn't born that way and I'm just too lazy or easily distracted to implement and maintain it to the degree you do.
Regardless, I love to see it and appreciate the value. You're an inspiration. Thanks for posting and being an example of how it can be.

Back to POTD !!
- Joined
- Mar 2, 2013
- Messages
- 895
Worked in the shop the last few days making different things. Here is a slitting/slotting saw arbor I made.
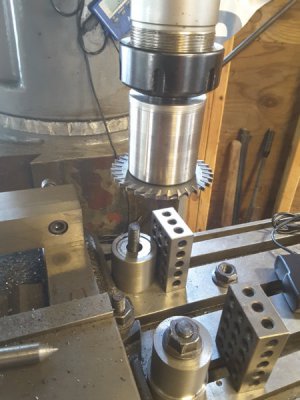
I learned a bit about order of operations, this is destined for the scrap pile, it's about 5 thou out.
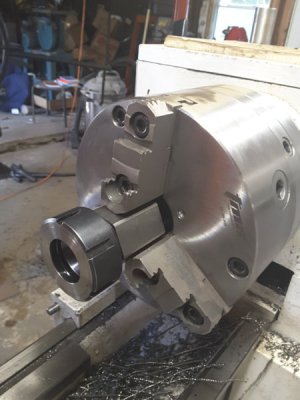
This one of those er 40 collet blocks, I read a couple months back you can place them in your lathe chuck and use them that way... the chuck is a bison knockoff set tru, with a little bit of tapping on the chuck and collet block I was able to get the er40 collet block to within 1/2 thou, now when I make the new slitting saw arbor, I'll be sure to use the collects and make the 1" spindle side first for each of the parts
It's slow going at times, but every mistake I learn more than the successes
Rich

I learned a bit about order of operations, this is destined for the scrap pile, it's about 5 thou out.

This one of those er 40 collet blocks, I read a couple months back you can place them in your lathe chuck and use them that way... the chuck is a bison knockoff set tru, with a little bit of tapping on the chuck and collet block I was able to get the er40 collet block to within 1/2 thou, now when I make the new slitting saw arbor, I'll be sure to use the collects and make the 1" spindle side first for each of the parts
It's slow going at times, but every mistake I learn more than the successes

Rich
Last edited:
F
Firestopper
Forum Guest
Register Today
Todays POTD was cut short due to a an unusual busy night. Some fine citizens of Tucson kept requiring 911 like every 1-2 hours after 10 pm. That said, I drove home haggard and somewhat defeated after a stand up 24 hour shift. Went out into the shop and cranked some XM tunes and got a second wind for the next 4.5 hours.
The 12 gauge x 1" round tubing was cut and de-burred last week so to bending I went. The bender is an Ercolina rotary type that can repeat bends very well. I can bend 1.5 bars/min with this unit.
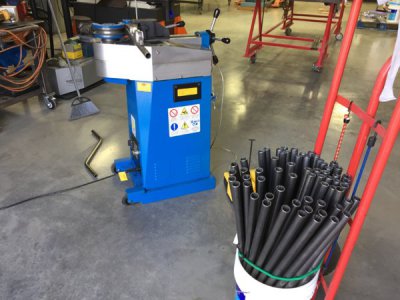
After a couple of hours the pail was empty.
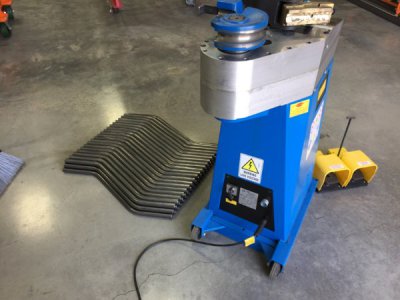
The shop floor space was rearranged for a third time for the nest production run of welding, drilling and cleaning the burrs and weld spatter.
The handle bar jig was set up and measurements taken for the 16 gauge x 3/4" cross member.
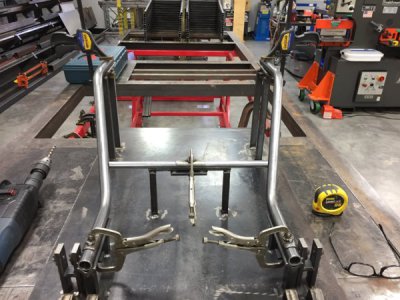
The holes on the handle bars are drilled by hand using an electric drill. Drill bushings ensure a perpendicular and centered 5/16" hole. The handle bars rotate 180º for the stowed position once assembled so the hole location is important for proper smooth operation.
A close up of one side of the drill bushings.
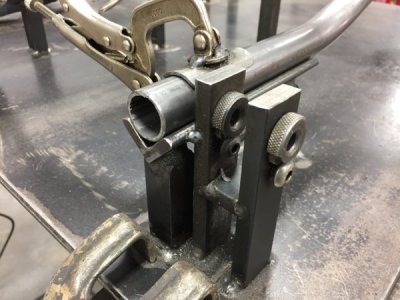
Here you can see the centerline of the tubing. I use a new 5/16" "bullet point" drill bit for every production run since I don't like to exert more pressure than required.
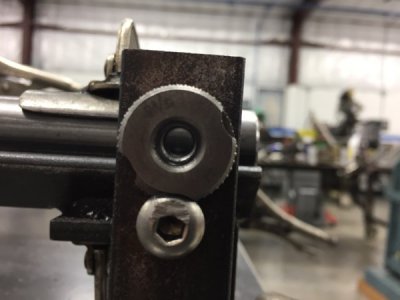
The three clamps have been permanently modified for this operation an work well for securing to the jig.
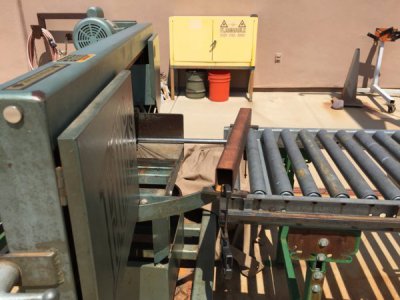
I also realized I hadn't cut any cross members as of yet (only had three since last run), so off to the saw station. The saw was set to 8º and the 3/4" round tubing was rotated 180º after each cut. I used a make shift back gauge to indicate the angle after each rotation.
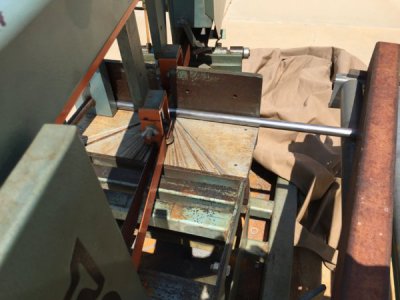
Here's a close up of the weld joint of the cross member.
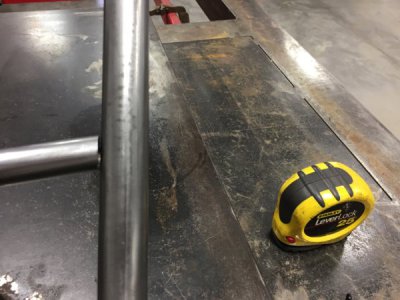
Time to relax the back and mind for the day and recover for tomorrows 24 hour shift. Sunday's POTD will be finishing the handle bar run (welding, drilling and cleaning).
Thanks for looking and hope some of these operations can help someone out.
Turn and burn!
Paco
The 12 gauge x 1" round tubing was cut and de-burred last week so to bending I went. The bender is an Ercolina rotary type that can repeat bends very well. I can bend 1.5 bars/min with this unit.

After a couple of hours the pail was empty.

The shop floor space was rearranged for a third time for the nest production run of welding, drilling and cleaning the burrs and weld spatter.
The handle bar jig was set up and measurements taken for the 16 gauge x 3/4" cross member.

The holes on the handle bars are drilled by hand using an electric drill. Drill bushings ensure a perpendicular and centered 5/16" hole. The handle bars rotate 180º for the stowed position once assembled so the hole location is important for proper smooth operation.
A close up of one side of the drill bushings.

Here you can see the centerline of the tubing. I use a new 5/16" "bullet point" drill bit for every production run since I don't like to exert more pressure than required.

The three clamps have been permanently modified for this operation an work well for securing to the jig.
I also realized I hadn't cut any cross members as of yet (only had three since last run), so off to the saw station. The saw was set to 8º and the 3/4" round tubing was rotated 180º after each cut. I used a make shift back gauge to indicate the angle after each rotation.


Here's a close up of the weld joint of the cross member.

Time to relax the back and mind for the day and recover for tomorrows 24 hour shift. Sunday's POTD will be finishing the handle bar run (welding, drilling and cleaning).
Thanks for looking and hope some of these operations can help someone out.
Turn and burn!
Paco
B
British Steel
Forum Guest
Register Today
I've always hated bleeding brakes/clutches, so finally got around to making it easy...
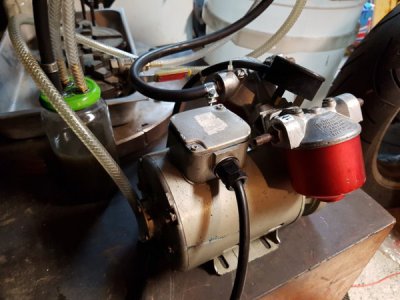
A half-horsepower vacuum pump from the World's Best Skip, a few hose barbs and silicone goo, some 1/4" hose and a ball valve to turn the vacuum off, all attached to a mayo jar - had to eat the mayo though, on my chips
No more running around trying to find a kid to pump the pedal / lever and top up while I wiggle a spanner on the nipple (ooer Mrs), clutch bled in less than 5 minutes!
Dave H. (the other one)
- Joined
- Aug 22, 2012
- Messages
- 4,121
Made this today and it took a lot longer that I thought it would.
Its for clamping the jaws of my three jaw chuck in position so I can hopefully grind them true or better than they are now.
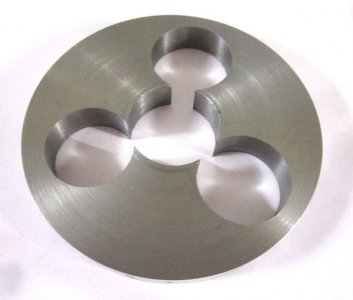
Marked out the positions of all 4 holes on some plate, drilled out the middle.
bolted to a mandrel to turn the plate round, into the 4 jaw, centered it, bored out the centre to size.
Then used the tail stock live centre to pin the next hole to the chuck, snuck up the jaws and used an indicator on the moving part of the live centre of it to get it perfectly centered.
Then proceeded to bore the first outer hole.
Now this is where I need some advice.
To bore the next two holes I worried about my marking out and whether it was accurate enough so I decided to sneak up on their diameters until the gap measured the same on all three gaps.
Do you think this as the right way to go?
Its for clamping the jaws of my three jaw chuck in position so I can hopefully grind them true or better than they are now.

Marked out the positions of all 4 holes on some plate, drilled out the middle.
bolted to a mandrel to turn the plate round, into the 4 jaw, centered it, bored out the centre to size.
Then used the tail stock live centre to pin the next hole to the chuck, snuck up the jaws and used an indicator on the moving part of the live centre of it to get it perfectly centered.
Then proceeded to bore the first outer hole.
Now this is where I need some advice.
To bore the next two holes I worried about my marking out and whether it was accurate enough so I decided to sneak up on their diameters until the gap measured the same on all three gaps.
Do you think this as the right way to go?
Made this today and it took a lot longer that I thought it would.
Its for clamping the jaws of my three jaw chuck in position so I can hopefully grind them true or better than they are now.
View attachment 241190
Marked out the positions of all 4 holes on some plate, drilled out the middle.
bolted to a mandrel to turn the plate round, into the 4 jaw, centered it, bored out the centre to size.
Then used the tail stock live centre to pin the next hole to the chuck, snuck up the jaws and used an indicator on the moving part of the live centre of it to get it perfectly centered.
Then proceeded to bore the first outer hole.
Now this is where I need some advice.
To bore the next two holes I worried about my marking out and whether it was accurate enough so I decided to sneak up on their diameters until the gap measured the same on all three gaps.
Do you think this as the right way to go?
The three jaw holes need to be on the same radius, exactly 120 deg arcs, and the same size. Difficult to do using the method you describe, but possible. Why not just make a heavy wall ring then chuck it in your three jaw and grind the jaws?
- Joined
- Aug 22, 2012
- Messages
- 4,121
If I tighten up on the inside of the ring then am I not using outward pressure which will place the jaws in a different strain that tightening them onto something?The three jaw holes need to be on the same radius, exactly 120 deg arcs, and the same size. Difficult to do using the method you describe, but possible. Why not just make a heavy wall ring then chuck it in your three jaw and grind the jaws?
B
British Steel
Forum Guest
Register Today
If I tighten up on the inside of the ring then am I not using outward pressure which will place the jaws in a different strain that tightening them onto something?
It will, yes, and wear on the opening and closing faces of the chuck scroll will differ - be aware that the jaws are likely to be concentric after grinding only close to the location they're ground at, again because the wear on the scroll will vary
Dave H. (the other one)

