2017 POTD Thread Archive

Nice job.
What is the reason for narrowing the wheels?
I thought most people wanted wider wheels.
In demolition derby the end goal is to be the last one running. One of the main tactics is to take out the wheels of your opponent. If you narrow the wheel it takes more hits before it will contact the frame or ball joints lo
Nice job.
What is the reason for narrowing the wheels?
I thought most people wanted wider wheels.
In Demolition Derby the object is to eliminate your opponents and be the the last car running. You have to find every advantage to make your car the last one. One of the most common strategies to take out your opponent is to hit their wheels and attempt to lock up a wheel because it is against the frame or upper ball joints. By narrowing the wheel from the inside side you gain frame and ball joint clearance which allows you to potentially take more hits before you are done. Its a chess game at 40mph and you need every advantage :)
 
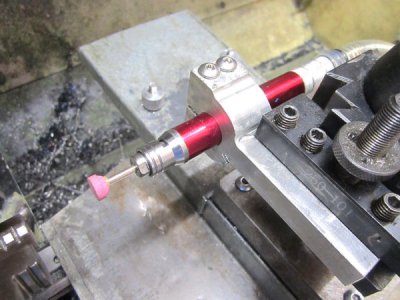
finished my little air grinder today.
Eventually eroded the broken tap out.
Then I found there was too much metal to clamp the grinder so I had to make a cut (just seen under the bottom curve) to get some spring.
Now it clamps tight.
air-grinder.jpg

But, major problem with my chuck jaw grinding aid.
The central hole is too small to allow the full length of the jaws to be reached with the grinder wheel.
Simple cure, just bore it out a wee bit more.
 
Last edited:
Not meant as criticism, if it cuts to your satisfaction, it's good. However, it appears to be cutting one half too width ahead of center.
 
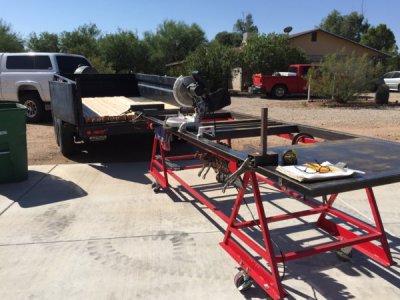
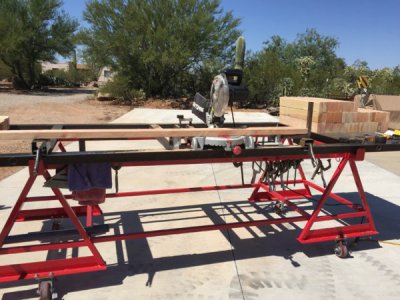
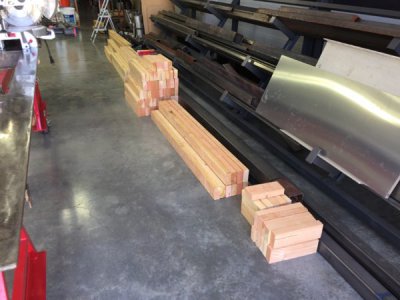
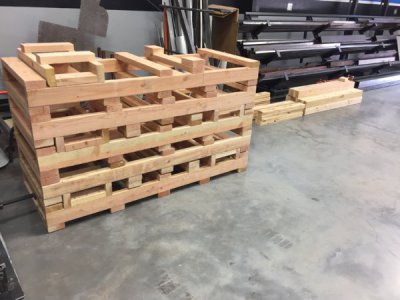
Today's POTD was to pick up wood and set up a cut station for the pallets and crating. I worked out of the dump trailer and pulled as I went. It worked out pretty well despite the triple digit temps. The Jig table converts quickly and the saw is secured via three drilled and taped holes. The make shift back-gauge is clamped for fast cutting.
The powder coaters assured me the load would be ready on Thursday so I wanted tasty ahead of the game. As we assemble the litters, we then stack them on the pallets and secure them to each other as well as to the pallet using banding material.

The wood came from a sister plant where my son works in Oregon (Weyerhaeuser), so I did my part in supporting the cause.:)
The cut station.
IMG_1492.JPG IMG_1494.JPG
It went fairly quick so I decided to build the pallets as well. The rest of the precut wood will be used for crating.
IMG_1497.JPG
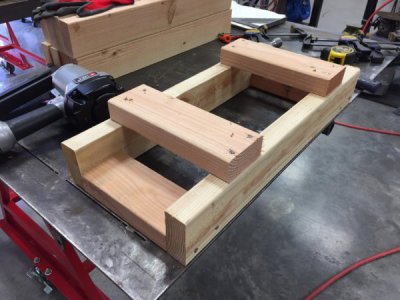
The saddle where built first and added to the pallets. The saddles secure the tires on the assembled first unit (bottom of stack).
IMG_1498.JPG IMG_1499.JPG
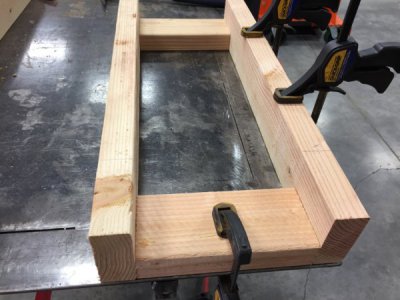
The jig table was built back in 1998 and is used for fence paneling,railing etc. No need to use a square as the inside/outside is built squared.

A completed pallet.
IMG_1501.JPG
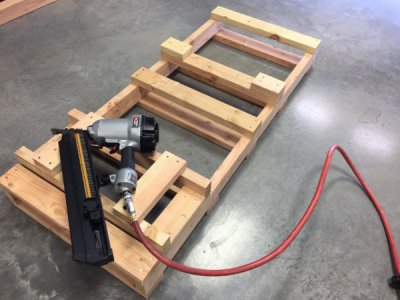
The main rails where layer out in groups eliminating measuring while building, I did have to pull diagonals to ensure the pallets where square. The floor was also marked at four corners to start off close.
The completed pallets awaiting the goods.
IMG_1502.JPG
Since I'm ahead of the game and still have till Thursday, I'm gonna take mama to the movies tomorrow.
Turn and burn!
Paco
 
Not meant as criticism, if it cuts to your satisfaction, it's good. However, it appears to be cutting one half too width ahead of center.
If you are talking about the shape of the grinding stone then that is its as supplied shape as it hasnt been used yet.:D
 
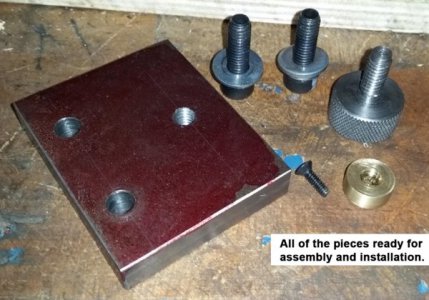
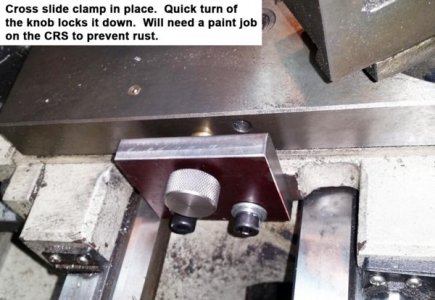
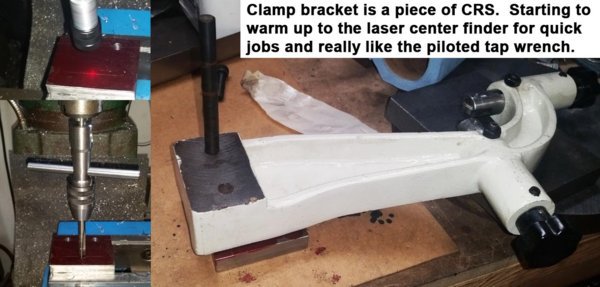
POTD was making a cross slide lock for my Grizzly G0709 lathe. The lathe has a gib lock on the RH side, but my DRO scale obscures it, so my plan was to make a friction lock on the opposite side. Like others, used the follower rest existing holes in the saddle for the bracket mounting holes.

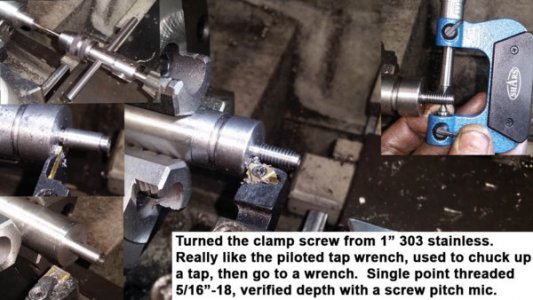
Cut a piece of ½” thick CRS to size, Dykem’d it up and transferred the follow rest mounting holes to the block. Then to the mill for drilling clearance holes and a tapped hole for a clamp screw. I picked up an SDA laser edge finder a couple of weeks ago and have been getting to like it more and more. For non-critical stuff, it quickly lets me find the center of a prick-punched hole. Wiggler works just as well, just my current personal preference. Also picked up a set of 0-1/4” and ¼”-1/2” piloted tap wrenches a while back. Really like using them as opposed to my old method of putting a tap in the drill chuck, turn the mill spindle by hand until the thread was at least 1 ½ diameter’s deep, then unchuck and use a conventional tap wrench.

Since the clamp was going on the LH side of the saddle, it’s going to get a lot of chips and coolant directly dumped on it. The clamp screw material of choice was 303 stainless. Turned a 1” round down to 5/16” for the screw. Drilled/tapped a 6-32 screw hole in the end for a brass clamping pad.

I could have run a die over the rod for threading, but chose to single point thread. I’ve single point threaded 100’s of times in the last 40 years and still go that route to keep up on the process. It wasn’t that long ago that I made a first pass with the compound at 45 deg. instead of 29.5 or 30. . .

I used a carbide inserted tool holder for the cutting, advanced the compound about 0.003” per pass. Started checking the thread with a screw pitch mic when the thread was getting close. Have to admit to running a die over top when it was done for a cursory check/clean up.

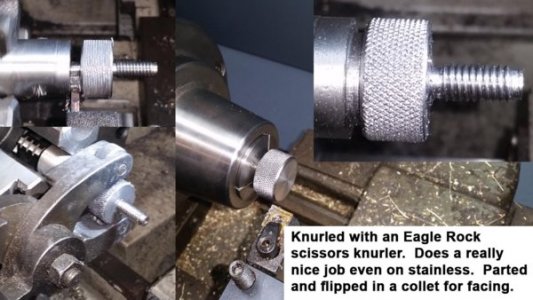
I’ve seen other make a slip-through clamp rod like a C-clamp for cranking down on the screw, but went with a knurled knob instead. I was concerned about the tommy bar sticking up and hitting the chuck, the knob is benign and not in the way. Eagle Rock scissors knurling tool with sharp knurls has NO problems with 303 stainless.

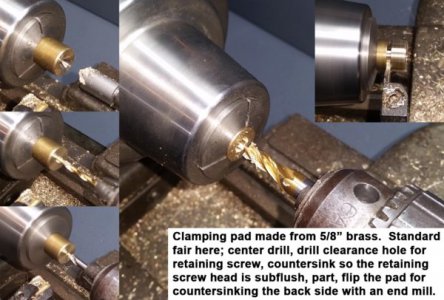
Brass clamping pad is 5/8” diameter stock. Nothing special here, was the material on hand. It was drilled and countersunk for a flat head cap screw into the stainless knob/screw. Flipped the brass after parting and countersunk a ¼” flat hole with a ¼” end mill.

It works well though the CRS block will need some treatment to prevent rust. Rattle can of gray Rustoleum primer should do the trick.

Bruce
20170913_131635.jpg 20170913_151113.jpg 20170913_153237.jpg 20170913_154936.jpg 20170913_155132.jpg 20170913_155846.jpg
 
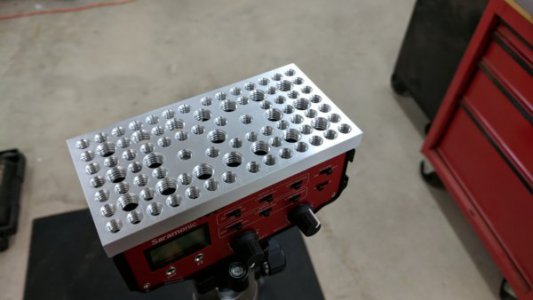
"Finished making a custom cheese plat to mount to my pre-amp."

Dan
Sounds like you tap things just like I do, hand on the chuck. Just curious, but what kind of a pro-amplifier
is this plate for? Not for my sound system, that I know. Ham?? Love to see the rest of it when you get
it done, (and in between too). Neat job!
 
Back
Top