
am restoring an older delta 20" metal wood bandsaw this saw spent most of its life 100 yards from the ocean. 20 plus years last 10 years untouched. everything very rusty. had 3 phase motor and I changed it to single. variable speed 50 fpm to 5000 fpm will when I'm done will cut metal and wood again. bill

-
Welcome back Guest! Did you know you can mentor other members here at H-M? If not, please check out our Relaunch of Hobby Machinist Mentoring Program!
- Forums
- THE PROJECTS AREA
- PROJECT OF THE DAY --- WHAT DID YOU DO IN YOUR SHOP TODAY?
- Project of the Day Mega-Thread Archives
You are using an out of date browser. It may not display this or other websites correctly.
You should upgrade or use an alternative browser.
You should upgrade or use an alternative browser.
2017 POTD Thread Archive
- Thread starter jpfabricator
- Start date
- Joined
- Apr 12, 2011
- Messages
- 3,481
Yes, I hook my shopvac to it. Maybe tempered glass would be better. I don't think that glass beads are as quite as hard on the glass as an abrasive media. I remember many years ago we had a blast cabinet in the shop I worked at, ran only glass beads. I don't remember the glass frosting.
Jim,
I use plastic liners that are taped to the inside of the glass. I've had my blast cabinet over 25 years and have never replaced the glass. I have used all the different kinds of media. I get them from TP Tools. Here is a link.
http://www.tptools.com/Cabinet-Inner-Lens-Protectors.html
- Joined
- Feb 8, 2014
- Messages
- 11,144
Today is Plasma Torch mod day. A Chinese plasma torch (Loto) was given to me and it actually works pretty good. It was time to buy some new ceramic nozzle cups, so off to Ebay. Well the new nozzles didn't fit the torch handle because the ID was 20mm and the flange shown in the picture was 21mm. So they hit the flange and wouldn't screw on.


So here is my young son's solution to the problem, just nip off the back of the nozzle until it fits. Gotta have a talk with that boy.
  Not only is it being lazy, it also affects the airflow.

So to fix it right, the flange has to be 1mm smaller. So how do you hang on to a plasma torch handle for machining?
I can't put it in the lathe because I didn't want to disassemble it, and the handle interfered with the chuck jaws anyway. Since it's injection molded, there is draft in everything except the area shown in the next picture. So this looks like a mill job.

So first grab a piece of scrap 3/8 aluminum off the shelf, and make some vice jaws out of it. I have soft jaws on the vice, and had already drilled & tapped 1/4-20 holes in them for another job. I knew the spacings in the x axis, so all I had to do was locate one hole with the pointy end of the edge finder, and then open the jaws to get the Y axis spacing I wanted to have clearance for the handle. Drill the holes and screw down the plate. Then pocket a 1.255 hole to fit the torch body. Then over to the bandsaw to cut it in half. Relocating was easy because I'm using flat head screws and the taper centers them up.

Then I leveled the top of the torch head in the X and Y axis by loosening the vice and moving the torch around until it's close enough. Yeah, I know, the bubble is off a bit, but it matches the mill. Not quite level.

Then find center of the brass with the Blake, because the brass part is not exactly in the center of the plastic.

And then spend about a minute doing the actual machining. It took about a half hour to set it up. This also allows me to square up the base with the brass, it was off a bit which caused a varying gap between the ceramic nozzle and the other nozzle thingus (technical term) which caused a different air flow side to side.

And here it is, a nice fit now. and no more breaking nozzles to get it to fit.

So here is my young son's solution to the problem, just nip off the back of the nozzle until it fits.
Gotta have a talk with that boy. Not only is it being lazy, it also affects the airflow.So to fix it right, the flange has to be 1mm smaller. So how do you hang on to a plasma torch handle for machining?
I can't put it in the lathe because I didn't want to disassemble it, and the handle interfered with the chuck jaws anyway. Since it's injection molded, there is draft in everything except the area shown in the next picture. So this looks like a mill job.
So first grab a piece of scrap 3/8 aluminum off the shelf, and make some vice jaws out of it. I have soft jaws on the vice, and had already drilled & tapped 1/4-20 holes in them for another job. I knew the spacings in the x axis, so all I had to do was locate one hole with the pointy end of the edge finder, and then open the jaws to get the Y axis spacing I wanted to have clearance for the handle. Drill the holes and screw down the plate. Then pocket a 1.255 hole to fit the torch body. Then over to the bandsaw to cut it in half. Relocating was easy because I'm using flat head screws and the taper centers them up.
Then I leveled the top of the torch head in the X and Y axis by loosening the vice and moving the torch around until it's close enough. Yeah, I know, the bubble is off a bit, but it matches the mill. Not quite level.
Then find center of the brass with the Blake, because the brass part is not exactly in the center of the plastic.
And then spend about a minute doing the actual machining. It took about a half hour to set it up. This also allows me to square up the base with the brass, it was off a bit which caused a varying gap between the ceramic nozzle and the other nozzle thingus (technical term
) which caused a different air flow side to side.And here it is, a nice fit now.
and no more breaking nozzles to get it to fit.
Last edited:
F
Firestopper
Forum Guest
Register Today
Jim,
Always impressed with you ingenuity.
Heres another link to blasting media;
http://www.lonearrow.com/contact.html
Turn and burn
Paco
Always impressed with you ingenuity.
Heres another link to blasting media;
http://www.lonearrow.com/contact.html
Turn and burn
Paco
- Joined
- Mar 19, 2014
- Messages
- 2,681
I needed a certain size punch that’s not in my Pratt & Whitney set. I made the punch set out of 1144 steel. Yes, I understand that it was not the best choice of steel for the job. I used it only because it was easy to grab. And what the heck, let’s see if this stuff will hold up to a punching operation. I'm happy to report, it worked out great! I made about 30 holes in 0.030” stainless and not a hint of wear/damage to the punch set! For heat treat and tempering, I heated the punch set to a cherry red with a Mapp torch. Then tossed the parts in oil. I then heated the parts still wet with the oil, until the oil started to smoke. And then left the parts to air cool. I did not sharpen the cutting edges after HT. They looked good enough to use after the HT. It took me about an hour to make the punch set. The pic is showing the punch set used after making the holes.

Last edited:
- Joined
- Sep 2, 2013
- Messages
- 5,108
Nice, but might be a little tougher with with long pieces. Mike
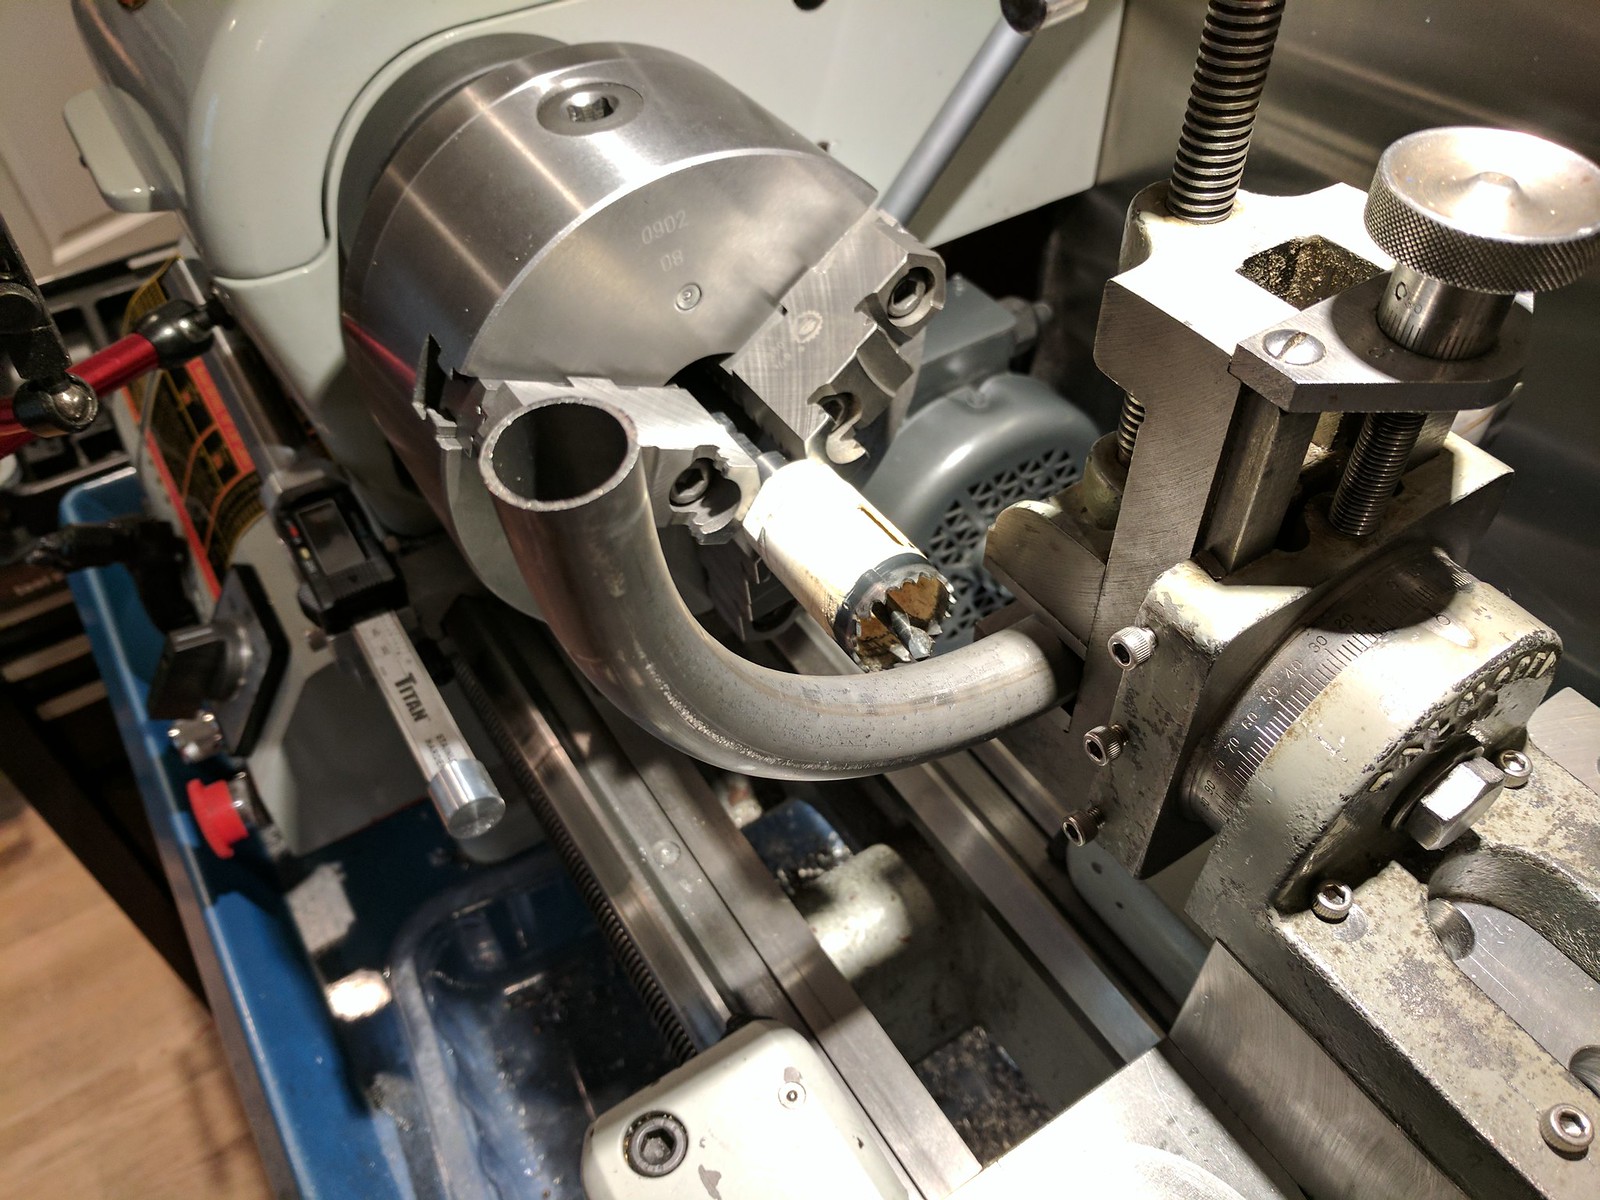
I was surprised to find I owned a tubing notcher:
Robert