-
Welcome back Guest! Did you know you can mentor other members here at H-M? If not, please check out our Relaunch of Hobby Machinist Mentoring Program!
- Forums
- THE PROJECTS AREA
- PROJECT OF THE DAY --- WHAT DID YOU DO IN YOUR SHOP TODAY?
- Project of the Day Mega-Thread Archives
You are using an out of date browser. It may not display this or other websites correctly.
You should upgrade or use an alternative browser.
You should upgrade or use an alternative browser.
2017 POTD Thread Archive
- Thread starter jpfabricator
- Start date
- Joined
- Jun 26, 2014
- Messages
- 619
Tonight’s project (yes I’m spending far more time in the workshop than usual at present - need some alone time from the wife at present, but that’s a whole different, much less interesting topic)
I recently upgraded my cordless drill - so the old one is now expendable and available for experimenting.
The main problem with the old one was the ni-cad batteries. They wouldn’t keep a charge so whenever I wanted to use the drill it was flat. So I decided to try a lithium ion upgrade.
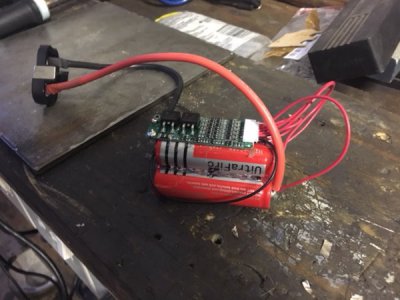
Brought some cheap 18650 cells (~$2 each) and a balance charge circuit board (~$4.30) and had at it.
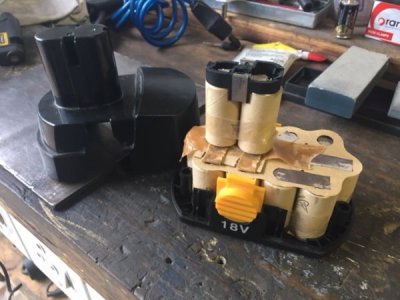
Old ni-cad pack
New Li-ion setup (much lighter)
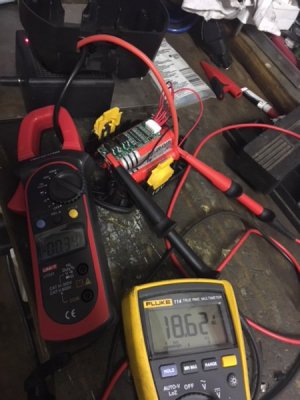
Charging seems to be going well, still need to test it. Hopefully the end result is a drill for occasional use that will maintain its charge while sitting on the shelf and actually be ready to use when wanted.
I recently upgraded my cordless drill - so the old one is now expendable and available for experimenting.
The main problem with the old one was the ni-cad batteries. They wouldn’t keep a charge so whenever I wanted to use the drill it was flat. So I decided to try a lithium ion upgrade.
Brought some cheap 18650 cells (~$2 each) and a balance charge circuit board (~$4.30) and had at it.
Old ni-cad pack

New Li-ion setup (much lighter)

Charging seems to be going well, still need to test it. Hopefully the end result is a drill for occasional use that will maintain its charge while sitting on the shelf and actually be ready to use when wanted.

F
f350ca
Forum Guest
Register Today
Any time I've tried to drill through an insulated wall I get a massive birds nest of fibreglass wrapped around the spinning bit. Came up with this today.
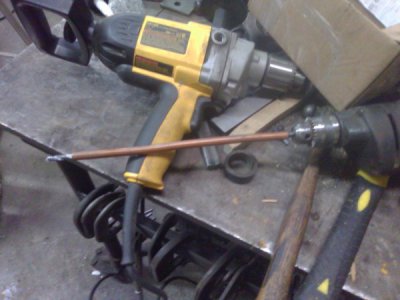
Just a piece of copper tube over the bit.
Needed to run a 1 inch conduit through the back wall of the shop. Used a hole saw to cut the inside sheeting then poked the tubing cover bit through the insulation. Holding the tube against the outer sheeting while i drilled the pilot hole worked like a charm. Then used the plot hole to locate the hole saw on the outside wall.
Greg
Just a piece of copper tube over the bit.
Needed to run a 1 inch conduit through the back wall of the shop. Used a hole saw to cut the inside sheeting then poked the tubing cover bit through the insulation. Holding the tube against the outer sheeting while i drilled the pilot hole worked like a charm. Then used the plot hole to locate the hole saw on the outside wall.
That's an excellent idea, mind if I remember that for future reference?
After doing a spot of shopping, I worked on making a side wall for my customized plow. I could buy one (or two, I'm not sure if I want one one each end) from Warn for about $80 each, but I wouldn't be a member of a site like this if I did something crazy like that.
Here's pics of what I've done so far:
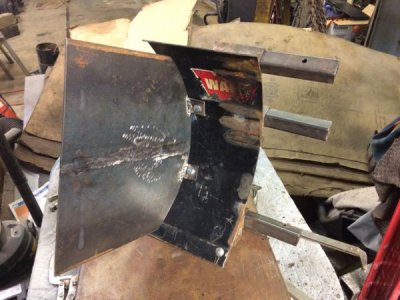
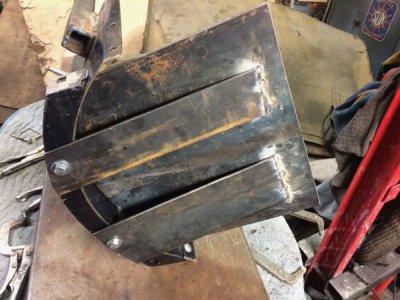
It's roughly based off the Warn 80607 side wall (online images of the unit, as well as the install instructions), but mine extends out more and it also is bolted to the face of the plow, not just the end of it.
Tomorrow (well, later today) I plan on boxing in the support braces, bolting on a strip of a conveyor belt to the bottom edge to close off that edge while still being able to go over uneven pavement without catching the sidewall on it, and round off the corners a bit so they aren't so ouchy.
I'll try it out a bit tomorrow, but there isn't any unplowed pavement around (well, that I know of) that I can do a proper test of how well it works.
Once I'm able to do a real test of it, I'll decide if I should make another one for the other end...
Here's pics of what I've done so far:


It's roughly based off the Warn 80607 side wall (online images of the unit, as well as the install instructions), but mine extends out more and it also is bolted to the face of the plow, not just the end of it.
Tomorrow (well, later today) I plan on boxing in the support braces, bolting on a strip of a conveyor belt to the bottom edge to close off that edge while still being able to go over uneven pavement without catching the sidewall on it, and round off the corners a bit so they aren't so ouchy.
I'll try it out a bit tomorrow, but there isn't any unplowed pavement around (well, that I know of) that I can do a proper test of how well it works.
Once I'm able to do a real test of it, I'll decide if I should make another one for the other end...
- Joined
- Dec 22, 2015
- Messages
- 561
Not today, but the last several days off and on.
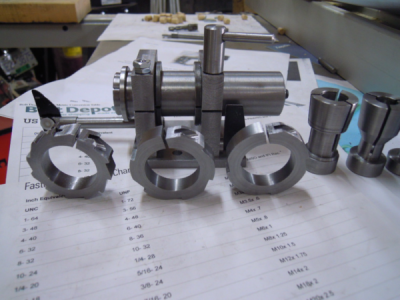
First I made 3 indexing collars for the end mill sharpener; 4 stops, 6 stops and 12 stops (for the dovetail cutter). I had to make a tapered arbor to mount the blank on, for milling. First time doing this and it seemed to work fine.
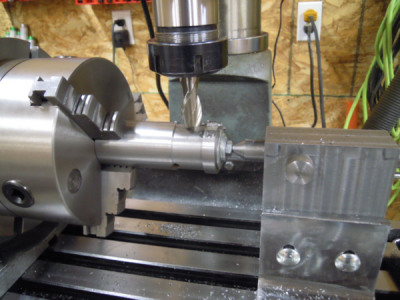
Cutting the slot.
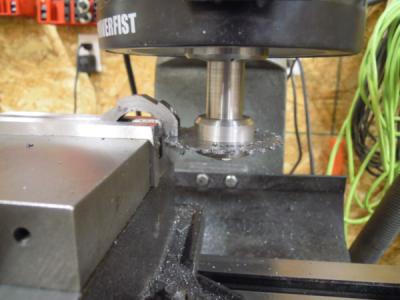
and the finished pieces.
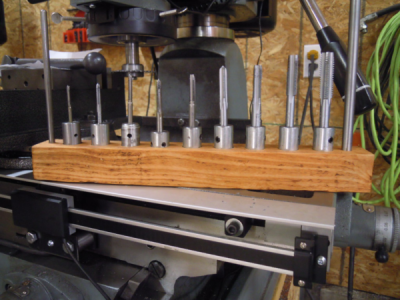
and my 10 year old grandson made a holder for the new tap holders. He did all the sanding, drilling and staining. He did a great job and was very proud of his work. As he should be.
Working on a new stand for the mill drill. Getting tired of the temporary wooden one I made and not having any storage. My Milling stuff is all over the shop, including on the floor next to the mill. The new one will have drawers under it and a little room next to the base so I don't have to put things on the mill table.
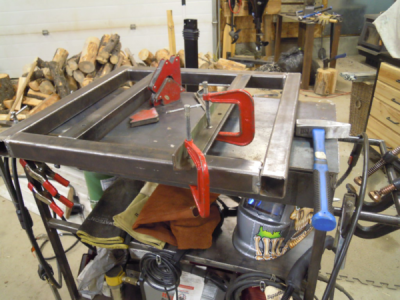
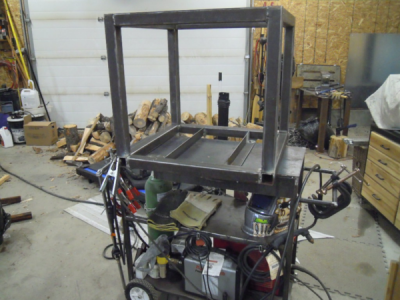
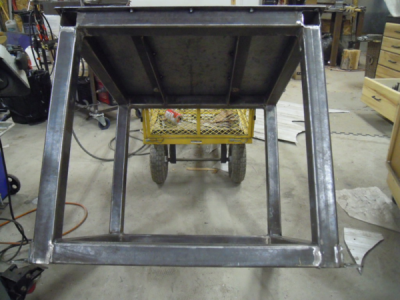
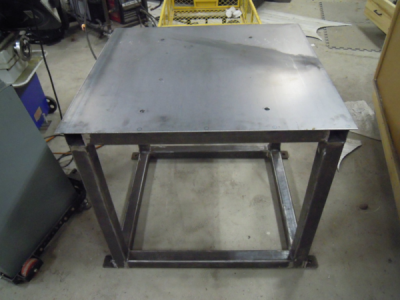
and the first of the leveling feet using the hockey pucks I got from the consignment store (CAD $0.69 each).
Notice the different colored threads. These are 5" x 5/8" bolts I got on sale. A box of about 80 for $10. They didn't have threads all the way to the head so I chucked them up to extend the threads and discovered the heads weren't centered on the shafts. So I got to use the new ER40 hex collet block made to shave a little off each side of the hex to get it centered. Then into the lathe to extend the threads.
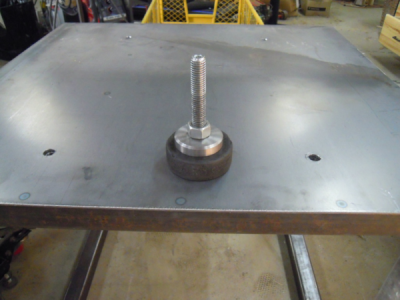
That's all for now. More to come when I get time.
First I made 3 indexing collars for the end mill sharpener; 4 stops, 6 stops and 12 stops (for the dovetail cutter). I had to make a tapered arbor to mount the blank on, for milling. First time doing this and it seemed to work fine.

Cutting the slot.

and the finished pieces.

and my 10 year old grandson made a holder for the new tap holders. He did all the sanding, drilling and staining. He did a great job and was very proud of his work. As he should be.

Working on a new stand for the mill drill. Getting tired of the temporary wooden one I made and not having any storage. My Milling stuff is all over the shop, including on the floor next to the mill. The new one will have drawers under it and a little room next to the base so I don't have to put things on the mill table.


and the first of the leveling feet using the hockey pucks I got from the consignment store (CAD $0.69 each).
Notice the different colored threads. These are 5" x 5/8" bolts I got on sale. A box of about 80 for $10. They didn't have threads all the way to the head so I chucked them up to extend the threads and discovered the heads weren't centered on the shafts. So I got to use the new ER40 hex collet block made to shave a little off each side of the hex to get it centered. Then into the lathe to extend the threads.

That's all for now. More to come when I get time.
- Joined
- Dec 22, 2015
- Messages
- 561
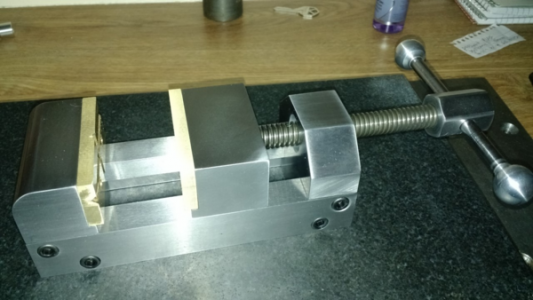
That is an awesome looking vise!!! I think you should display above your fireplace or somewhere prominent for people to see the quality of your work.Today I finally finished the vise I've been wanting to make. It's a combination of A2, 4130, 12l14 and brass. It might get used once or twice but making it was enjoyable.
View attachment 248380
- Joined
- Oct 4, 2014
- Messages
- 172
Today I finally finished the vise I've been wanting to make. It's a combination of A2, 4130, 12l14 and brass. It might get used once or twice but making it was enjoyable.
View attachment 248380
What a nice job you did on the vice, very professional looking work. Did you make it from available plans, or design it yourself? This is on my to-do list when I get time.

