I won't install the double tool post. Just the standard compound one.I would jump on any spare parts for your lathe. And I think one rear tool post is all you need. In the old old days a quick change tool post in front was rare.

-
Welcome back Guest! Did you know you can mentor other members here at H-M? If not, please check out our Relaunch of Hobby Machinist Mentoring Program!
You are using an out of date browser. It may not display this or other websites correctly.
You should upgrade or use an alternative browser.
You should upgrade or use an alternative browser.
Logan 1935-2 lathe
- Thread starter Oldseabee
- Start date
- Joined
- Apr 23, 2013
- Messages
- 1,004
It’s about a ten minute job to change the double or the compound slide back and forth. And many guys say you get less chatter with the double post. But I would use what makes you comfortable.I won't install the double tool post. Just the standard compound one.
Well as heavy as that double tool post is I could imagine less chatter. Probably make heavier cut that way too. Maybe I'll try ot out. But the double tool post is missing the stop I'd have to order that from Logan. So when you change these out do you already have the screw and nut on that or do you swap out the screw and nut? To me it would seem quicker if bot tool posts had there own screw and nut. Am I correct in the assumption?It’s about a ten minute job to change the double or the compound slide back and forth. And many guys say you get less chatter with the double post. But I would use what makes you comfortable.
- Joined
- Apr 23, 2013
- Messages
- 1,004
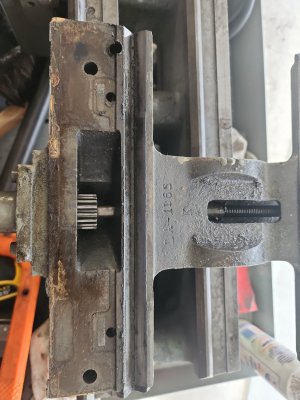
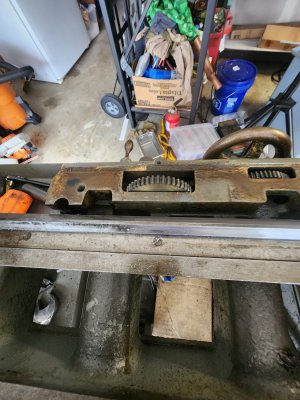
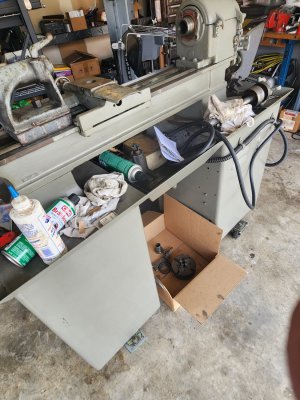
Logan made two production cross slides . One has a handle that lets you just pull the slide from from front to back where IF you want you can just set a stop. Like a form tool in front with a cutoff tool or the like in back. This type is fixed on the ways. The other production slide lets you use the cross slide like a standard slide. Both cross slides have a hard stop on the back of slides IF you want to use the stop. The double slide you have can use the hard stop or you can use the slide just using the dial. I used a grease pencil to mark which way I going or coming. You don’t NEED the hard stop but it is nice for production. The back tool can also be used to time two tools to hold close lengths. Timing means you can face a part from the front post and set a groove tool in back post upside down and using the same stop to hold close lengths. The cross slide nut is the same. And only thing about other tool post is base sets tool at 90 degrees to each other. Or it’s simple to make new back post. I just added a pic of stop that fits on back of production cross slide. Easy to make.Well as heavy as that double tool post is I could imagine less chatter. Probably make heavier cut that way too. Maybe I'll try ot out. But the double tool post is missing the stop I'd have to order that from Logan. So when you change these out do you already have the screw and nut on that or do you swap out the screw and nut? To me it would seem quicker if bot tool posts had there own screw and nut. Am I correct in the assumption?
To change slides take shcs out of one slide . Push slide off back. Slide other slide on replace shcs ,adjust gib then ready to go. You can then put qctp on front of double slide and ready to go.
Attachments
Last edited:
- Joined
- Apr 23, 2013
- Messages
- 1,004

All you do is remove the shcs from the compound slide acme nut. Slide that slide off and replace it with the double slide replace shcs adjust gibs and you are done.Well as heavy as that double tool post is I could imagine less chatter. Probably make heavier cut that way too. Maybe I'll try ot out. But the double tool post is missing the stop I'd have to order that from Logan. So when you change these out do you already have the screw and nut on that or do you swap out the screw and nut? To me it would seem quicker if bot tool posts had their own screw and nut. Am I correct in the assumption?
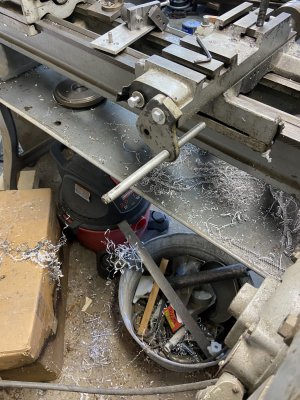
I cleaned up the inside of the new to me tailstock. Then removed the turret assembly. A bit heavy. Then cleaned the ways really good as that turret has been on the lathe for a long time. Then oiled the ways and set the tailstock. In a week or so my compound parts, new screw and nut and front compound bearing will be here. Then I'll start re assembly. Oh. And some paint work too.
Mike
Mike
Attachments
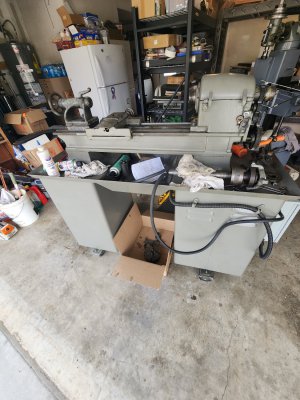
Well today I took the tailstock and cleaned it up and painted it. Then I removed the saddle to check on it. Out board gibb only making contact on both ends. So I'm glad I pulled it. I found a light brown paint underneath the grease and gray paint. Talk about a mess. It all looks OK just needs a really good cleaning and some adjustments. I'm not sure if I should pull the carriage off or not. I think this is enough for now.
Mike
Mike