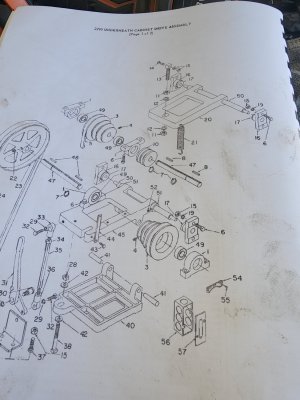
Now a question on wear. How much play is to much when pertaining to the Worm gear in the apron? It's supported on each end by a bearing but the parts manual says bearings only pertains to the 12 inch model not my 11 inch. But my worm gear is set up exactly like it shows In the diagram with bearing supports on each end and these supports held in place by set screws.
Any advice or help appreciated. I'm going to call Logan on Monday to see what they think.
Mike
Any advice or help appreciated. I'm going to call Logan on Monday to see what they think.
Mike