I just ordered the bearings this morning through Alpine bearings. They had the best price for Real bearings not knock offs removed and/or faked. They have an office in Anaheim California and one back east. Very knowledgeable person.all my bearings are marked P5 , 50x80x16 front end matched set precision and the rear 45x75x16 P5 and these are shielded bearings. All deep groove bearings. In my Logan manual they show my model available with 2 front bearings so that's what I'm doing. Shipped Priority mail total bill just over $200.00 for the 3 bearings.

-
Welcome back Guest! Did you know you can mentor other members here at H-M? If not, please check out our Relaunch of Hobby Machinist Mentoring Program!
You are using an out of date browser. It may not display this or other websites correctly.
You should upgrade or use an alternative browser.
You should upgrade or use an alternative browser.
Logan 1935-2 lathe
- Thread starter Oldseabee
- Start date
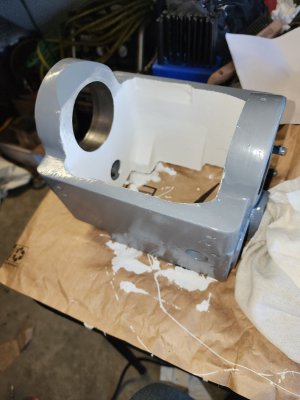
Still waiting for parts. So while waiting more prep work. I painted the inside of the headstock with white oil base primer. Then after a day drying 2 coats of white oil based enamel. This smoothed the inside up so that should help in keeping chips and lubricant down a bit.
Attachments
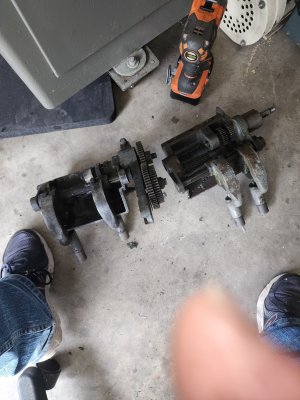
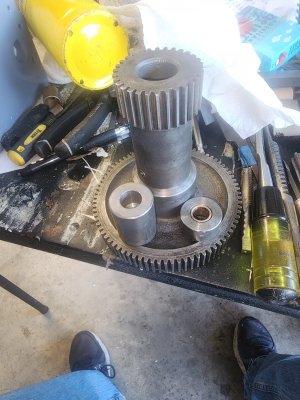
I picked up a spare transmission for the lathe. But it is crapped out. Need one new shaft and all the bushings replaced. Cleaned up all the paint from bearing cavities and still waiting for parts. Logan said next week. I even got a New data plate and the 4 little rivets for it coming.
Attachments
My parts order from Logan arrived this morning. Oh boy.
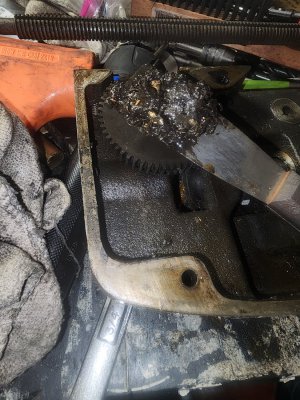
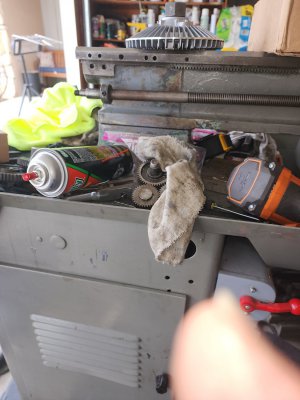
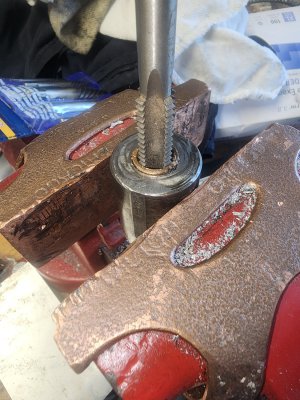
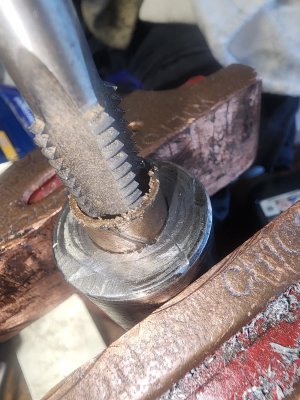
One of the support bushings for the back gear is bored through. Easy to knock that bushing out. For the longer support bushing it's a Blind hole. I heated it up with my propane torch, then sprayed with penatrating oil. Then I clamped it In my vice and used a 1/2x13 tap. The tap fit perfectly and I ran it all the way down. Then some more pressure with the tap going into the bushing and it came right out. Easy Peasy. So tomorrow I'll get the lower end of the headstock completed. Plus my electrician will finish my wiring. I also had a friend who is a retired machinst cut the snap ring groove in my new front bearing.
One of the support bushings for the back gear is bored through. Easy to knock that bushing out. For the longer support bushing it's a Blind hole. I heated it up with my propane torch, then sprayed with penatrating oil. Then I clamped it In my vice and used a 1/2x13 tap. The tap fit perfectly and I ran it all the way down. Then some more pressure with the tap going into the bushing and it came right out. Easy Peasy. So tomorrow I'll get the lower end of the headstock completed. Plus my electrician will finish my wiring. I also had a friend who is a retired machinst cut the snap ring groove in my new front bearing.
Attachments
Now with all the needed repairs I can claim that I was taken my a shyster. They had painted the lathe and installed a new 3 phase motor. But the head stock was trashed. Both spindel bearings were frozen, so that tells me that they had to heat the bearings up to get it to run. Back gear eccentric where the little gear for actuation the backyard was bent. I have a used one coming that will work.
At least when completed I'll have a decent lathe able to do closer tolerance work than the Chinese lathes and at about a third of the price.
At least when completed I'll have a decent lathe able to do closer tolerance work than the Chinese lathes and at about a third of the price.
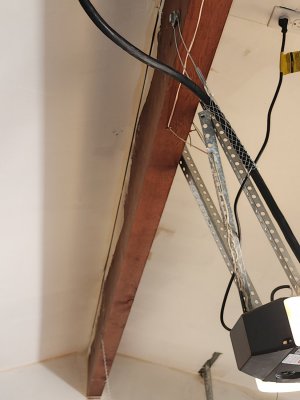
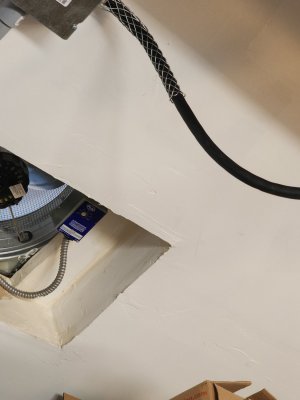
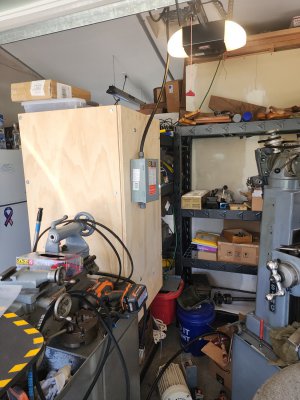
Progress. I got my electrical feed installed. Now I can start wiring the mill controler and the Rotary phase converter. I also have to order 3 more bronze bushing from Logan for the vbelt pulley and the pinion cone gear. I measured it all again and I haveclearnce issues. When new there is only 0.002 clearance on the spindel. The rear bushing is at 0.017 front at 0.024. When completed it should be like a New lathe.
The strain relief from the beam down to the disconect is rated at 1,900 lbs
The strain relief from the beam down to the disconect is rated at 1,900 lbs
Attachments
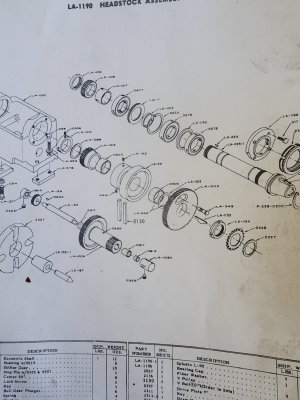
On model 1935 lathes and a few others there was an option for 2 front bearings. In the manual a parts diagram for the LA-1190 headstock assembly shows a spacer, part# LA-1192. I called Logan to order some more parts and asked about this spacer. Not in stock and no measurements available. So if you have had your double fron bearing spindel apart do you rember the width of the spacer? Otherwise I'm left with the trial and error method installing shims and testing fitment.
Any help appreciated.
Mike
Any help appreciated.
Mike
Attachments
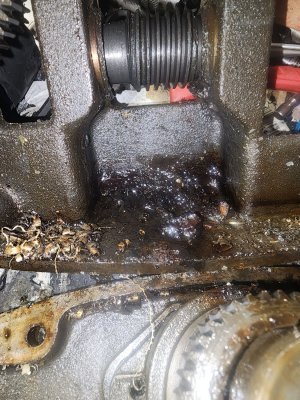
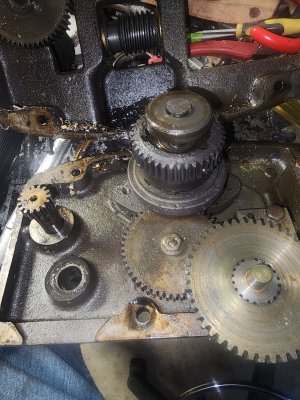
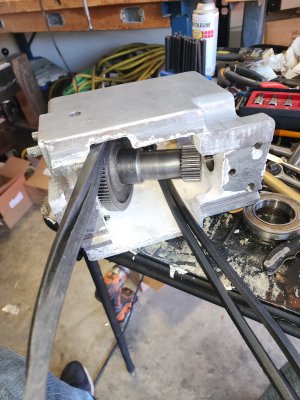
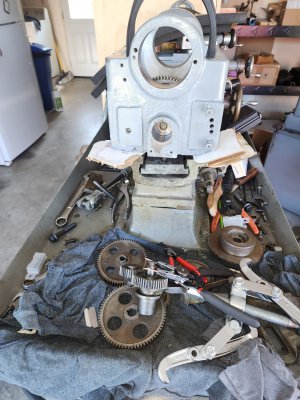
My new used eccentric shaft came in and is now residing in the head with the backgear on it and 2 new drive belts. Whoever worked on this before had no idea on how to install the parts. I think from the damage to the eccentric shaft and end cap bushing I would guess he used a Large hammer to beat the pieces together. I used a brake cylinder hone to remove the burrs in the bore for bushing caps. They had them on backwards and I think that's why they had to force them. Now the caps slide right in easy as they should be. Install the short cap in the rear first. Then place backgear with shaft into the cavity, then install the drive belts. Then put the rear eccentric shaft in that rear bushing. The little gear will probably fall off, mine did wrestling it in. One mounted I turned the headstock on its rear and installed the front bushing. Then lay the headstock on its side bottom facing you. Now you can slide the gear and shaft assembly to where it need to be. Push the bushings up to contact the shaft and then install the 2 socket set screws. The rear bushing set screw hole is also the rear headstock mounting hole. I ran a tap through all threaded holes before any assembly work.
Now I have the headstock setting where it goes except I have the rear set on some cardboard as that rear mounting bolt and the headstock clamp will not go on unless you elevate it about a 1/2 inch. So today I'll finish the mounting of the headstock and the install the new bushings for the Vbelt drive and cone pinion gear.
Now I have the headstock setting where it goes except I have the rear set on some cardboard as that rear mounting bolt and the headstock clamp will not go on unless you elevate it about a 1/2 inch. So today I'll finish the mounting of the headstock and the install the new bushings for the Vbelt drive and cone pinion gear.
Attachments
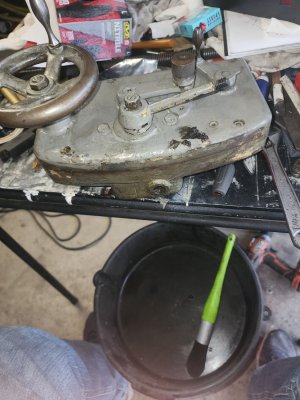
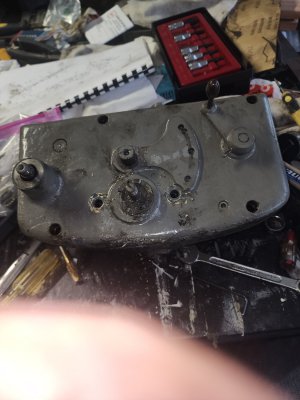
I'm still waiting for one bearing so I decided to pull the Apron off and check overall condition. I got it off and carefully removed the oil drain plug. I was expecting some oil. Not dry but almost. When I shined a light up inside the drain I couldn't see anything as it was blocked. Used a screwdriver to dig out a bunch of hardened slug with shavings. Then I decided might just as well tear it down and clean it up. No damage found so far. Tomorrow it goes in a bucket of diesel fuel to help clean it up. Pretty easy to remove from the lathe as I already had pulled the transmission and leads crew. Had to remove the newly installed saddle lock and 2 he'd head botlt and it came right out.