-
Welcome back Guest! Did you know you can mentor other members here at H-M? If not, please check out our Relaunch of Hobby Machinist Mentoring Program!
You are using an out of date browser. It may not display this or other websites correctly.
You should upgrade or use an alternative browser.
You should upgrade or use an alternative browser.
My Next Project - A Metal Brake
- Thread starter Mark_f
- Start date
- Joined
- Oct 20, 2014
- Messages
- 495
Excellent job so far! I know what you mean about having to reposition the workpiece several times to get the whole length cut. I am contemplating a project that would require the same thing, only I would be milling a keyway. Biggest issue I am trying to figure out is how to secure the workpiece. Looking forward to more progress. And you nailed it when you said that most purchased finger breaks are wimpy. Heck, I could use a hella-stout ring roller, will probably have to build it.
Excellent job so far! I know what you mean about having to reposition the workpiece several times to get the whole length cut. I am contemplating a project that would require the same thing, only I would be milling a keyway. Biggest issue I am trying to figure out is how to secure the workpiece. Looking forward to more progress. And you nailed it when you said that most purchased finger breaks are wimpy. Heck, I could use a hella-stout ring roller, will probably have to build it.
I cut a keyway in a long bar once and to hold it , I set it in the table slot and held it down with milling clamps. To move it, I slid it in the slot and reclamped it. I made a small block that fit in the table slot with a keyway in it and put a key in it and the end of the bar before sliding it. that way the alignment stayed perfect. This works great as long as the bar is bigger then the slot.
Since the clamping plate edge must be located on the center of the hinge pin axis, I had to figure an easy way to be sure the location was correct before drilling the large amount of bolt holes that hold the hinge to the end plate.
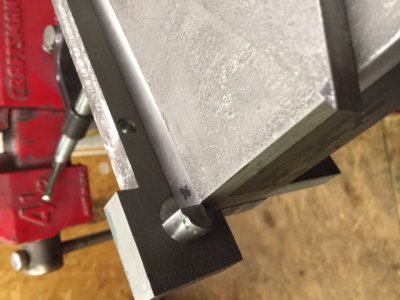
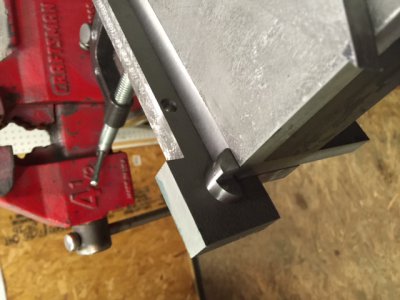
I milled a half flat in two directions on a piece of precision .750" drill rod. If you look closely in the two photos, the pin is inserted in the hinge and rotated 90 degrees to check alignment in both directions. when the pin rotates easily and fits flush on the surfaces in both directions, the hinge is aligned and clamped in place. Now I can transfer punch all the bolt holes to the end plates knowing everything will be in alignment. Then drill and tap the 16 holes.
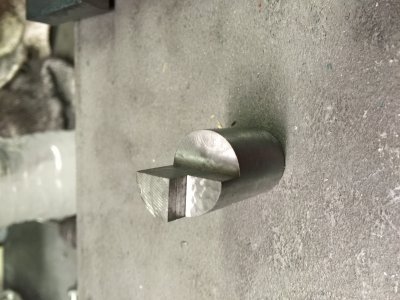
This is the alignment plug I made to use in the above photos to get the hinge on center.


I milled a half flat in two directions on a piece of precision .750" drill rod. If you look closely in the two photos, the pin is inserted in the hinge and rotated 90 degrees to check alignment in both directions. when the pin rotates easily and fits flush on the surfaces in both directions, the hinge is aligned and clamped in place. Now I can transfer punch all the bolt holes to the end plates knowing everything will be in alignment. Then drill and tap the 16 holes.

This is the alignment plug I made to use in the above photos to get the hinge on center.
Last edited by a moderator:
Today I finished the ends with hinges and this completes the base of the brake. I am thinking to go ahead and paint these parts as I hate to assemble and disassemble it again just to paint it.
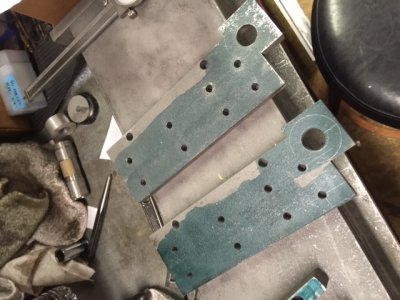
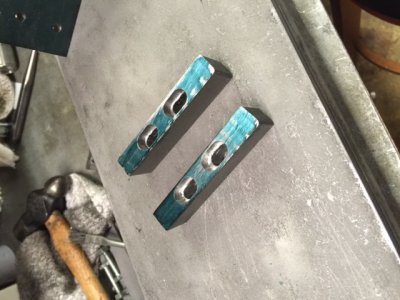
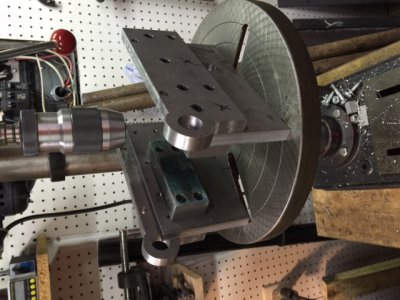 As soon as these are painted and the clamp plate is painted, The base will be complete and next will be the bending leaf and handles. I will be changing the handle design somewhat to have longer handles and I want them round. So they will be 7/8" diameter round cold roll for handles. In the photo you can see the blocks that support the ends of the clamping plate. I made them much larger and longer than the prints because my clamping bed is 6 inches deep instead of 4 inches. These interfered with two hinge bolt holes so I plugged the two holes and drilled new ones slightly off original location. Doo-Doo like that happens when you change things or beef them up a little, but it is a minor fix and wont be noticeable in the end.
Note:
If you notice in this photo, the hinge pin areas have been rounded off. Most machinist's would do this on a rotary table, taking a couple hours getting everything set up and dialed in and slowly machining the excess material off. While I could have done this, I did here as I have on many projects. There were layout lines on the parts , so I just milled off most of the material by clamping the part on the table and moving it and milling close to the lines. I then take the part to my belt sander with a course belt and grind to the line turning the part. With a small amount of practice you can get results that few could tell whether or not you used a rotary table. And the job was done on both pieces in 30 minutes instead of hours of making fixtures and setting up.
Last edited by a moderator:
B
Bill Gruby
Forum Guest
Register Today
I sincerely hope ALL the new people to machining are watching this build. Take a good look, no Bridgeport or any other large machines. Mark does not need them. He coaxes the max out of what he has. Kudos to you Mark, you are living proof that it is not the machine but the operator that gets the job done. Super work so far buddy.
"Billy G"
"Billy G"
I sincerely hope ALL the new people to machining are watching this build. Take a good look, no Bridgeport or any other large machines. Mark does not need them. He coaxes the max out of what he has. Kudos to you Mark, you are living proof that it is not the machine but the operator that gets the job done. Super work so far buddy.
"Billy G"
Thank you , Bill. It is my hope building the projects I build that I can show the hobbyist that he can make almost anything without a lot of expensive equipment, and make quality tooling for himself without forking out a ton of money. By making most of my own machine accessories ( and some machines themselves) I save much money, but even more , it is very satisfying to use equipment you can look at and say " I made that". Doing this really hones your skills and provides a great sense of satisfaction. I often wonder if anyone ever gets the point I try so hard to make and you just gave me that satisfaction that someone does. I thank you for that.
- Joined
- Mar 21, 2013
- Messages
- 4,118
Mark, I consider you and Bill G both to be shining examples of true 'hobby machinists', and cornerstones of what this site is supposed to be. I will never be as good as either of you, but continue to learn from you both, as well as others here. My hat's off to both of you gentlemen. 
And Mark, your description of how you rounded the area around the hinge pin support is exactly how I would do it. My machines are here to support me, not the other way around. I spend more time hand making/fitting parts than using my machines. My pistolsmith mentor had to use machine setups to fit 1911 barrels because he had so many to do. I spent over an hour last Sat. hand fitting one with files and stones and it came out perfect. Guess I'll never be much of a machinist. Maybe more of a craftsman.
And Mark, your description of how you rounded the area around the hinge pin support is exactly how I would do it. My machines are here to support me, not the other way around. I spend more time hand making/fitting parts than using my machines. My pistolsmith mentor had to use machine setups to fit 1911 barrels because he had so many to do. I spent over an hour last Sat. hand fitting one with files and stones and it came out perfect. Guess I'll never be much of a machinist. Maybe more of a craftsman.
- Joined
- Oct 13, 2014
- Messages
- 9,451
Thats a great philosophy, truly something to aspire to.It is my hope building the projects I build that I can show the hobbyist that he can make almost anything without a lot of expensive equipment, and make quality tooling for himself without forking out a ton of money.
Thank You

