New To Me 1966 Clausing 5914

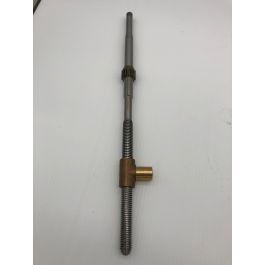
i was able to adjust the clutch easily. I just used a pin in one of the adjustment holes on the ring nut after loosening. I just rotated the pulley and used the linkage bar to stop the pin. rotated about an 1/8th of a turn as manual states. Also tried out the range on the hydraulic speed control. This lathe does not have a round cy;inder, but the hole block moves into the suare manifold. I took a fewe videos of the speed testing and clutch engagement and stopping. It gets noticibly noisy at lower rpms ??? I believe i need to adjust the motor belt connecting the bottom sheave of the hydraulic drive.I did not use that blue level to level the lathe. I did use a precision level +/-.0002 per 10" to level.
 
Last edited:
Finally have the QCTP base milled and installed. I have new 3/16" SAE 100R7 hose on the way hydraulic hose on the way. This is the most cost effective i have seen. Roughly $16 for 48" with shipping. If what i've seen is correct, the end fittings are crimpless in nature. I also have a length of 1/4" hose with 1/4" female 37* jic fittings on each end, but would need to wrangle the vent louvre to get it to pass through. A mistake on my part, it can be used on another hydraulic project.


One thing new i have noticed is that tumbler shaft end (4900-26) is pretty loose in the casting. It appears to be missing the bearing (049-52). Anyone know the ID x OD on that bushing? On the other hand, it isnt something that really impeeds the use of the lathe. I've also done a little cleaning, wiring brushing and rubby some surfaces with steel wool. All the shcs's were full of chips and debri. Another item on the list is to crack the head cover and replace the oil level window. I already have gasket material and will transfer the outline from the head stock cap to the material. At some point the carraige oil level window will also need replaced. Literally, can not easily see what the oil level is without a flashlight and a fair bit focus.


Also going to need to replace the screw as well as the nut on the crossfeed. Only at each end of the screw are the threads square on top. Requested pricing from Clausing.
20240114_173603.jpg
17052720108063129813792731265530.jpg
 
Last edited:
Wow, new screw, gear, and nut assembly from clausing is $580.00. Unless the gear is terribly worn or I win the lottery, I think i will be making/ modifying myself.
I can buy acme threaded stock and use the original gear section at a much lower out of pocket cost.
 
I started making the new nut for the cross feed and decided to buy a length of 303 stainless steel to thread the screw myself. I am doing this to ensure the closest fit possible and least amount of play. Ultimately, i needed a .5225" pilot hole for the 5/8"-10LH acme tap to start in. It was important to thread the tap straight through, with out reversing or breaking the chip, to keep it as true as possible. I did use a live center to align the tap and keep some light pressure as i threaded the hole.
I threaded first, then repositioned to turn the neck. I still need to buy an ball oiler before drilling that hole and will leave it chucked up until i do. I do not think i need to turn the barrel of the nut and will just knock off the corners unless i encounter a clearance issue.
So , far happy with the surface finish, although it is only 932 bronze.
I also picked up some 85w gear oil, since I ran out of vactra #2, and honestly don't think I see or will see much of a difference. I also purchase some aw46 hydraulic fluid, received the 100r7 3/16" hose, and thinking on the best way to replace it to minimize bleeding the line and cylinders on the speed control system. I'd like to keep the reservoir fed with fluid and catch the run off, while changing over the top of the hose and fitting, then crimping the hose and letting it seep before final tightening of the fitting at the bottom. Ill let you know how that works out.
1000002065.jpg1000002066.jpg1000002064.jpg
 
Last edited:
A little hiccup in my plans. I was replacing the hydraulic hose and sprung a leak at the master cylinder while bleeding system. Fluid was seeping from the push rod and cylinder. Upon disassembling the master cylinder, i found the push pin reversed in orientation, the reservoir oring completely flattened and hard with no bouce back, and instead of a cup seal for the cylinder rod, a flat rubber oring. Looks like this was previously repaired without the proper oring and re-assembled incorrectly. It did work for awhile i imagine, but prefer correct components
I am going to replace both the master and slave cylinder cup and round orings while the hydraulic system is down to avoid issues in the future, as the bleeding process is a bit tedious. Finding information on replacement slave cylinder cup orings was pretty easy, but finding the master cylinder cup oring information, just wasnt available. So i took a little gamble, measured myself and hopefully ordered the correct part. Should be receiving tomorrow and will update on funtion once re-assembled and working correctly.
I did receive the tooling and material to make new cross and compound screws. I also received the ball oiler and fit to the nut.20240220_161514.jpg20240220_161241.jpg20240220_161207.jpg20240220_161315.jpg20240220_170750.jpg20240220_171807.jpg
 
Last edited:
The new ering fit perfectly. I places the u cup ring for the cylinder and although a little tough, popped right in and could feel compression through the fitting orifice. I did clean thebare block with break cleaner to remove any debri before oiling the cup oring and re-assembling. I also made sure to assemble correctly, per the manual diagram, not how i found it. Next the slave cylinder, although i am not wanting to disassemble, because i am sure the coating is very worn on the pully shaft. I'm wonder if any one has tried a thin delrin bushing to replace the coating?
Here is the old reservoir oring compared to the new.20240220_181825.jpg
 
I wanted to test the master cylinder and work through the bleeding process. Reinstalling was a breeze and after 10min or so finally figured out the bleeding. I also confirmed the need to rebuild the lower slave cylinder block.
When I pulled the slave cylinder to replace the cup orings, I found the culprit of some drive noise. The outer reeves sheave bearing was definitely shot. Moving by hand produces noise and is visibly sloppy. I ordered a new NSK 6205-2zC3(Japan) replacement bearing that should arrive Saturday.
The cup rings on the slave cylinder were much harder to remove and replace than the master. A little patience and some proding with a pick got them removed and also new seated though. Sorry, no pics. I was in a hurry to get it done and didn't notice the bearing until I was finished with the slave cylinder.
You do want to orient the oring side of the cup toward the inside of the bore on both the master and slave cylinder blocks. If you don't, you are going to have sealing issues, ruin the cup orings, and/or have one hell of a time trying reinstall the push rods/cylinders.
 
Last edited:
Inside of outer reeves sheave. Looks like plastic sleeve is in decent condition. The male side with coating looks decent as well except for some chipping on the edge. Could be worse. Would like to try and do something for the edge. At least to stop and/or prevent more chipping to occur. Any ideas?
20240222_202922.jpg20240222_202938.jpg20240222_205234.jpg20240222_205248.jpg
 
And here is the bearing and inside of the outer sheave after pressing bearing out. Yuck.
Other than being dirty and bearing change, it looks to be in good shape. New bearing is supposed to arrive tomorrow.
I've learned not to skimp on the bearings over the years. For the small difference in cost, its welll worth it imo.
Two bearings are being replaced with NSK 6205-2z-C3 (Japan). The outboard bearing doesn't necessarily seem bad, but i might as well replace it as well.
20240223_174203.jpg20240223_174216.jpg20240223_184006.jpg20240223_194205.jpg
 
Last edited:
While i am waiting on the bearings, i decided to make a new slave cylinder block cover. This is PLA, but im also going to print one gray PA6-GF. Can make more if anyone is interested, as well as, other 3d printed parts. My BambuLabs X1Carbon with AMS, does a great job. 20240224_105433.jpg20240224_105222.jpg
20240224_105305.jpg
 
Back
Top