SB Heavy 10 (10L) Rebuild - Model CL8187ZN

The Square D drum switch was rebuilt and a repro label produced - I inverted the FWD/REV labels so they read correct from the mounting perspective. I also found a mount that attached to the back gear cover and an adapter plate was made for a clean install.
 

Attachments

  • IMG_0715.jpg
    IMG_0715.jpg
    15.4 KB · Views: 8
  • IMG_0717.jpg
    IMG_0717.jpg
    28.2 KB · Views: 8
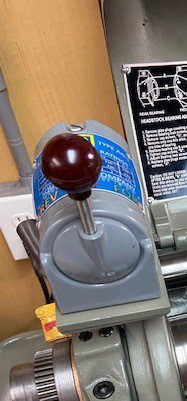
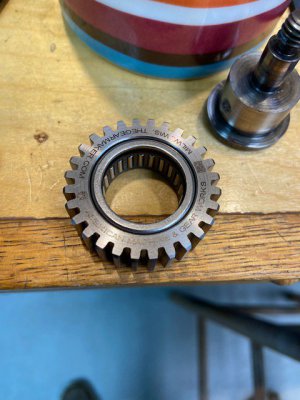
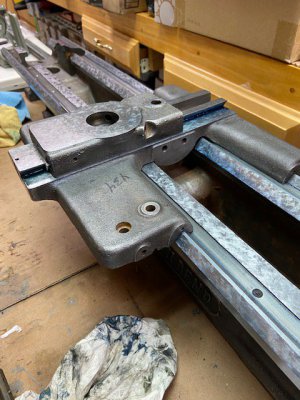
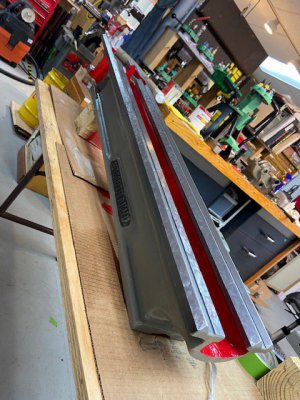
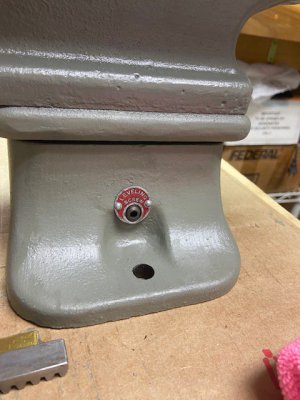
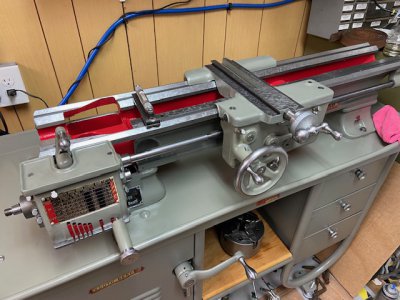
All throughout the rebuild - small problems (or sometimes bigger ones) would crop up. I found that my best course of action was to stop walk away and just think about it rather than trying to fix it immediately - this approach saved me a lot of frustration...simply put, take your time. One such instance was actually a blessing in disguise. When I was reassembling the reverse lever unit, I went to tighten the nut that holds one of the twin reversing gear studs. I barely put any pressure on the wrench and the threaded stud sheared off. %$#*&@!! In addition the brass locking handle had at some point in time long ago been broken off and brazed back together - it didn't look great. I ended up finding a complete assembly for short $ and was able to cannibalize it for a new brass lock, better condition studs for the twin reverse gears and at the same time I upgraded those gears with a set of roller bearing units made by American Machine & Gearworks (exquisite gears BTW).
Also - any small spring (i.e. detent in the gearbox, back gear tension adjustment etc were replaced with new springs. In addition every lock screw for any type of adjustment - i.e. dials, were fitted with new brass shoes.
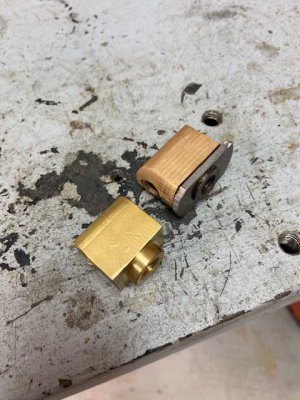
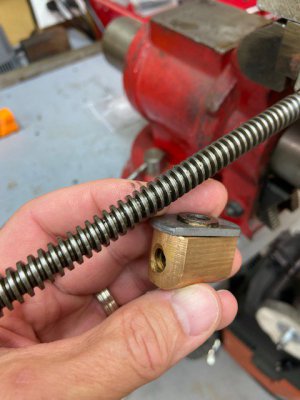
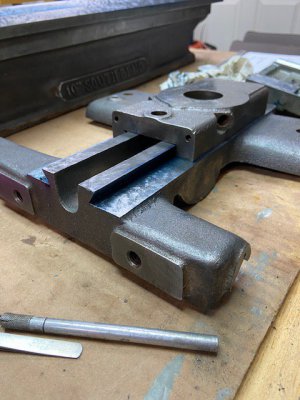
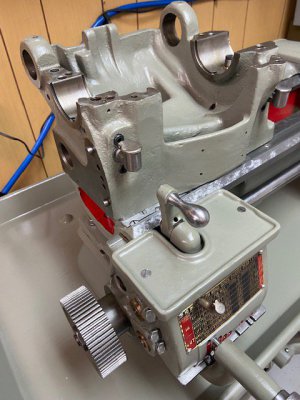
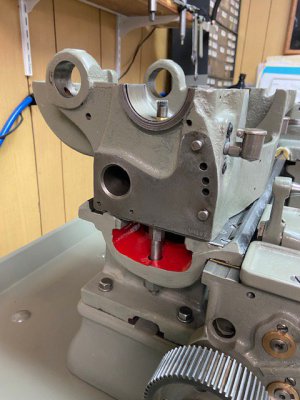
Another problem cropped up and I am embarrassed to even detail it. In rebuilding the cross slide and the compound - my goal was to reduce the backlash that I experienced - on the order of .015 - .020". The threads for both assemblies seemed to be in pretty decent shape, so my assumption was that the bronze nuts were worn. I was able to order new ones and the compound tightened up immensely - down to .005-.006" When I went to test fit the nut on the cross slide - it wouldn't fit. The nuts were also very different with a spacer under the one that came out of the machine. My knee jerk was that the vendor sent me the wrong nut. Before I called him - I set about determining exactly what the problem was - maybe the minor dia was too small? I looked and checked and looked again...no idea. I reached out to a guy that rebuilds these assemblies and he asked for pictures. His determination was that someone had in the past brazed a new threaded portion on to the pinion shaft. After that I went and checked the pitch....Bingo...the threaded portion had be changed from 10tpi to an 8tpi thread - which (HUGE DUH for me) explained why any feeds in my cross slide were always off - I made a lazy assumption years ago that it was the result of worn parts - so I always snuck up on my final dimension. Not even taking the time to think that it doesn't even make sense.
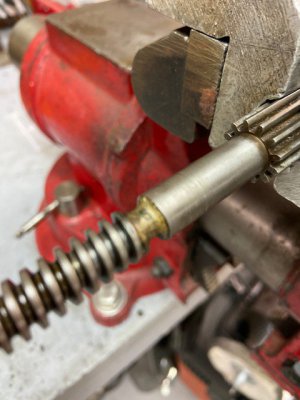
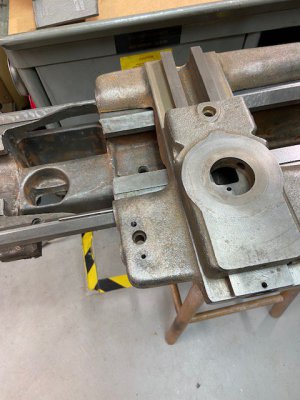
So, now I am faced with trying to find a new CS pinion and at this point it made sense to upgrade to the large diametrical / direct reading dial. SB Ted came through again and furnished a complete assy -nut, pinion, dial , handle etc. I was able to also source a large dial assy for the compound. This one had issues - the acme threaded portion had a slight bend where it intersected the pinion shaft. I was able to correct this with a jig that I put together and using gentle pressure and dial indicators, (VERY difficult to bend BTW...) I got the bend reduced to less than a half thou. It functioned before but had a slight bind on rotation - once straightened, zero bind - smooth as glass. Both the CF & Compound have backlash under .002"
 

Attachments

  • 71778729698__98437CE2-FC5D-4E9D-A1A0-1E51236326BC.jpg
    71778729698__98437CE2-FC5D-4E9D-A1A0-1E51236326BC.jpg
    84.5 KB · Views: 9
  • 71778725537__15D850C8-C0D9-43F3-917D-5080490AB3D3.jpg
    71778725537__15D850C8-C0D9-43F3-917D-5080490AB3D3.jpg
    56.9 KB · Views: 9
  • 71778753922__6E3C6E08-C78E-4BA4-82B9-362C6CA55634.jpg
    71778753922__6E3C6E08-C78E-4BA4-82B9-362C6CA55634.jpg
    56.8 KB · Views: 9
  • IMG_0734.jpg
    IMG_0734.jpg
    67.1 KB · Views: 8
  • IMG_0483.jpg
    IMG_0483.jpg
    73.8 KB · Views: 9
Last edited:
Another note regarding the process - it goes back again to the cleaning and inspection. Every part was thoroughly inspected and if needed, any burrs, scrapes dings were carefully stoned and dressed. It aided so much in smoother assembly and eventual operation.
 
Great read so far. Excellent job on this rebuild. It will be good for another 70+ years now.


Cutting oil is my blood.
 
At this time - I was into this entire rebuild by about 8 or 9 months. Rees Acheson had the bed and the CS and other parts. All the sub assemblies were complete - fitted, checked and rechecked. Just waiting on the call to come pick up the remaining pieces. He was extremely helpful during all this - emailing me about the progress, important dimensions, consideration on the reassembly etc. After about 5 weeks - I got the call - "come git it!"
Picked up everything and spoke to him at length about the process and got a second look at his shop (wow....) The planing was done on a 24"x96" planer manufactured by the G.A. Gray Co. in 1905. He had upgraded it with hydraulics and all DRO. He has had it since 1973. He has done a LOT of planing.
Some of the little things he mentioned were reducing the diameter of the HS locating pin so that the HS does not bind or interfere with it sitting down tight and aligned on the V ways. He also provided detailed spec sheets for the material that was removed. I had to account for the reduction in the bed V way height as well as the planing on the underside of the saddle. His estimate was .060" combined with a caveat that it could be a tiny bit more or a tiny bit less. Eventually I installed .058' brass shim between the gearbox and the bed and the lead screw support bearing as well as the rack gear - smooth smooth smooth operation no binding or issues of any kind. I initially used shim stacks and once I got the right height. I used once piece shims.
The last pic is of the bed/saddle prior to any work being done. You can see faint scraping that would have been under the head stock. By taking measurements here and out in the usable area of the bed ways - it looked like a had about a .022" dip - good ol' swayback. There was also some noticeable wear on the saddle way areas that appeared to be on the order of about .012". He also determined that I had about a .006" twist in the bed that was prominent way down at the tails stock end - didn't seen to be present anywhere near the middle.
Rees is NOT a fan of grinding ways on CI beds that have not been hardened. He opined that heat control in grinding is a HUGE concern in that it will impart warping that isn't shown during the process but become prevalent after cooling and reassembly.

Another note on resurfacing the bed. I looked far and wide for shops that would do this work. I couldn't find anyone near me that was within budget. Virtually all the shops that I talked to, did grinding and the cost was...well lets just say far outside my budget. They ranged from about $2350 up to $4500 and that didn't include shipping. All these shops did the Moglice or Turcite applications as well. Rees preferred not to use this method but rather opting to plane the saddle & CS using the same set up system and process so that the CS travel is exactly perpendicular to the ways. For this he required that I bring the headstock up with the bed.

Note of irony - he was located only 2 hrs away from me - so I was able to drop off and pick up.

Below are pictures of the just returned bed and other parts - the Prussian blue is still visible on a lot of the surfaces as a remnant of all the scraping. He scraped EVERYTHING in.
 

Attachments

  • IMG_0631.jpg
    IMG_0631.jpg
    70.8 KB · Views: 17
  • IMG_0632.jpg
    IMG_0632.jpg
    79.5 KB · Views: 15
  • IMG_0636.jpg
    IMG_0636.jpg
    88.6 KB · Views: 17
  • IMG_0635.jpg
    IMG_0635.jpg
    84 KB · Views: 14
  • IMG_0634.jpg
    IMG_0634.jpg
    73.1 KB · Views: 14
  • IMG_0633.jpg
    IMG_0633.jpg
    88.7 KB · Views: 15
  • IMG_0507.jpg
    IMG_0507.jpg
    72.5 KB · Views: 8
Last edited:
After all this stuff was degreased and cleaned - it was primed/painted and set aside to cure. The oil based Sherwin William paint does take a bit to fully harden. The color is dead nuts for the classic SB gray. I opted to paint the interior of the bed with a fire engine red for some contrast.

Acknowledgement and thanks to Brad Jacobs for the SW color matching he did on a build back in 2011 I believe. Color was perfect.
 

Attachments

  • SB Paint.jpg
    SB Paint.jpg
    91.4 KB · Views: 10
  • IMG_0644.jpg
    IMG_0644.jpg
    87.4 KB · Views: 11
  • IMG_0663.jpg
    IMG_0663.jpg
    85 KB · Views: 9
  • IMG_0662.jpg
    IMG_0662.jpg
    143.6 KB · Views: 8
  • IMG_0652.jpg
    IMG_0652.jpg
    94.3 KB · Views: 8
  • IMG_0648.jpg
    IMG_0648.jpg
    77.6 KB · Views: 8
  • IMG_0646.jpg
    IMG_0646.jpg
    90.3 KB · Views: 8
  • IMG_0665.jpg
    IMG_0665.jpg
    79.3 KB · Views: 8
  • IMG_0666.jpg
    IMG_0666.jpg
    71.2 KB · Views: 7
  • IMG_0667.jpg
    IMG_0667.jpg
    87.5 KB · Views: 11
Last edited:
Added a little lipstick for the old girl...
 

Attachments

  • IMG_0661.jpg
    IMG_0661.jpg
    96.4 KB · Views: 6
Added a data plate on the back side of the bed attesting to his work & when the rebuild was done. (faded out my name)
 

Attachments

  • IMG_0672 - Copy.jpg
    IMG_0672 - Copy.jpg
    81.7 KB · Views: 10
Continued clean/prime/paint/cure... piece by piece.
 

Attachments

  • IMG_0669.jpg
    IMG_0669.jpg
    68.3 KB · Views: 6
  • IMG_0655.jpg
    IMG_0655.jpg
    79.5 KB · Views: 6
  • IMG_0650.jpg
    IMG_0650.jpg
    70.2 KB · Views: 6
  • IMG_0673.jpg
    IMG_0673.jpg
    103.8 KB · Views: 6
Both the cross slide and compound were fitted with shims set behind the tapered gibs. One was .003 and the other .005. Extreme care was exercised in fitting and ensuring zero interference. Smooth as a babies butt.
After this - the major sub assemblies started to be reassembled. Again - metal to metal (no paint) contact was treated with Boeshield T9. Cleanliness was really watched to avoid any foreign material getting in between the various parts.
Prior to assembly the cabinet was leveled and then the bed was checked and tweaked - it needed very little adjustment (this was all done through the feet on the cabinet.)
 

Attachments

  • IMG_0675.jpg
    IMG_0675.jpg
    132.5 KB · Views: 11
  • IMG_0691.jpg
    IMG_0691.jpg
    75 KB · Views: 11
  • IMG_0692.jpg
    IMG_0692.jpg
    69 KB · Views: 10
  • IMG_0693.jpg
    IMG_0693.jpg
    77.3 KB · Views: 12
Last edited:
Back
Top