SB Heavy 10 (10L) Rebuild - Model CL8187ZN

The next big step was setting up reassembly of the spindle and the bearings / caps / shims / thrust washer etc. The shims were new laminated die cut in .0015 increments. The shim pack front and rear should be within 1 shim of each other. This took quite a bit of trial and test - a LOT of assemble test / disassemble / change reassemble / test. Wash Rinse Repeat. In the end - success - .0007" lift using a pipe and dial indicator.
 

Attachments

  • IMG_0695.jpg
    IMG_0695.jpg
    63.3 KB · Views: 15
  • IMG_0696.jpg
    IMG_0696.jpg
    71.8 KB · Views: 11
  • IMG_0697.jpg
    IMG_0697.jpg
    102.2 KB · Views: 12
  • IMG_0698.jpg
    IMG_0698.jpg
    92.2 KB · Views: 11
  • IMG_0699.jpg
    IMG_0699.jpg
    80.7 KB · Views: 12
  • IMG_0711.jpg
    IMG_0711.jpg
    72.8 KB · Views: 10
  • IMG_0712.jpg
    IMG_0712.jpg
    111.6 KB · Views: 11
  • IMG_0713.jpg
    IMG_0713.jpg
    69.7 KB · Views: 15
Endplay on the spindle was checked and adjusted. I used a bronze take-up nut washer and the take-up nut itself had a lot of TLC - stoning / etc.
I ended up using a glued synthetic - rubber/nylon belt from Al Bino Industrial Belting - they were great to work with and provided everything needed. (Interesting aside - the thickness of the Al Bino belt is about 1/3 less than what the other outfit provides Ilion / Steve Webb I think) Short $ as well. Way back when, I had machined up a little aluminum jig to align the two ends/sides of the belt for gluing. Space is a little tight for clamps etc but it turned out well. The glue was allowed to set up for 24hrs+ before I put any tension on it. Belt ran virtually true when tested.
My goal initially was to pay super close attention to the bearings - being new and running on the original spindle - I was concerned that there may be some "seating in or mating period" I started out slow and did a lot of hand turning the spindle to try and get a feel for any dragging or binding. I couldn't detect any - so it was now time to test under power. I did this for very short periods of time - less than a 1 min to start. I used a IR Thermometer and kept a close eye on the temp on the bearing caps and spindle - after a cool down, I would do another lift test and an end play test. I repeated this for longer intervals until I had the machine running for 30 mins straight. The lift test never changed and the temperature never raised by more than 8 degrees. Of note; prior to and during assembly copious amounts of oil where used. The spring bearing wicks were presoaked - oil reservoirs filled, journals were soaked etc. No chance of anything running dry. I did have to adjust the end play take-up nut a little and I continue to monitor that. A NOS spindle gear was installed as well. The back gear clearance was adjusted using a newly made dog point bolt and the tension was set.
 

Attachments

  • IMG_0718.jpg
    IMG_0718.jpg
    83.1 KB · Views: 9
  • IMG_0716.jpg
    IMG_0716.jpg
    80.1 KB · Views: 9
Last edited:
The gear train went together very easily and adjustment is crazy simple. I installed threaded studs and spacers for the gear train cover, opting to use acorn nuts to hold the cover in place. It's a lot easier putting the cover onto studs vs trying to feed in a long screw and hunt/peck for the hole.
 

Attachments

  • IMG_0733.jpg
    IMG_0733.jpg
    80.1 KB · Views: 9
Another note to be aware of is to test fit / mock up assemble the gear train gear studs/shafts so that the oiling holes are accessible with the cover on. Just makes things a lot easier down the road when you are trying to squirt a bit of oil into a hole you can actually see.... LOL
 
The final assembly was easy and really fun. The tailstock required .007" shim to get the center in line with the spindle. This was checked with a precision ground test bar - checking the front face for horizontal alignment and along thee top for vertical alignment. I found that using a torque wrench to tighten the tailstock clamp would allow me to have repeatable alignments under 4 tenths.. I also found a discernible difference in repeatability between two live centers I had for the tailstock - one of which will probably go in the trash.
The tail stock was simple to rebuild and was in good shape - as SLK pointed out - it is not original to that machine - that was the only assembly that did not match to the original invoice. (Which makes me wonder when SB went back to bronze bearings) The machine was ordered at the tail end of WWII and delivered after Japan surrendered (Dec '45)
A few other small tidbits that I had to contend with; with the planing of the bed and the saddle, I had to switch to a smaller diameter screw to hold the brass keepers for the saddle felt wipers and I had to slightly elongate the holes in the brass keepers so they would have clearance above the V ways. The tail stock needed the same but to a far lesser degree and the screws did not interfere but were changed out with new SS pan head pieces. Coincidentally, the screws for the rack gear were also replaced with SS flat head hex key screws. Because of the shimming - new screw lengths needed to be used. Any other screw or oil cap screw was replaced with new parts if available.
The bearing caps were torqued to matching numbers front & back, left and right (35ft lbs)

Note/Question: In all the rebuilding info I saw/read/watched - I never once saw any specifications regarding torque specs for any bolts. Kind of odd...

After every test / period of running - I have gone over all the screws / bolts to check for tightness - the only ones that have loosened are the two large slotted filister head screws that attach the apron to the saddle - I'm watching you...(Loctite 242?)
 
Last edited:
Almost done! Everything was completely assembled and I began running some test cuts - as mentioned before I used a test bar for alignment and also checked the bed ways with a Starrett machinists level. I made a "tiny" tweak to the leveling screw in the tailstock base and then cut a test bar. A single adjustment backing off maybe 1/4 of what I turned to begin with got me where I wanted. With a 14" piece of 416R between centers, I was able to consistently reproduce tapers of less than .0008" Sometime half that. I'm very happy with that. Given what I put into this - time & money - it should do that! Finish on various stock has been superb to include aluminum, brass, 4140 & 416R.

All the accessories were rebuilt / refinished to include;
Threading Dial
Telescoping Steady Rest
Telescoping Follow Rest
Micrometer Saddle Stop
Threading Crossslide Stop
Handwheel Collet System with rack

The original lathe was a toolroom model and had a taper attachment - I do not have that, and quite frankly don't want it. I really have zero need to turn tapers that would require that.

I built a Hall effect Tach for it - works great and it is set up with an hours meter so I can keep track of it.

Motor is a Dayton 1ph 120v 1HP unit.

One shocking thing is how QUIET it runs - nothing like before. Like going from a bucket of bolts jaloppy to a a Ferrari! LOL

Attached are the pics of the finished product (mostly)

If anyone wants specific pictures or info - please do not hesitate to ask - this forum and others were an invaluable source of not only information and advice, but inspiration as well.
 

Attachments

  • IMG_0737.jpg
    IMG_0737.jpg
    117.3 KB · Views: 16
  • IMG_0738.jpg
    IMG_0738.jpg
    144.2 KB · Views: 15
  • IMG_0571.jpg
    IMG_0571.jpg
    52.8 KB · Views: 14
  • IMG_0736.jpg
    IMG_0736.jpg
    79.1 KB · Views: 16
  • IMG_0739 - Copy.jpg
    IMG_0739 - Copy.jpg
    5.9 KB · Views: 18
Last edited:
Here is a list of all the parts/work that was done...
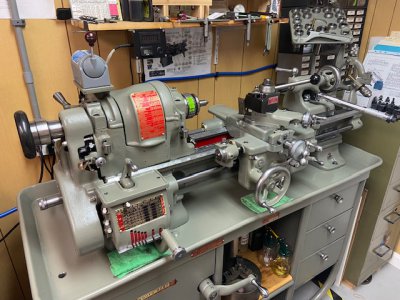
SOUTH BEND 10LX TOOLROOM PRECISION LATHE
Model No. CL8187ZN 3-1/2 Ft Bed SN: 168288
Ordered 27 Aug 1945 / Delivered: 10 Dec 1945
Rebuilt & Restored March 2023 – January 2024
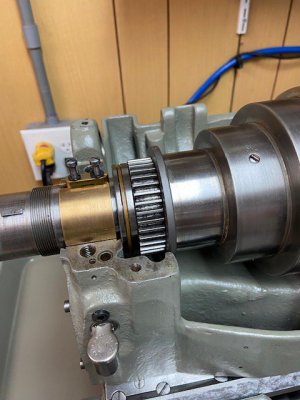
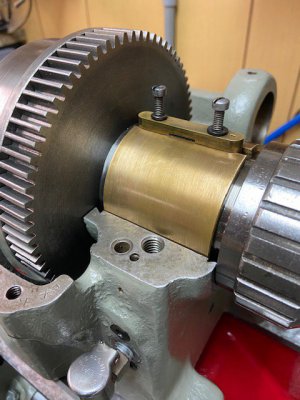
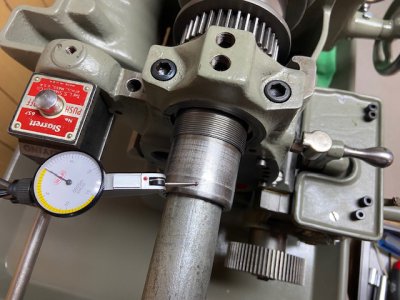
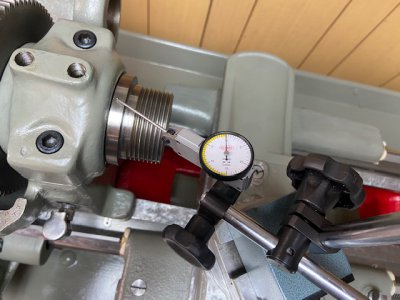
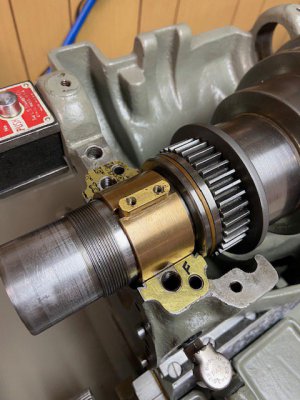
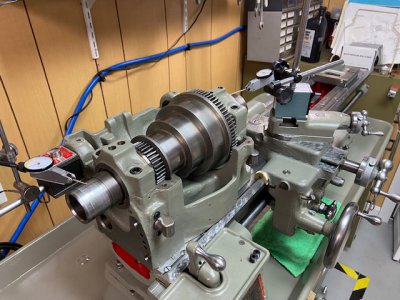
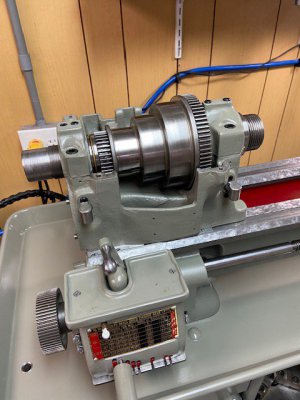
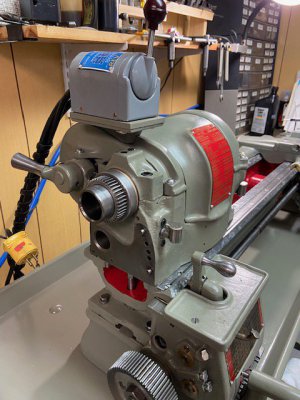
HEADSTOCK

New Oiling Data Plate w/ new drive screws
New Bearing Adjustment Data Plate w/ new drive screws
New S/S Cover hinge screws and jamb nuts
NOS Bronze Spindle Bearings and Expanders
New Felts
New laminated brass bearing cap shims
Original bolts & screws refinished in black oxide
New Capillary oiler tubes mfr’d & refitted
New capillary oilers
New Back Gear dog point set screw mfr’d
New spindle take up nut washer replaced w/ bronze oilite washer/bearing & bearing surface refinished
Spindle gear replaced with NOS item
Twin gears (Reversing gears) replaced with new gears with sealed roller bearings (American Machine & Gearworks)
All taper pins replaced with S/S pins & holes clean-up reamed
New oiling felts installed in reversing gear assembly
New ½ height S/S nut installed on reversing gear stud
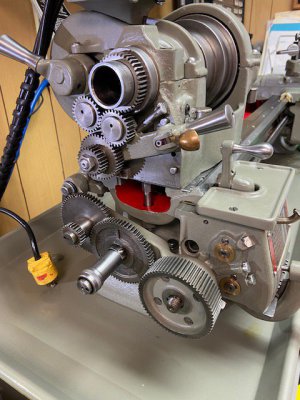
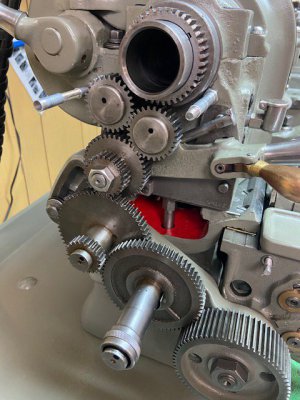
GEAR TRAIN ASSY
Primary Guard Cover screws converted to studs with acorn nuts
Data plates restored
Primary drive gear replaced with NOS item
Primary bracket (Banjo bracket) mounting stud replaced with S/S bolt & hardened washers
APRON
NOS Worm Gear installed
NOS Worm Gear Collar installed
NOS Worm Gear Bushing installed
NOS Worm Gear pins installed
NOS Worm Gear / Lead Screw Key installed
Rebuilt Star Clutch Assy
NOS Star clutch L/H screw installed
Apron oiler tube installed (previously missing)
Gits oiler installed for Apron Hand wheel shaft (modification)
New sump cover gasket installed & sealed
New oiling felt-wicks installed throughout
All taper pins replaced with S/S pins & holes clean-up reamed
SADDLE ASSY
NOS Complete Direct Reading (Lg Dial) Assy installed
New ball crank handle nut installed
Threading Stop Assy Installed with hex head shoulder bolt.
Gib replaced and shimmed
New wipers installed
Wiper retainers refinished
Wiper retainer screw replaced with new S/S screws
Wipers & brass holders modified for lower height / new screws custom fit
NOS bronze Cross Feed screw nut installed
Cross Feed ways planed and scraped perpendicular to spindle Center Line.
Saddle ways planed & scraped to fit bed.
Saddle gib shimmed to provide .002 clearance
New Gib adjustment screw lock screw installed
Follow rest mounting holes plugged with set screws
Taper attachment mounting holes plugged with set screws

COMPOUND REST ASSY
Complete Direct Reading (Lg Dial) Assy installed
Compound screw straitened to > .0015 TIR
New Compound Rest nut installed (brass)
New ball crank handle nut installed
Gib replaced
New Gib adjustment screw lock screw installed

SINGLE TUMBLER GEAR BOX
New Gits oilers installed (8)
Gits oiler tube installed as mod for tumber/idler gear lube.
Restored brass data plate installed
NOS Pinion gear installed
Custom made Idler gear mfr’s & installed
New Timken roller bear installed for idler gear/shft
New custom made bronze bearings mfr’d for Clutch Lever gear shaft & Cone Gear shaft
Bearing diameters on shafts turned to .500”
All taper pins replaced with S/S pins & holes clean-up reamed
Oil passage set screws for clutch lever shaft replaced with new.
New oiling felts installed throughout

TAIL STOCK ASSY
Quill cleaned & polished
New felt washer installed on quill screw
New rubber washer installed on quill screw
Quill wheel nut replaced with acorn nut
NOS Tail Stock clamp installed
New felt wipers installed
Tail stock based planed and scraped to fit bed
Shims installed between base and housing to account for planning and scraping (.008”)

BED ASSY

Bed ways and flats planed and scraped (-.036”)
Rack gear shimmed down to account for planning (.058” brass stock)
Gearbox mounting shimmed down to account for planning (.058” brass stock)
Lead screw support bearing shimmed down to account for planning (.058” brass stock)
New gaskets mfr’d for Head stock & tail stock bed mounts (Felpro Karopak)
New S/S screws for lead screw / gearbox cover
New S/S screws for rack gear (longer)
Rebuild & Planing/Scraping Data Plate installed on back side of bed.

MISCELLANEOUS
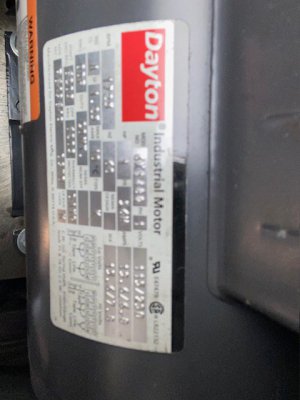
NOS motor pulley installed (PT213K2)
New 5L44 V belt installed
Cabinet drawer slides rebuilt.
Cabinet drawer locks/latches rebuilt
Original cabinet badging & data plates installed
Anti-vibration pads installed for motor mount (8)
Anti-vibration leveling legs installed on cabinet legs (4)
Wood center shelf install w/ under cabinet lighting
South Bend Forward / Reverse switch mount installed on quill guard
Square D switch rebuilt / restored
All handles and knobs polished
Installed ball oiler on flat belt tension lever shaft housing
Rubber / Nylon flat belt (glued) installed (59-1/4”)

OVERALL
All parts / entire machine detail stripped, cleaned & gauged – all parts repaired or replaced as needed and new paint applied – Sherwin William SB Gray (Custom mix 11-1321). Chip tray further coated with VHT Engine Clear Coat (Gloss)

All unpainted / non lubricated surfaces treated with Boeshield T-9

All way planning & scraping performed by:

Rees Acheson
Alstead, NH

ACCESSORIES
Hand Wheel Collet Closer w/ 42 Collets, Wrench, & (2) spindle thread protector nuts.
Collet Storage Rack (stripped, cleaned, painted & restored)
Micrometer Carriage Stop (stripped, cleaned, painted & restored)
Threading Dial (stripped, cleaned, painted & restored)
Threading C.F. Stop (stripped, cleaned, painted & restored)
Telescoping Steady Rest
Aloris AXA Tool Post installed

UPGRADES
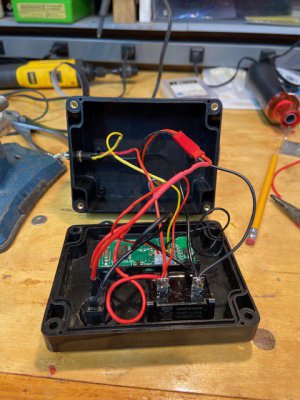
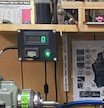
Digital Tachometer installed

LUBRICANTS

New lubricants obtained:
Mobil DTE Heavy Medium 26 (General Lube),
Mobil DTE Light 22 (Gearbox),
Mobil Velocite 10 (Spindle)
Super Lube ISO 150 EP (Ways),
Super Lube Synthetic Grease (Back gear)
Roy Dean DE112 Grease (Back gear / cone pulley)
 
Last edited:
You are one of the very few that “rebuild” their machines properly. Love it!!
Most of the threads show a clean up and paint job on a 70 year old machine???
I’m one of your biggest fans!!
Thank you. Much appreciated!
 
Very well done. Thank you for sharing all the info and pictures.
Your commitment to old iron is much appreciated.
May you get as much enjoyment out of your "new" lathe as you did in the restoration.
 
Thank you. It really came down to staying with the old iron. Given what I’ve spent on this project, I could have easily bought a brand new import. But it wouldn’t have the history, it wasn’t made here and you can’t put a price on the knowledge gained. I now know every single square inch of this lathe and am happy for it. Rees told me and it fed right into a statement we have all heard and used…”they don’t make them like that anymore “. It’s actually true. He said that the cast iron back then was unlike anything today. So much better. Machines better, planes cleaner, scrapes better. So in the end I am really happy I did it. It was a lot of work and frustrating at times but so worth it.

Scott
 
Last edited:
Back
Top