-
Welcome back Guest! Did you know you can mentor other members here at H-M? If not, please check out our Relaunch of Hobby Machinist Mentoring Program!
You are using an out of date browser. It may not display this or other websites correctly.
You should upgrade or use an alternative browser.
You should upgrade or use an alternative browser.
Wells-Index 847 Milling Machine - Ownership Thread
- Thread starter wachuko
- Start date
- Joined
- Aug 6, 2015
- Messages
- 3,935
You had to encourage me... Took a piece of delrin, turn it down, rounded the ends, made a cut and voila!
View attachment 397915
I know it looks like a suppository, but who cares!
View attachment 397916

Too bad there isn't a way to keep the brake arm from marking your nice shiney paint work? Maybe a delrin pad mounted ,like a smile, where it does all the contact?
I just realized what you actually meant... a smile... a flat curved piece under the brake handle... maybe glued to the top cover... so the brake handle moves/slides over it.... ahhh.... back to the drawing board... let me try that approach.
Last edited:
- Joined
- Aug 6, 2015
- Messages
- 3,935
Drove over to Ocala to drop off a few things...
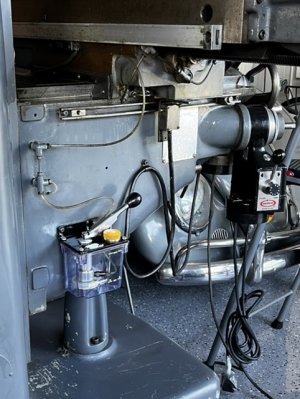
Oil tank installed...next will be to redo all the lines.
This is how it is supposed to all fit... this is the part I machined. Now it goes over the brass shaft from the gear... Still need to drill the 1/8" hole in the gear and pin the two parts
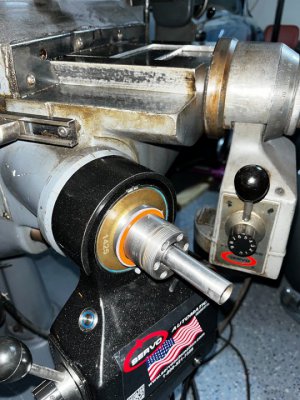
Yeah, now it looks better... Instructions call for the extension to be pinned with the stock shaft... but I think that I can remove the extension shaft. I will not be installing the handle. I can always screw the extension back in if needed...
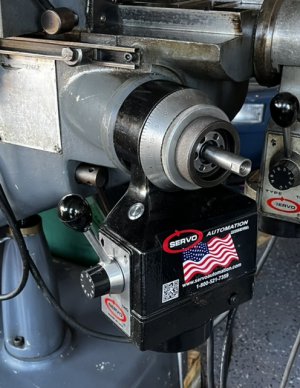
Pulley installed!!
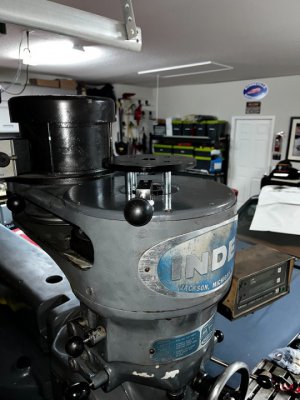
This is how the draw bar should be... the stuff you see in the hand brake is copper paste, not rust...
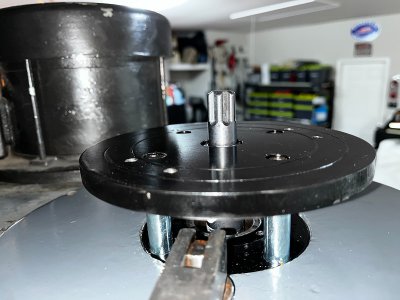
And this is now much I need to remove from it...
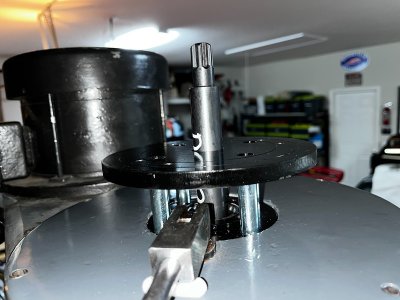
A mistake that I made was not measuring the spacer that they place at the end of the of the drawbar... I figured it was the same width as the bar... Nope... so it would not go through the hole I made on the top base, sob!! So either I turn down that spacer or I make the hole larger...
Oil tank installed...next will be to redo all the lines.

This is how it is supposed to all fit... this is the part I machined. Now it goes over the brass shaft from the gear... Still need to drill the 1/8" hole in the gear and pin the two parts

Yeah, now it looks better... Instructions call for the extension to be pinned with the stock shaft... but I think that I can remove the extension shaft. I will not be installing the handle. I can always screw the extension back in if needed...

Pulley installed!!

This is how the draw bar should be... the stuff you see in the hand brake is copper paste, not rust...

And this is now much I need to remove from it...

A mistake that I made was not measuring the spacer that they place at the end of the of the drawbar... I figured it was the same width as the bar... Nope... so it would not go through the hole I made on the top base, sob!! So either I turn down that spacer or I make the hole larger...
Last edited:
- Joined
- Aug 6, 2015
- Messages
- 3,935
- Joined
- Aug 6, 2015
- Messages
- 3,935
The gear is pinned with the machined part… so for practical purposes, it is now one piece…
I need to watch the videos and read the instructions again… to validate if the complete assembly is then pinned to the shaft or if it just held in place with a bolt and washer in the front of the shaft…
EDIT: This answers my question...
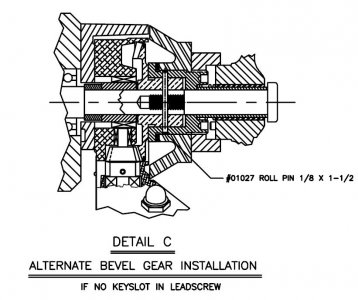
Only insert a roll pin across everything IF there is no key slot in the leadscrew... mine has the key slot... so the assembly is only held in place, against the motor gear, by the bolt and washer that goes in front. Got it!
I need to watch the videos and read the instructions again… to validate if the complete assembly is then pinned to the shaft or if it just held in place with a bolt and washer in the front of the shaft…
EDIT: This answers my question...

Only insert a roll pin across everything IF there is no key slot in the leadscrew... mine has the key slot... so the assembly is only held in place, against the motor gear, by the bolt and washer that goes in front. Got it!
Last edited:
- Joined
- Aug 6, 2015
- Messages
- 3,935
Modifying the drawbar…
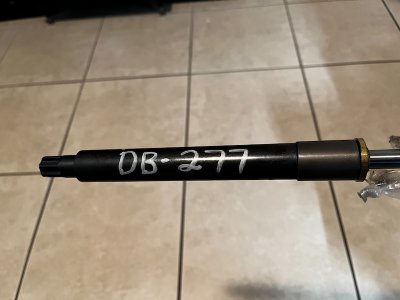
I removed the roll pin but the rod would not budge… Applied some heat, tapitytap… would not come out…
Applied some additional heat (this is just using a heat gun)… tried to see if this was screwed in… would not budge either…
Well, took it to the lathe… turning it down little by little… What do you know! Looks like it is actually threaded. The red loctite secured it well.
Had I known, I could have used a torch to get the loctite to release…
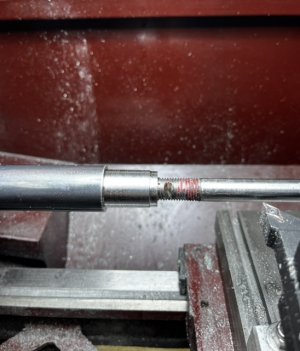
I am going to continue to turn down the bar to release it all…now that I know I can do it without damaging the threads.

I removed the roll pin but the rod would not budge… Applied some heat, tapitytap… would not come out…
Applied some additional heat (this is just using a heat gun)… tried to see if this was screwed in… would not budge either…
Well, took it to the lathe… turning it down little by little… What do you know! Looks like it is actually threaded. The red loctite secured it well.
Had I known, I could have used a torch to get the loctite to release…

I am going to continue to turn down the bar to release it all…now that I know I can do it without damaging the threads.
Last edited:
- Joined
- Aug 6, 2015
- Messages
- 3,935
Threaded section is out!
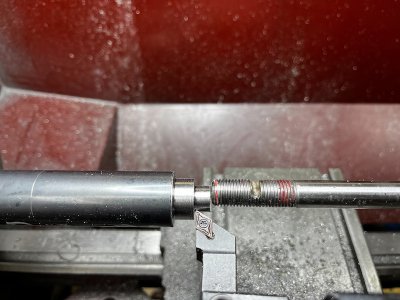
Not turning the rest... quicker to cut...
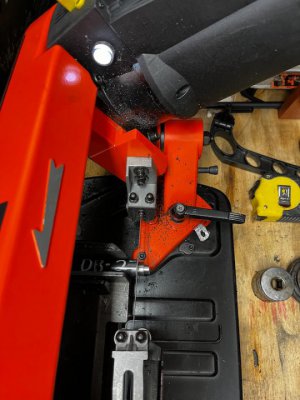
And then clean up...
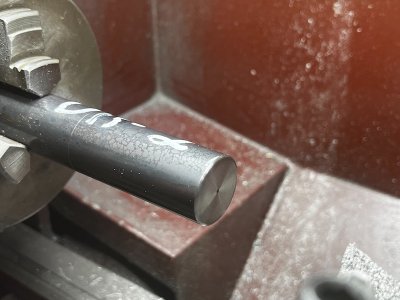
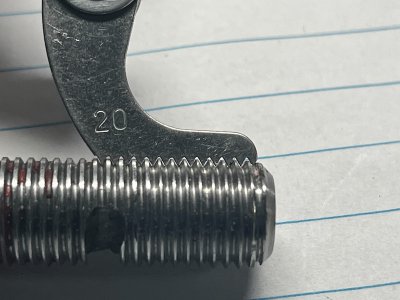
Confirming thread size... 7/16"-20
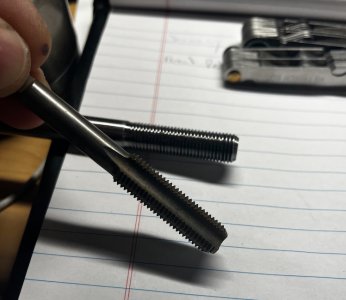
Found a 7/16-20 USA tap in the box of stuff I bought... need a 25/64 drill bit to go with it.
So far, all is going well... next is to drill and tap the top section of the drawbar...

Not turning the rest... quicker to cut...

And then clean up...

Confirming thread size... 7/16"-20

Found a 7/16-20 USA tap in the box of stuff I bought... need a 25/64 drill bit to go with it.

So far, all is going well... next is to drill and tap the top section of the drawbar...
- Joined
- Dec 18, 2019
- Messages
- 6,597
That tap appears to be a bottoming tap. It is going to be hard to start. You might consider getting a tap with a longer taper. (Tapered chamfer, or plug chamfer.) Of course if this is all fixtured, like in a lathe, might be ok. A tapered chamfer tap is a whole lot easier to start.Threaded section is out!
View attachment 398471
Not turning the rest... quicker to cut...
View attachment 398472
And then clean up...
View attachment 398473
Confirming thread size... 7/16"-20
View attachment 398474
Found a 7/16-20 USA tap in the box of stuff I bought... need a 25/64 drill bit to go with it.
View attachment 398475
So far, all is going well... next is to drill and tap the top section of the drawbar...
- Joined
- Aug 6, 2015
- Messages
- 3,935
Okay, let me see if there is another one in the box...That tap appears to be a bottoming tap. It is going to be hard to start. You might consider getting a tap with a longer taper. (Tapered chamfer, or plug chamfer.) Of course if this is all fixtured, like in a lathe, might be ok. A tapered chamfer tap is a whole lot easier to start.
- Joined
- Dec 18, 2019
- Messages
- 6,597
$13.83 uncoated HSS @ McMaster, probably cheaper elsewhere.
Last edited:


