POTD- PROJECT OF THE DAY: What Did You Make In Your Shop Today?

Do you guys get a lot of rust down there?

Here we have a lot of snow (Oct - April/May) and they're running a lot of salt on the roads to melt that. The side effect is a battle to keep anything looking nice. The up side is pure summer cars get only about 3 months of driving per year! lol ;)
Thankfully not down here, but I've had the "pleasure" of working on 15yr+ old North Eastern cars
 
Cars! Rust! Grrrrr...
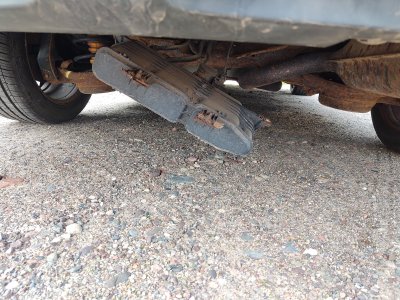
Cars.jpg


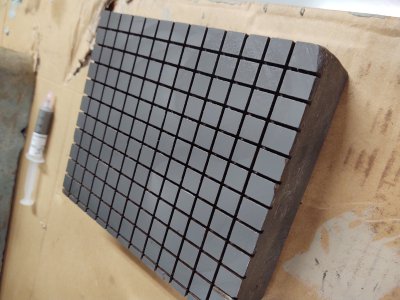
On to fun stuff. Spent a few minutes in the shop. Loaded up the cast iron lap with some 10um diamond. Not sure I like this diamond compound. It's on there with what feels like grease or something really sticky. It only took the most tiny little bit to cover the whole thing. A spot the size of a number two pencil tip did all 42 square inches of this lap!
Lap-Loaded.jpg

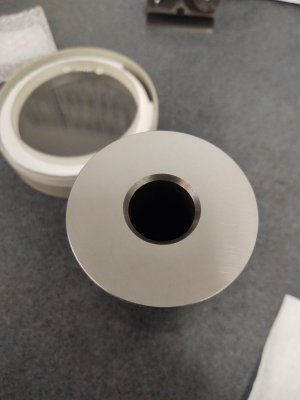
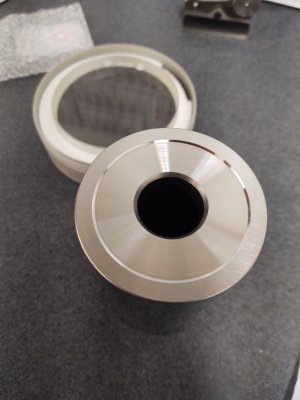
It did short work on the cylinder square flat face. I also surface ground the opposite side and lapped it for kicks. All the lapping only took about 5 minutes. The ground face isn't exactly square to the cylinder body. It's out by ~2-3 tenths at 5" height. Might have to start with something more aggressive to move the ~tenth on the flat face that needs to be removed, then lap again. Maybe back to the the old DMT diamond plate. Have a feeling with all that surface area, that will be a slow process.

Opposite.jpgCylSquareLapped.jpg

Checked the lapped flats with the optical flat. 10um diamond is a bit aggressive to get a good read with the optical, but it can be read. Probably should have gone 4 to 6um for that, but the read is there. The side that's flat (raised outer lip) has a couple of very small raised islands 180 apart. Maybe one or two bands of 532nm. the other side being surface ground first, is dead flat against the optical flat. Over the whole face there isn't a single band. Had to tip the optical flat up just to be sure it was reading. As it settled you could see the bands spread out into one single band. Really surprised how fast that came out flat.

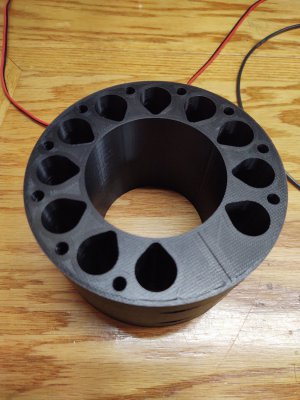
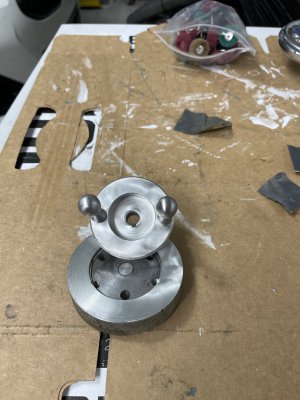
One final step will be to try to lap the 'belly' out of this cylinder. I know it's square to the plate, but bulges ever so slightly in the middle. The plan is to spin it in the lathe, and lap the outside until it's nearly a perfect cylinder. Decided to try print a lap for that rather than waste some nice aluminum rounds.
OD-LAP.jpg

The plan will be to chuck this in the lathe, bore it out to just slightly over the cylinder square diameter then cut it at the line with the band saw. Then cut into each of the teardrops from the inside to give the lap some flex. There's two holes for tension screws to snug it up. Honestly not sure if this will work, but it was quick enough to draw up. Still need to find a big bolt to chuck up in the lathe to spin the cylinder square on for lapping...
 
POTD was making some stainless steel blades for our cordless weed whacker. We have a Ryobi 40V unit which works pretty well. I'm not a big fan of the line reel which does a great job wrapping long weeds around the axle. Ours came with a plastic blade head also which works well on the taller stuff, but not the thicker stuff.


I like the design for convenient blade replacement. Bayonet mount head with snap-on blades. However, the plastic doesn't fair well against stones and thicker weeds.
View attachment 448676
View attachment 448677
View attachment 448678


I grabbed some 0.036" stainless and Dykem'd a couple of holes to slip the blades over a set of the plastic ones. Did the rough hole on the Bridgeport (alas, no photos). Then over to the Oliver die filer for a tight fit. I was a little worried about the stainless separating from the plastic blade and launching it into my foot, so went with a slotted hole so the steel is captured by the cast-metal detail in the head.


Roughed the holes on the BP, and fine tuned with the die filer
View attachment 448679


My dad passed away 4 years ago, mom last year. Going through their house, I found my dad had an Indestro riveting tool with a punch for tubular rivets. It's been a nice addition to my toolbox, I reproduce a few Erector set parts that use tubular rivets, the punch works much better than a ball peen hammer. Anyway, punched a couple of 5/32" holes in the stainless and drilled through the plastic blades. Peened over a couple of stainless tubular rivets and proceeded to cause much harm to many weeds! Full disclosure, the stainless blades work great on weeds and small saplings up to 3/4" diameter, but at 0.036" thick, the tips will bend so I'll probably replace them with some 1/16" thick stainless. Oh, don't ask me how I know, but they also work great cutting through vinyl siding!


View attachment 448680
View attachment 448681
View attachment 448682

Maybe paint the tips orange for safety?
View attachment 448683


Thanks for looking, Bruce
Be careful!

Your machine looks like gear head.

A friend added a similar aftermarket head that worked great, until the gears stripped.

Sent from my SM-G781V using Tapatalk
 
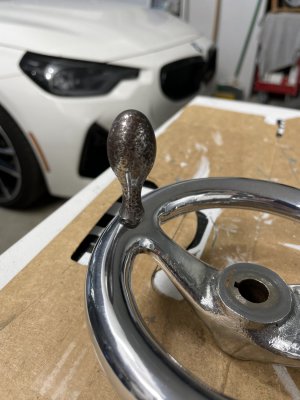
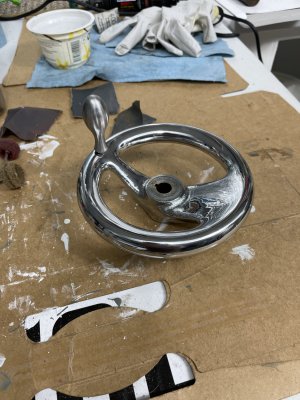
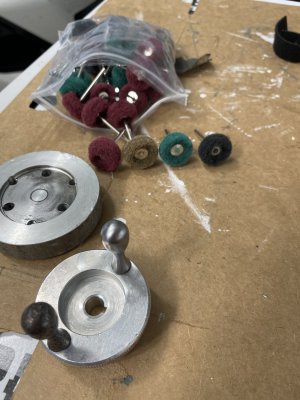
Cleaning up the wheel handles for my Clausing 49046E894F73-965E-43D0-A981-945C0546C081.jpegCECD6CA9-E7C2-4DC9-80B8-5C11E7A14D92.jpeg
Impressed with these little scotchbrite knock off wheels. Lot less effort to do the initial cleanup and gives a nice satin finis. Wish they offered some in felt for buffing
76358C0E-24C0-49A4-94D3-77559CB4855C.jpeg
66AB060F-8960-4967-A0DE-024884CC9A70.jpeg
 
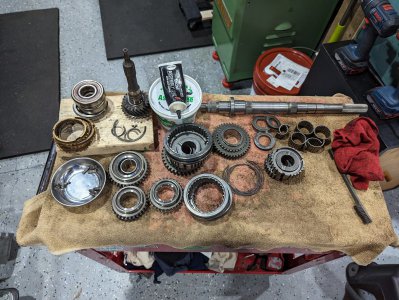
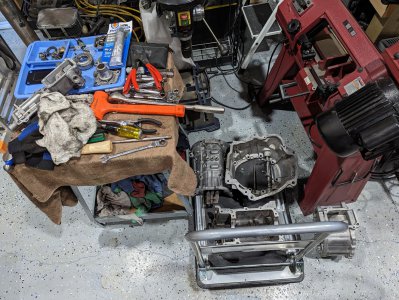
Today, I continued the long process of reviving a transmission that had never seen an oil change. It's a tough little Suzuki split case that's still produced, albeit in Dehli instead of Japan. I've been sitting on it for a long time, bought it when it was affordable with big plans to double transfer cases in my Samurai. It was preserved in a half inch of caked on **** until last week, when I sprayed it down with blue-can oven cleaner and pressure washed the bejeezus out of it. Tearing into it, it was clearly abused. The oil in the needle bearings and cartridges on the main shaft was coked(!) solid. The input shaft was hammered bad, but I quickly found a new replacement. There was a lot of wear on the reverse dogs, but it moves free. No wear signs where it counts, so it must not have got hot enough to ruin the heat treatment, so it's rebuildable. Lots of time spent over the solvent tank and still coke deposits. I ran the suckers in the ultrasonic cleaner with stoddard solvent for a few hours and let the stuff soak while I spent the week at work. It took another hour with a toothbrush in the solvent tank and now the needle bearings are clean. The needle bearings specifically aren't available, or at least nobody knows interchange part numbers for the damn things, so I'm stuck. I pulled a few pins and they came in at a uniform 2.9996 mm (no typo, German comparator mic). I think it will live. It'a time to put it back together now.

PXL_20230527_002617960.jpgPXL_20230527_002632727.jpg
 
Today, I continued the long process of reviving a transmission that had never seen an oil change. It's a tough little Suzuki split case that's still produced, albeit in Dehli instead of Japan. I've been sitting on it for a long time, bought it when it was affordable with big plans to double transfer cases in my Samurai. It was preserved in a half inch of caked on **** until last week, when I sprayed it down with blue-can oven cleaner and pressure washed the bejeezus out of it. Tearing into it, it was clearly abused. The oil in the needle bearings and cartridges on the main shaft was coked(!) solid. The input shaft was hammered bad, but I quickly found a new replacement. There was a lot of wear on the reverse dogs, but it moves free. No wear signs where it counts, so it must not have got hot enough to ruin the heat treatment, so it's rebuildable. Lots of time spent over the solvent tank and still coke deposits. I ran the suckers in the ultrasonic cleaner with stoddard solvent for a few hours and let the stuff soak while I spent the week at work. It took another hour with a toothbrush in the solvent tank and now the needle bearings are clean. The needle bearings specifically aren't available, or at least nobody knows interchange part numbers for the damn things, so I'm stuck. I pulled a few pins and they came in at a uniform 2.9996 mm (no typo, German comparator mic). I think it will live. It'a time to put it back together now.

View attachment 449059View attachment 449058
FYI, ultrasonic cleaning and bearings... NO NO.. the ultrasonic can/will brinnel the bearings. Just best to run the solvent over it with a pump.
 
FYI, ultrasonic cleaning and bearings... NO NO.. the ultrasonic can/will brinnel the bearings. Just best to run the solvent over it with a pump.
Jeff, I think that may be possible with some far-out industrial size setup, but my little overfilled 90-watt denture cleaner just manages to knock the dust off. :encourage:
 
I was on another tangent and did some research on cavitation corrosion. For an unrelated reason, I was thinking about the metallurgical solutions my dad helped advise for cavitation corrosion in hydroelectric impellers, and did some reading. The mechanism of wear is the same in ultrasonic cleaning. It's the collapse of the vapor bubble that does the cleaning in an ultrasonic cleaner, it's also the same thing that causes corrosion in boat propellers. Under extreme, continuous cavitation for many thousands of hours, the metal does eventually show wear. I don't think that's an issue for bearings in a cleaner, but there's a second effect, the micro vibrations may hammer the bearings against the races in a microscopic sense. I'm convinced that this is a non-issue for a cycle or three at 20/mins per go. I appreciate the chance to refresh my memory, though!
 
I was on another tangent and did some research on cavitation corrosion. For an unrelated reason, I was thinking about the metallurgical solutions my dad helped advise for cavitation corrosion in hydroelectric impellers, and did some reading. The mechanism of wear is the same in ultrasonic cleaning. It's the collapse of the vapor bubble that does the cleaning in an ultrasonic cleaner, it's also the same thing that causes corrosion in boat propellers. Under extreme, continuous cavitation for many thousands of hours, the metal does eventually show wear. I don't think that's an issue for bearings in a cleaner, but there's a second effect, the micro vibrations may hammer the bearings against the races in a microscopic sense. I'm convinced that this is a non-issue for a cycle or three at 20/mins per go. I appreciate the chance to refresh my memory, though!
glad you are convinced. All the bearing manufacturers absolutely advise against it.
My son used to race inline before going to ice. I used to use ultrasonic cleaning. A friends microscope showed that I was not helping him.
 
Back
Top