2021 POTD Thread Archive

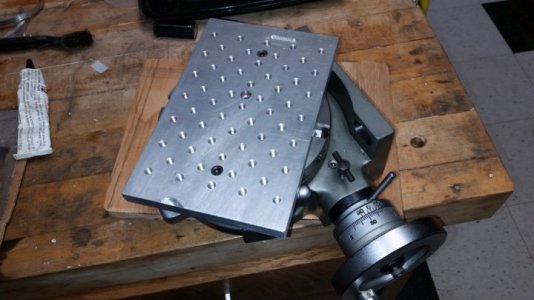
made these today for the rotary table. I was going to sit the day out my back is out, but standing helps more than sitting. Can't do lathe work, its too low.

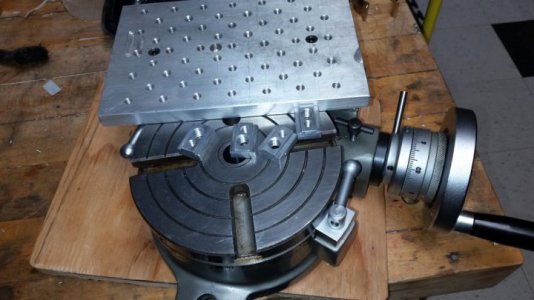
so I made the plate before I had a mill on the drill press. I needed a pallet for the lathe milling attachment. I use it from time to time on the mill. Well it will come in handy for the 6" rotary table.

I put 3/8-16 for regular mill hold down... and 1/4 20 for my small pallet fingers. The pallet uses 1/4 socket to hold it down.
 

Attachments

  • 20211215_152353.jpg
    20211215_152353.jpg
    51.9 KB · Views: 35
  • 20211215_152339.jpg
    20211215_152339.jpg
    54.7 KB · Views: 34
  • 20211215_152044.jpg
    20211215_152044.jpg
    58.2 KB · Views: 36
well, it must be Attention Deficit Disorder...
I took the head off my Clausing. I got so fed up with the quill brake.. I know that there might not be enough of a bite since the original hole was 1/16" of an inch away from the quill.. but I am taking a big risk, and machining my head on the drill press. My lathe is too small to mount the head on the cross slide for boring on that. I tried drilling, but the chuck kept dropping out. Then I tried milling with a roughing end mill. I was able to get a lot of the hole off center so that I can use a boring bar. DON'T tell me that the drill press won't do this... I know all the problems, not a stiff quill... no way to hold it (draw bar), no way to move the head (no x-y table). But I was so fed up with the brake. I thought about just sticking a slug in the existing hole and redrilling.. but when I thought about it, I thought that was a one way operation.. if it didn't work I was screwed. What I am doing it boring out just to the split in the casting. If I am successful, I can go all the way. if not, I can still use the old type of brake which pulls the casting split together... I am looking to do a bridgeport split collet clamp.
BTW the lidocaine patches are allowing me to work today...:)

20211215_181015.jpg20211215_181028.jpg20211215_185745.jpg20211215_185751.jpg
 
btw, that light colored (almost white) around the new hole is me trying to knock the burs down with a die grinder. A little tight in there. I apparently got them though, but it walked last second. I followed up with some emery.. After I get a brake hone and smooth the bore out I'll clean the entire casting in mineral spirits, re-assemble. I have been thinking how to make the half moon in the slug. If I reassemble I can use the boring head.
If I mount it in the lathe on my face plate, I will have to make some hold downs to hold it... and it will be fussy on the radius.. But I have watched @savarin do amazing things with his lathe. So it might be worth it.

I also want to see about making a quick adjust for the quill stop. It might have to be integral, or a clip on one. There's not much room on the threaded rod , the casting is quite close around it. I may also add a pulley to it, to give me the ability to have it spring back on me... There's no wound clock spring on the Clausing... And I really miss that.
 
I just figured out what you were trying to do. Makes sense now. Sounds like using the mill with a boring head would be the easiest way to cut the plug.
 
Since my shop is on long term delay due to building a house for my parents on our property, I've decided to put the time to good use by learning solidworks. For a first project, I'm just doing chess pieces, then printing them on my 3d printer.
View attachment 388453
Coolest thing I ever saw from an SLA/SLS R&D shop was a full set of chess pieces done in some translucent media. The modeler had added tons of features to the pieces. I recall clearly the internal spiral staircase leading to the door way on top of the rook! The pieces were 3 or 4 inches tall IIRC./ Nice work!
 
Coolest thing I ever saw from an SLA/SLS R&D shop was a full set of chess pieces done in some translucent media. The modeler had added tons of features to the pieces. I recall clearly the internal spiral staircase leading to the door way on top of the rook! The pieces were 3 or 4 inches tall IIRC./ Nice work!
Wow! That sounds really cool. I'm now refining my designs. Will post some more after Christmas if all goes well.
 
Today i spent all my spare time helping family members with their cars. First was my brother, he parked to wait for his children to finish school with his headlight on and the astra would not start. That wouldn't be too bad just a jump start but it's raining all day very hard. And like any school the line of vehicles was very long and he was blocking one lane, so i push him bumper to bumper straight in the school playground up to the lean roof and pull up from the other side that way i did not get very wet and jump starter him. It took more than an hour because of the traffic. After getting home i put my overalls to start working on the little niva but my cousin call he drove in standing water and locked up his engine on the highway in the rain. So i headed over there also push him bumper to bumper to the first petrol station. He is also driving 90's diesel peugeot, i know those engine are tough so i went in the petrol station bought a cheap wrench set for 4$, unbolted the glow plugs he crank it it shoot out lots of water, i also removed his air filter and reinstall the glow plugs. The thing fired up on the very first crank, it seems to have a noise perhaps he bent couple of the connecting rods but he was able to drive it home. Got back home then my father called he's got a flat tire. I grabbed my cordless impact and a 19mm socket, he was close but there was no escaping the rain changed his tire and send him on his way, his tire seems to be in a vacuum, no idea why. After this i needed to warm up and dry up.
IMG_20211208_134514.jpg
 
I'll be building a separate thread for this. Because someone may want to do this.

brass slug for split collet.
20211216_104937.jpg
back view of why the holes stopped in the casting
20211216_112815.jpg
brake with extra material for now.
20211216_112822.jpg
dykem so I could mark it.. it's a 2.5" bore. but I needed to remove it at this point.
20211216_134440.jpg20211216_134503.jpg
I am marking the lowest point for the parting/splitting. I retapped this in 5/16 -18
20211216_164324.jpg
here's the piece ready to test. I wound up having to take more off the split area to get a good grip. Took it off the piece with the allen head sticking out.
20211216_170816.jpg
here it is working .... :beer mugs: I need to make a new screw and a little arm.
For now the allen is it..
Now to make a quick adjust quill stop... it's a tight space..
20211216_174041.jpg
 
Back
Top