2000 Enco 110-2034

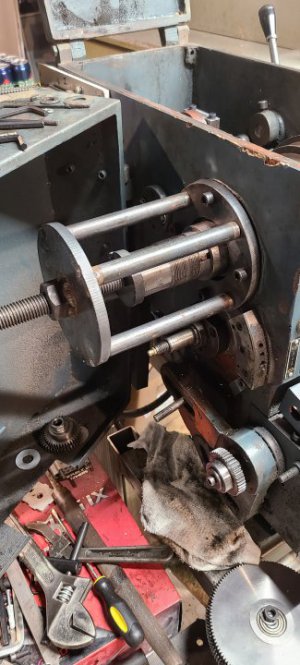
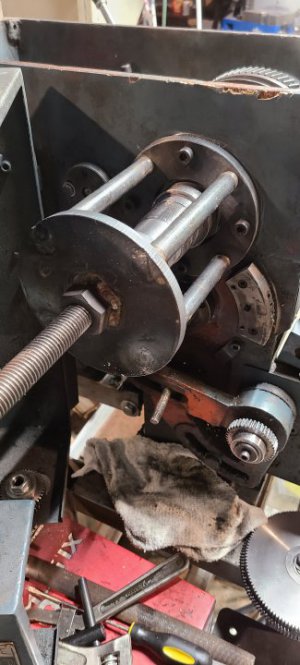
I ran into a slight problem after i reassembled the spindle and headstock gearing and looks like i will need to disassemble again. There is some small perceivable play in the spindle, although fully tightened and i certainly do not want to compromise the rear spindle threads. My guess is that there is a small difference in the new tapered bearings or bearing cones causing this. My solution will be to place a spacer in front of the rear bearing cone to push it out and allow more take up to get the bearings to seat fully. A 3"id x 3-1/2"od x .1235-1875" spacer should be plenty. My first clue, that i really didnt pay a lot of attention to, was some slight alignment issue in the back gear meshing in line with the spindle pulley and gears. There was just a touch too much linear play needed to make it work. About .0625". Hence the .125"-.1875" thick spacer. Also there was some oil leakage from the front cavity whereas the back was holding oil fine.
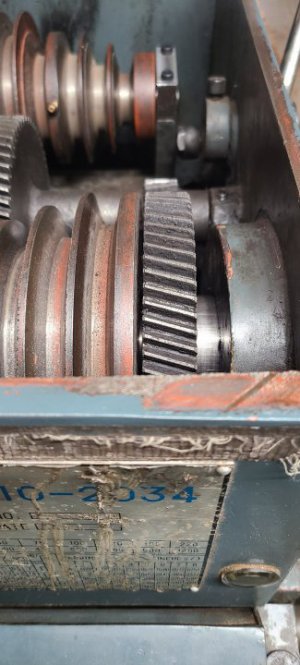
I may also need to turn down or shorten the flanged spacer to allow the back spindle gear to align properly with the pinion gear.
@Mr Mike Those caps didnt quite match and had to machine new, but if you saw the condition of this lathe and other equipment where i purchased, you may understand. The guy was a hack and just beat and misused things. He almost totally ruined the lathe bed. Not sure if he ground out or was turning something while it was making contact, but the tailstock is just usable close to the headstock because of it. Like i previously said this lathe was bought for its utility and hope of rebuild and usability, not its looks.
 

Attachments

  • 20220212_121908.jpg
    20220212_121908.jpg
    63.2 KB · Views: 28
  • 20220212_121913.jpg
    20220212_121913.jpg
    53.1 KB · Views: 25
  • 20220212_122036.jpg
    20220212_122036.jpg
    56 KB · Views: 26
Last edited:
Here is how I remove and also reinstall spindle. Extremely handy.
 

Attachments

  • 20220213_121357.jpg
    20220213_121357.jpg
    67.2 KB · Views: 19
  • 20220213_121418.jpg
    20220213_121418.jpg
    61.5 KB · Views: 19
  • 20220213_121428.jpg
    20220213_121428.jpg
    57.4 KB · Views: 22
Don't know man, it may not be pretty, but I have this sneaky suspicion that you're going to turn that lathe into a real work horse... Love your spindle jig... looks just heavy enough to put a big ding in the noggin of the person that tore up the tailstock rails like that.

How close to the spindle is that damage, I can't tell from the photo. the closer the better right...?

I'll keep watching your thread because I need to see how this turns out.
 
I ended up having to uninstall and reinstall spindle. Initially I had used the rear bearing spacer to press the rear bearing in place. I either did not press enough or spacer was an impedence to pressing correctly and had a little too much slop in spindle that the spanner nuts could not overcome. I reinstalled the spindle using the tool direct to the inner bearing race and locked the rear bearing into place. The spindle is now extremely firm without spanner nuts, spacer , or gear being installed. I'll most likely need to relieve it slightly for proper operation, but definitely easier relieving it than trying to tighten like the first time.
FYI concentrate and press the rear bearing onto the spindle by itself. Trying to do it with the spacer and gear to save time does not work.
 
Last edited:
Finally have headstock 100% together and working well. So much quieter and little to no vibration. It does sound like i need to look at the motor fan and cover. I may have dinged the cover because there is a slight noise and little vibration. I did replace the original new fiber gaskets with 1/16" rubber and also relieved some pressure on spindle. Spins firmly with no play or resistance other than gearing. Hopefully be able to cut some fresh chips a verify surface finish or other maintenance needed. Once im good with surface finish, i'll install new way wipers and focus on backlash and play in carriage and cross slide handwheels/leadscrew and nuts. Luckily the cross slide nut has two bolts to make adjustment.
 
Hopefully you won't have to many more issues getting that bad boy done, make sure you post a photo when you finish that stand it's on, and a couple of photos of parts your fab shop needed you to make...
 
First test cuts seem very promising. So far, seems comparable to my 1937 SB9c that has been kept well.
I'll sit down at some point and upload some interesting pics. I worry that I'll look or end up like I'm tooting my own horn. What I post is hobby fun, not work.
 
First test cuts seem very promising. So far, seems comparable to my 1937 SB9c that has been kept well.
I'll sit down at some point and upload some interesting pics. I worry that I'll look or end up like I'm tooting my own horn. What I post is hobby fun, not work.
Hence the Name: hobby-machinist forums... a fun-friendly place. lol if this was a tooting forum everyone would have a $50.000.00 Lathe, and a YouTube channel showing it off... so don't fret and post up some cool pics...

Besides I toot my own horn, I just finished reworking the coolest stand ever in the history of cool stands.... No one really cares about my stand but me..! however I figure if my rework thread helps just one other person that has this or a similar stand, by showing them the procedure to do it or give them some ideas they could use... well that would make me feel all warm and fuzzy.

FrontView.jpg

-- Show Us What You Got..! --
 
Back
Top