2000 Enco 110-2034

Finally back on this. I have two other projects going which is nice if i am waiting on something or need a little more thought on proceeding.
After playing around trying to get this quieted down, i decided to rebuild headstock and replace all bearing and races. I am so glad that i did.
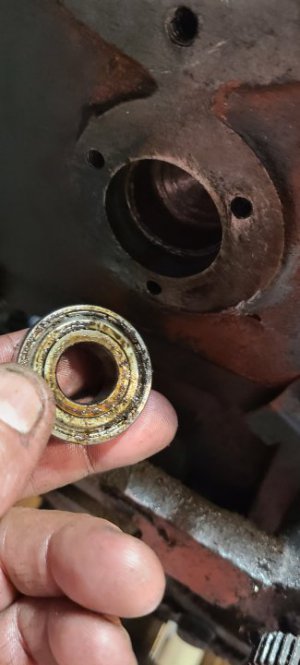
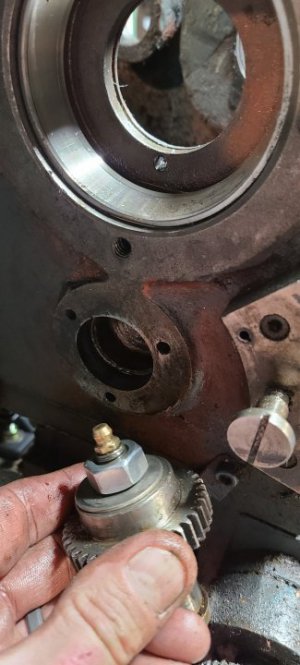
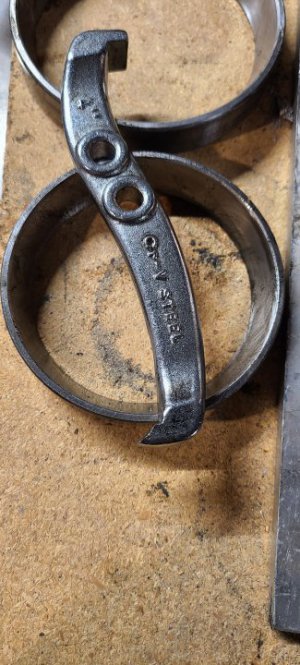
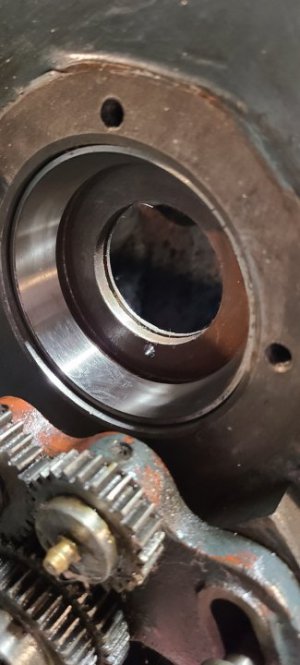
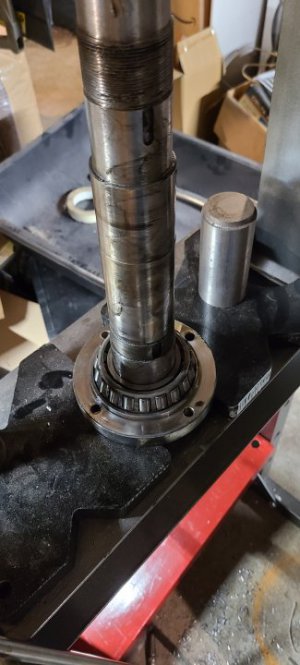
I found several issues pretty quickly. The pinion shaft bearing is toast and extremely course feeling. The backgear lever, small cast piece clamped to backgear shaft, has a chunk missing and will need to be replaced. And yes indeed the angular contact shaft bearing are extremely loose and have a great amount of slop, once freed from the headstock. The individual rollers inside the cage and the roller/cage assembly to inner race.
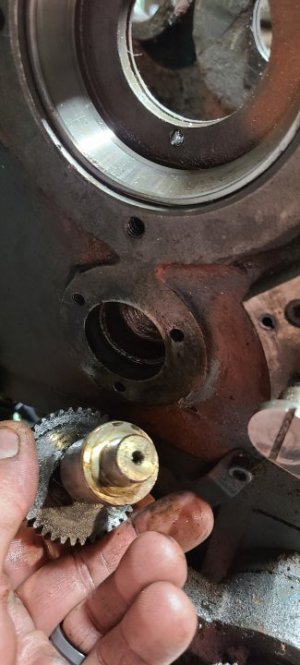
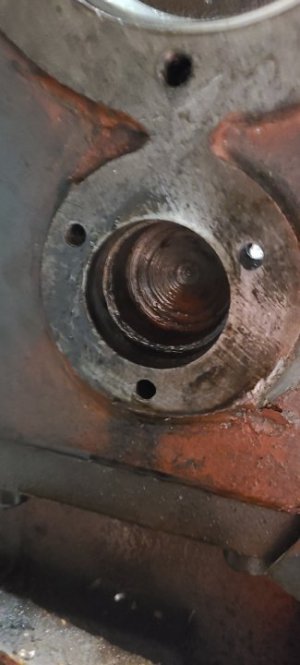
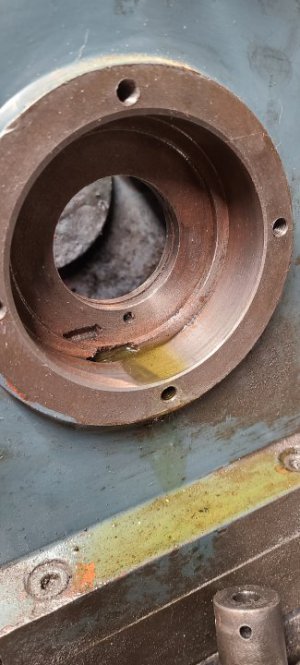
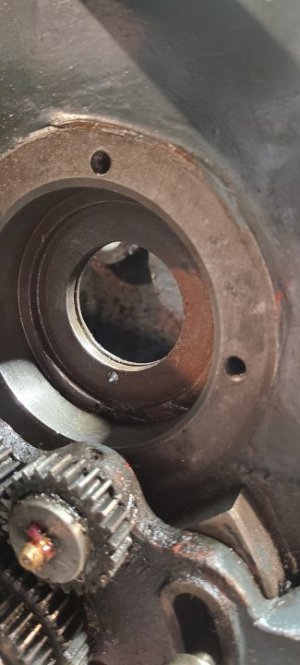
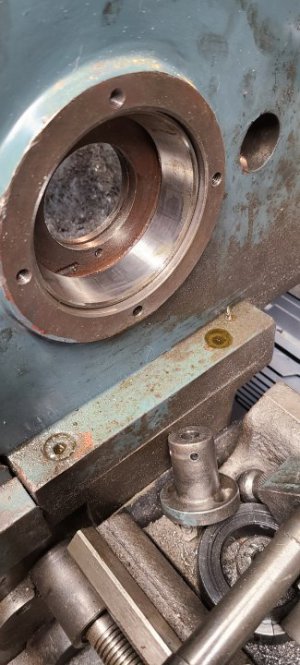
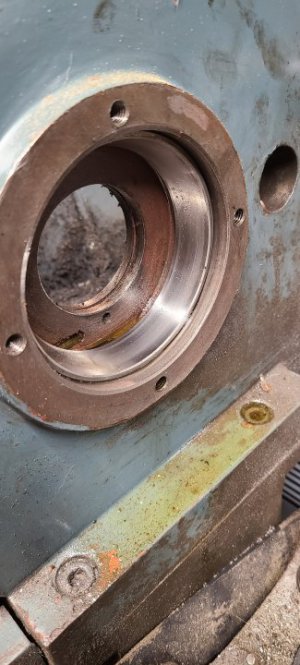
My next obstacle is how to remove the outer race from the headstock casting. There is a small recess behind the outer bearing race and casting to fit fingers or some sort of split ring?? Any suggestions would be appreciated.
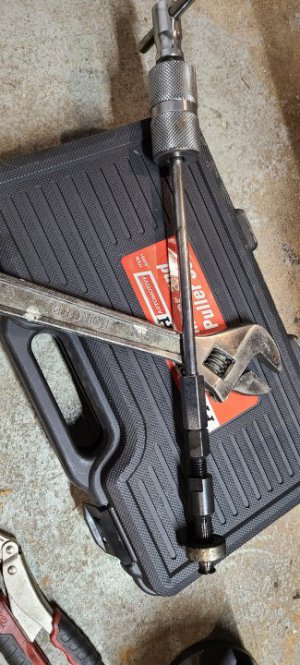
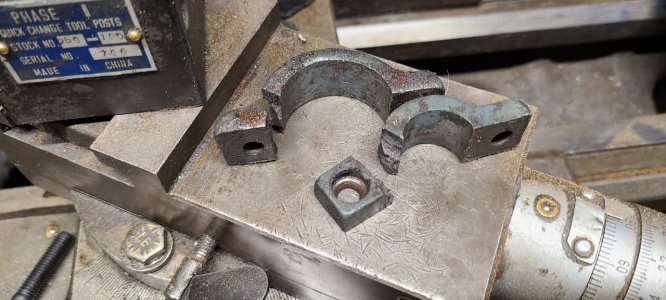
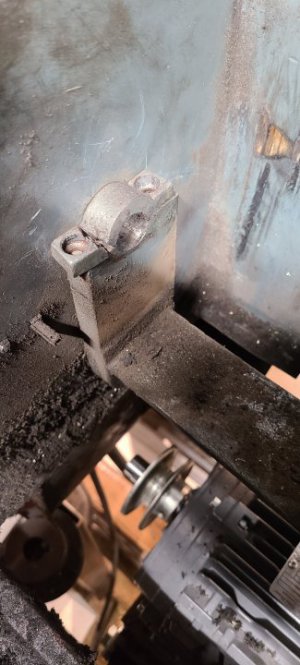
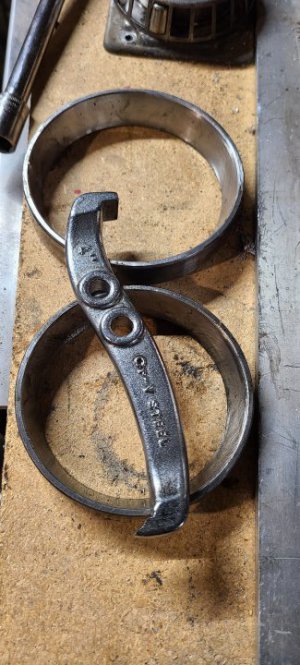
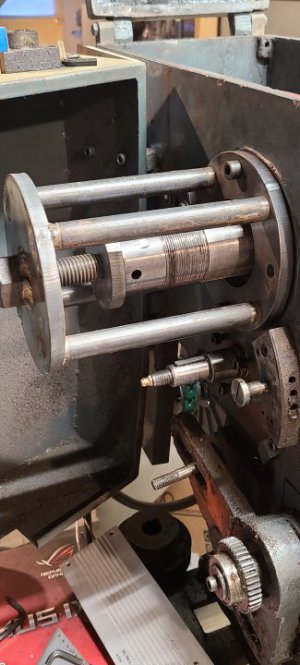
You can see the tool i designed and fabricated to remove and install the shaft. I lightly tapped the end of the threaded rod with a deadblow while turning and the shaft slid out with very little effort. The threaded rod is long enough to go through spindle and attach a donut on other side to pull the spindle back through for reinstallation.
 

Attachments

  • 20211219_151417.jpg
    20211219_151417.jpg
    58.7 KB · Views: 31
  • 20211220_175816.jpg
    20211220_175816.jpg
    51.4 KB · Views: 32
  • 20211220_175752.jpg
    20211220_175752.jpg
    62 KB · Views: 28
  • 20211220_175803.jpg
    20211220_175803.jpg
    45.6 KB · Views: 27
Last edited:
Luckily a buddy from work has a bearing pull kit. Hopefully has right size and what I need, otherwise designing and fabbing another tool.
The cages on new bearings are definitely heavier and appear to be of a higher quality than stock. While playing with old rear bearing, it just fell apart and all rollers and cage fell off inner race. Looks like lots if wear on rollers. Again, glad I decided on this course of action.
 
A bit of a surprise when I pulled shaft and bearing. For the shaft I used a couple rings of steel progressively smaller with keyed gear, some 1/2" washers and the stock nut. I clamped the gear and once I tightened and had the initial "crack" or give, it went really smooth with my hand holding the gear while tightening nut.
I then used my buddy's gear puller to get bearing out. A dozen firm whacks of the slide hammer and it was free. Doesn't feel as bad as it did in place, but the bearing itself was a surprise. It was a sealed bearing, not open as described. You can see the deep recess behind bearing seat, the hole in shaft end and the grease zirt. I did find a cross drilled hole in the shaft for gear lube. Not sure if bearing was replaced before or a faupe by the factory.
I'll be replacing with a open design
skf 6202 and utilizing the stock grease path.
Unfortunately the bearing pull kit does not contain a tool large enough for the spindle cones. I am modifying a 3 leg puller to try to remove those. Any other ideas would be appreciated.
 

Attachments

  • 20211222_154810.jpg
    20211222_154810.jpg
    89.7 KB · Views: 16
  • 20211222_154900.jpg
    20211222_154900.jpg
    39.3 KB · Views: 14
  • 20211222_154918.jpg
    20211222_154918.jpg
    50.3 KB · Views: 13
  • 20211222_154916.jpg
    20211222_154916.jpg
    51.2 KB · Views: 12
  • 20211222_154910.jpg
    20211222_154910.jpg
    37.7 KB · Views: 14
More bad news. I decided to disassemble pulley and replace bearings and unfortunately found this when I loosened bolts. Both shafts caps where broken. Man this machine was abused.
Good news is I can still get the replacement parts and they are about $20 for the pair. The back gear bracket arm is another $13.50. Not bad. I'm in less than $100 on the head/spindle rebuild so far.
 

Attachments

  • 20211222_163017.jpg
    20211222_163017.jpg
    190.8 KB · Views: 12
  • 20211222_162905.jpg
    20211222_162905.jpg
    55.4 KB · Views: 16
A bit of a surprise when I pulled shaft and bearing. For the shaft I used a couple rings of steel progressively smaller with keyed gear, some 1/2" washers and the stock nut. I clamped the gear and once I tightened and had the initial "crack" or give, it went really smooth with my hand holding the gear while tightening nut.
I then used my buddy's gear puller to get bearing out. A dozen firm whacks of the slide hammer and it was free. Doesn't feel as bad as it did in place, but the bearing itself was a surprise. It was a sealed bearing, not open as described. You can see the deep recess behind bearing seat, the hole in shaft end and the grease zirt. I did find a cross drilled hole in the shaft for gear lube. Not sure if bearing was replaced before or a faupe by the factory.
I'll be replacing with a open design
skf 6202 and utilizing the stock grease path.
Unfortunately the bearing pull kit does not contain a tool large enough for the spindle cones. I am modifying a 3 leg puller to try to remove those. Any other ideas would be appreciated.
It's possible that that bearing was originally an oil lubricated bearing, not grease. A bunch of folks around here have found, especially
on mills that the "zerk" fittings are actually are for oil. You might want to look into that a bit more.

It looks as though you're making good progress though.
 
It's possible that that bearing was originally an oil lubricated bearing, not grease. A bunch of folks around here have found, especially
on mills that the "zerk" fittings are actually are for oil. You might want to look into that a bit more.

It looks as though you're making good progress though.
The original manual has been pretty good on part call outs. The pulley showing 6005zz, whereas the idler showing as 6202, which is unshielded. In this particular case I'm pretty sure it it's grease as the path also feeds the two idler gears for forward and reverse. Also my other lathes all have grease points at same spot.
My Arboga Maskiner on the other hand has a grease zirk over the spindle, which definitely takes oil, not grease.
 
Ended up being able to remove outer race, cone, or seat by grinding a common 3 jaw puller arm. Once i was able to firmly seat the finger behind race and leveraged against casting, I gently tapped with a hammer and worked side to side. I did need a 1/4" spacer eventually, but popped out without a lot of effort.
I let the new bearings soak in PB Blaster overnight to help remove dried grease, being new old stock. Some clean up with a brass brush, wipe and light spray with oil, I will be ready to seat new races.
 

Attachments

  • 20211223_155823.jpg
    20211223_155823.jpg
    76.8 KB · Views: 12
  • 20211223_155825.jpg
    20211223_155825.jpg
    76 KB · Views: 14
  • 20211223_155834.jpg
    20211223_155834.jpg
    58 KB · Views: 13
  • 20211223_155843.jpg
    20211223_155843.jpg
    45.7 KB · Views: 15
I put the bearing races back in similar fashion to removal. I used a peace of aluminum and hammer to gently tap back and forth until seated. I still need to press stock inner bearing assembly off of spindle, but then it's on to reassembly tomorrow.
I Also ordered the pully shaft caps, back gear lever bracket, and a few inherent odds and ends. Hopefully be here next week week and can her up and running correctly.
 

Attachments

  • 20211223_193351.jpg
    20211223_193351.jpg
    65.9 KB · Views: 12
  • 20211223_193359.jpg
    20211223_193359.jpg
    44.6 KB · Views: 13
Back
Top