2014 POTD Thread Archive

Try using 7014 "contact rod" welding rods. The flux is rigid enough to maintain the proper arc distance as you drag it across the welding surface. Allows a ham-fisted welder to look like a pro. (Little skill is required to make a very good looking bead.) After each pass, one has to break off the flux to expose the electrode in order to re-establish the arc. Dragging the rod across a cement floor (or a small piece of Hardie cement board on your welding table) will do the trick.
The Harbor Freight electronic welding helmets (under $40 on sale) are wonderful for a new or old weldor.

I agree on the use of 7014 as a learning rod. If you want even more ease in arc striking use 7024 (sometimes called "jet rod" or "idiot rod"). All you have to do is touch it down at a typical angle and it will maintain an arc without needing to weave or use any pattern. It only runs flat or slightly down hill.

I have a Harbor Freight helmit also & with it's variable filter control I like it more than my fixed Speedglass unit which cost many times more than the HF unit.
 
Those look pretty darn good to me. If I may ask, what kind of steel did you use to make them with? My son has just gotten into "lifting" a bit and I may just have to "borrow" your design to make a set for him.

Thanks,

-Ron
Hello there
Was expecting that Q
To be honest, picked up these 40mm Diameter shafting pieces from the Scrap Dealer. So really don't know what they were. More like Bright Mild Steel, except that they were bloody hard in some spots to cause a flame on the tip of the Carbide Insert.
Guess Your best bet would be to tell Your Dealer what U want to make and get his input
Thanks for asking
Go find, Give them a go and Good luck !!
aRM

- - - Updated - - -

Those are Bad A$$!!!! Lucky Grandson.

- - - Updated - - -

Those are Bad A$$!!!! Lucky Grandson.

Thanks
Hope he proves that some day !!
aRM
 
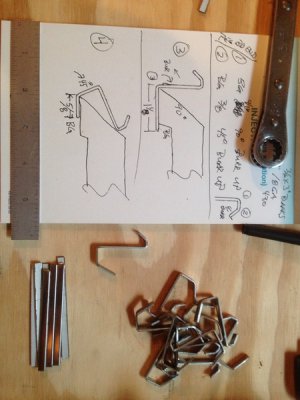
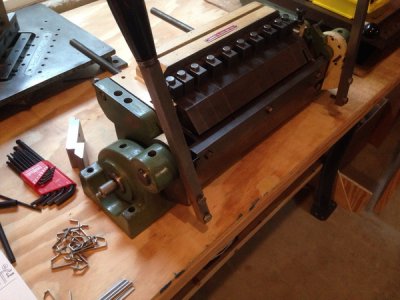
So. We generate boatloads of these 3/16 x 3" scrap slugs in 18 ga ss on our cnc turrets at work. I thought hmmm...... I could turn those into something useful. Pegboard hooks!
Grabbed a handful and brought em home. Monkeyed a bit with testing various angles and back gauge dims. It took a bit of trial and error but finally ended up with a decent all purpose peg board hook. I'll probably develop a few different styles for hanging various items. My Diacro finger brake worked awesome for making repeatable bends.
5adybyre.jpg
amugygar.jpg
y3eredej.jpg


Sent from my iPhone using Tapatalk
 
Spent part of the weekend helping oldest son change the ring and pinion gears in his pickup. The new HF 20 ton press was an invaluable asset in that project.

Also got time to install my new iGaging Absolute DROs on my Clausing 8520 mill this weekend, but I goofed up on one bracket, so will need to remake that one in a couple of weeks when I get some time again. Will be out of town all week and next weekend, so will just have to get at it when I get the chance.
 
I managed to make a good portion of my holiday Monday just disappear! Spent the day in the shop making the actual tool holding post for my sphere turner. Had it all but complete and then it happened! Fist and second hole for hold down's were drilled, then managed to break off the 6/32 OSG spiral flute tap!!! Not happy! Had to walk away, will go back to it today and see if there is anything I can do to salvage it? I fear it will go into the "prototype bucket" but we shall see.
 
I managed to make a good portion of my holiday Monday just disappear! Spent the day in the shop making the actual tool holding post for my sphere turner. Had it all but complete and then it happened! Fist and second hole for hold down's were drilled, then managed to break off the 6/32 OSG spiral flute tap!!! Not happy! Had to walk away, will go back to it today and see if there is anything I can do to salvage it? I fear it will go into the "prototype bucket" but we shall see.

Ouch. Sorry man. Im sure there will be some way to save it. Small taps are a biotch cuz most of the usual picks, punches easy outs etc are simply too large.


Sent from my iPhone using Tapatalk
 
Look for a local shop with a edm hole blaster. They make quick work of broken taps.
 
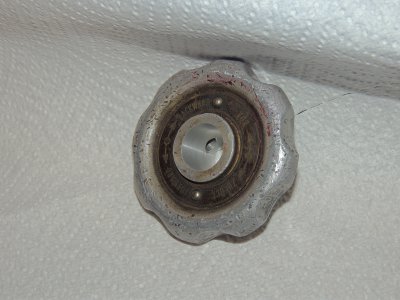
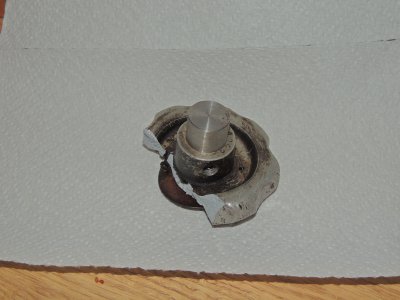
Caleb Army_089.JPGCaleb Army_082.JPGThe first pic is of a crappy old hand wheel with a horrific bore cleaned up to a crazy smooth beautiful bore. Pic two is after cooling the pug to 15 below 0* F and the wheel 550* F. I then proceeded to destroy the wheel pressing the two together. Before heating one and cooling the other, there was an interference fit of less than .001. The plug is steel abt .080 dia. The wheel is cast Al. So what did I do in my shop? I killed it:))

Caleb Army_082.JPG Caleb Army_089.JPG
 
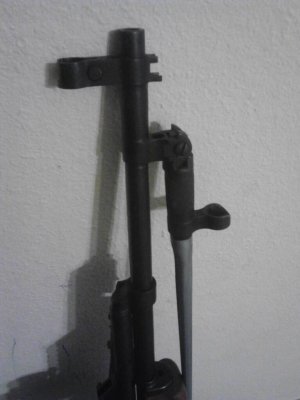
A friend of mine is putting a "Bull pup" stock on his SKS. The bayonet has to be removed as it will interfere with the new stock. He didnt want rhe mounting lugs on the end of the barrel anymore so he contacted me to slick it up! A half minute with a cut off wheel in the hand grinder, then a few minutes on the belt sander resulted in a finnished job. I polished it a few strokes with some fine emery cloth.
View attachment 83062
This is what it looked like before.uploadfromtaptalk1409707892581.jpg
I charged him the removed bayonet, as my SKS was missing it!:D
Jake Parker

uploadfromtaptalk1409707892581.jpg
 
After years of using a bench grinder while kneeling I decided to finally make a stand. I went to my local Metals Supermarket and the guy there sold me some 3/8" plate cut offs and a piece of 4" steel pipe. I sprayed it with Rustoleum Silver Hammered finish.
Oh yeah. I had to add a Holman Moody sticker to it. Why? Why not.


Now for the issue of anchoring to the floor. I had problems with keeping my grinder mounted with anchors in concrete. I found that taking a 4X8 piece of 3/4 inch plywood cut in half then glued together worked to anchor it to. Counter sink the bolt heads on the bottom of the plywood so it sits flat on the floor. Mounted so the grinder is on one end and you stand on the other end while using it. That way it stays nice and stable as you are standing on the base and it can't move on you.

I also have a large buffer similar situation. There is much more pressure as you hold work to it to buff and the plywood stand on stand works great. And for the buffer I made a 4X4X2 "Box" over the buffer to catch the debris the buffer puts out to keep it from going all over the shop.
 
Back
Top