7" of Shapely Goodness

That's a good idea; thanks Ted. Might give that a shot if I can find a small container of it; I got rid of all the K1 containers when we sold the farm (literally).


Masonry tub...

I feel so stupid for not thinking of that. I've been restoring a little drill press vise and that would have made everything so very much simpler. Thank you; I'll pick up one of those at the local box store when I go to check on kerosene...or maybe the local hardware; we have a good one in town and I like them better anyway.

Also, I looked in the manuals that I have downloaded, and all I could find was "machinery oil" as the lube spec; do you have better or more specific info on that? I don't have anything in the way of oils, yet; it wasn't economical to transport any of that stuff. About all I kept was some shutter oil, because it's very hard to get.


Nice catch; that's the back end of a JDM-spec 73-series. It's my daily, which is why I've had everything from shapers to sheepdogs in the back of it. It's quirky, but I like it, and the ambalamps doors are pretty handy for both shapers and sheepdogs, it turns out... especially the 140-lb. variety of the latter. Beats the hell out of the side-swing tailgate on my Jeeps that I (mostly) sold.
I was recently informed that there is such a thing as low odour kerosene.
 
I picked up a few of the concrete-mixing tubs in two sizes, today; 8-ish and 20-ish gallons. I think I spent about $75 and I got three of each; that's a deal for some durable wash/utility tubs. I also grabbed a bit of bronze wool, but I didn't find any kero, yet...but that didn't stop me from taking a few minutes to scrub away at some of the grime to see what I could find.

Pictured: I also popped the vise off to see what was underneath. Answer: cleanliness!

PXL_20230425_022503496.PORTRAIT.jpg


Pictured: ...and on the third day...

PXL_20230425_023100828.PORTRAIT.jpg


Amazing, what 30 seconds and some bronze wool will do. I really didn't expect it to be this clean, and I'm sure I can do better with the aforementioned degreasing, etc...but for now, this is encouraging. It's definitely seen some use, but I think it was taken care of; I mean, the engravings on the deck of the...thing that the vise mounts to...are still clear and pretty sharp.

Pictured: I didn't even know these were here until I started scrubbing.

PXL_20230425_023051630.PORTRAIT.ORIGINAL.jpg


Speaking of engravings: I gave the set on the vise...protractory-indicatory-thingy...a quick once-over.

Pictured: Bonzo like.

PXL_20230425_023148282.PORTRAIT.ORIGINAL.jpg


That's all for today; I had to work on the fence for the garden to keep the sheepdog out from where she shouldn't be patrolling...but I'm hoping that either tomorrow or the next day will see me a bit further along with this little project. I need to get some oil, an oiler, and start working on some kind of stand; I had the notion to use an old tool cabinet, but those are usually expensive, busted beyond repair, or both. I think the leg-set idea is good as well, and I don't know if I want to use a chip tray or just some kind of heavy, solid surface for the base.

I also need a power switch; I've been looking online, but I haven't gotten a conclusive answer on what was used from the factory. I know it's a Bulletin 600, but I don't know which one it is; there seem to be several, and Bonzo don't do vintage electrickiness...yet.
 
Ah, beautiful job. You do know it’s running backwards??
It should go faster on the return

Good eye Janderso.
Yes.
I posted that video on another forum and the fellows there told me the same thing. Motor was wired for 220 when I got it and I switched it to 110 but didn't get the rotation right. I fixed it so it runs the right way now. It will take a heavier cut running the right way too.
Thanks.
 
A couple of small updates...

I got started on cleaning a few small patches to see how bad things are, and I was surprised: it's not bad under there! Everything that's semi-brighter in the following pictures was spruced up with a paper towel soaked in a bit of Kroil; I think that some degreaser, microfiber cloths and some soft brass wool in selected areas would do a really nice job.

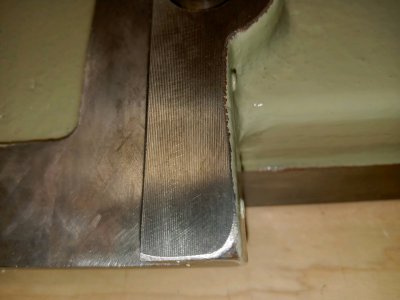
Pictured: The original milled surface is still visible outside of the wear range of the...uh...the whatever wears on this area.

View attachment 445554


Pictured: So, this may just be black paint, judging from the knocked-off spots on the front of the guard...but the knob looks pretty good!

View attachment 445555


Pictured: Turns out that it's Rockwell and/or battleship grey, underneath the grime.

View attachment 445556


Pictured: Vise surfaces aren't that bad, but there's some wear...but not much wear, considering.

View attachment 445557


Pictured: Damn. I didn't think the engravings would be this clear. That's a win.

View attachment 445558


I kind of knew that this thing was in decent shape, but I'm actually pretty impressed with just how clean it is; sure, it's caked with shop-grime on basically every surface - the horizontal ones are the worst, but the verticals aren't far behind - but that stuff will probably clean off pretty well. I may just set the entire thing in a large tub and start washing it down with...well, something. I don't really want to take a hose to it because that seems like nightmare fuel, so I may just take a bit of light-duty degreaser to it and see where we get. I've never seen Kroil cut paint before, but it cuts through everything else so I don't want to risk it here...and the more I look at this little thing, the more I don't want to restore it. It's somehow survived for somewhere around 80 years almost entirely intact, so I feel like I shouldn't deprive it of that achievement; making it showroom-perfect would...reduce it? Is that the phase I'm looking for? Regardless, it's a promising start and I think that a day of intensive cleaning will yield some pleasant results.

Also, I found a spare plug...so, this happened:


View attachment 445559

That motor doesn't just run, it purrs. Instant, fast start, and it's damned smooth and quiet for its age...and that with basically no oil in the bearings in however-long. I was planning on oiling it and letting it move around a bit, but somehow I managed to relocate myself by 3,000 miles and not bring a single oiler with me...so I'll have to fix that before I let it do much more. I'll also need some fresh belts and the motor section bolted into place, but that's all an easy fix.

Stay tuned.
Looking at the photo of the milled area you mentioned reminded me of this area on the cross slide on my SB.
As I was cleaning it I noticed the parallel lines.
I would say it is pretty obvious what kind of a machine was used to machine it.
Ha!
They used a shaper to build my shaper.
 

Attachments

  • 2023-04-25_03_05_09.jpg
    2023-04-25_03_05_09.jpg
    286.5 KB · Views: 18
Go to Lowes and buy the 5 gallon size of greased lighting.

No smell stuff that works great.


Put some in spray bottles or garden sprayer.

Spray on full strength and just let it work.

After time, scrub with brush.

Mix strong batch of dawn in garden sprayer to rinse.

Our Bobcat 825 was a Grease ball, after a few cycles very clean.

Sent from my SM-G781V using Tapatalk
 
So, just for ideas, my Atlas was bought new by a machinist that made little steam engines that he drove the neighborhood kids around in. (I bought it from his nephew who is also a machinist in his 60’s maybe? Nice guy.)

He mounted his shaper on a sturdy little angle iron reinforced wooden stand about 1-1/2 foot high. Under 2 foot high I’m pretty sure?
His idea was that it’s the perfect height to sit on a low stool (think of the little auto service rolling seats)

It being low to the ground made it easy to shove around too. No wheels. Just push it into the corner and pull it back out for use.
Maybe I’ll try to get some photos in the next couple days.
 
Here are some good documents I found. You might like them

That parts list has lubrication info. It’s for the Atlas so who knows what yours takes.
 

Attachments

  • 14900033-Atlas-7B-Know-Your-Shaper.pdf
    525.9 KB · Views: 3
  • 14899971-Atlas-7B-Shaper-Contour-Cutting.pdf
    720.8 KB · Views: 1
  • Atlas Shaper repair parts list.pdf
    795.7 KB · Views: 0
Last edited:
Good ideas, and thank you for the documentation! I'll give it a good read this evening.
 
Back
Top