- Joined
- Jan 1, 2014
- Messages
- 233
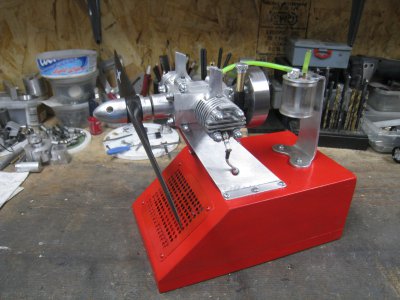
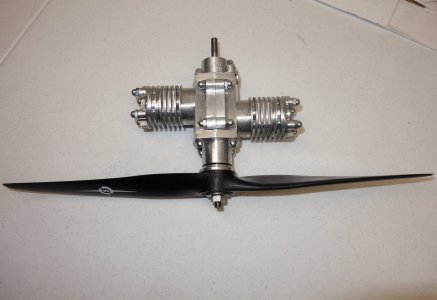
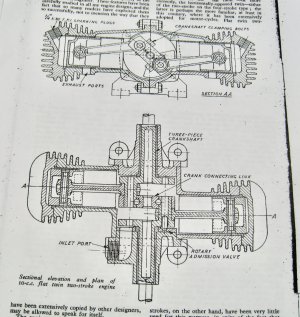
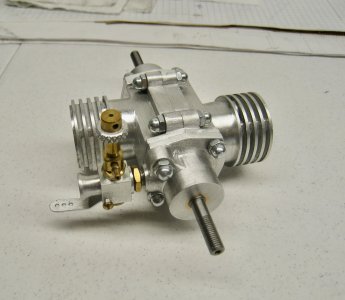
Edgar T. Westbury published an article in the British magazine “The Model Engineer” in 1948 about building a 10cc boxer twin engine. The design featured a 3 piece crank, split crankcase, rotary valve intake, 2 cycle, and with spark ignition from a rear mounted magneto. Can't remember what twigged me to try and find that article but it is online so had a look.
Castings were used originally but are not available now, however, there were enough dimensional drawings in the article for construction, and it looked like it could be made from bar stock, so thought I would give it a go!
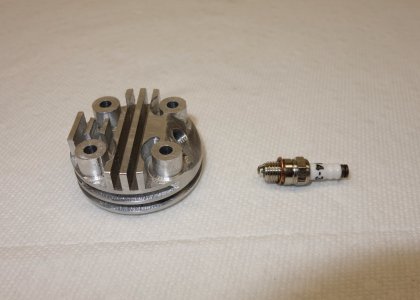
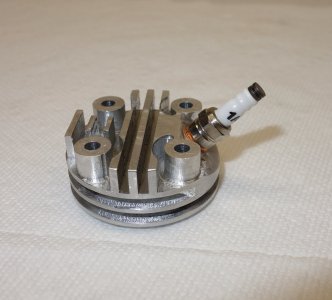
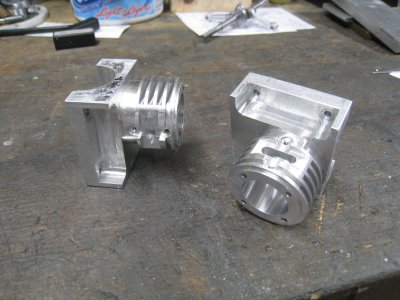
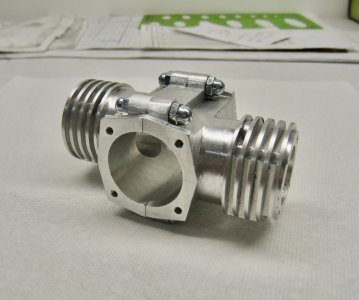
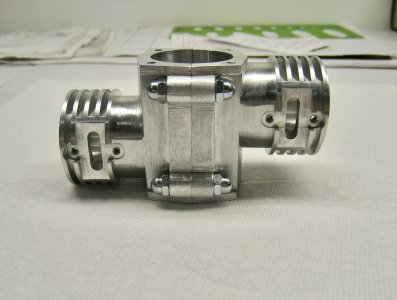
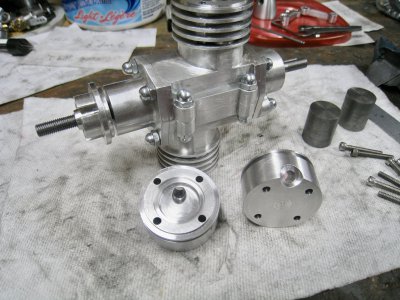
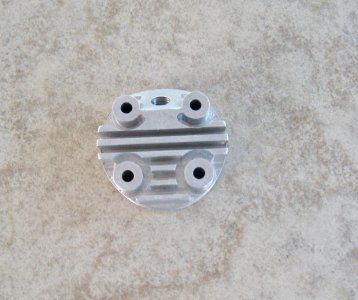
The biggest challenge was the need to see things from a 3D perspective to get rid of as much metal as possible. This just resulted in a lot of extra milling time which was fine with me. The crankcase and heads looked pretty good when finished.
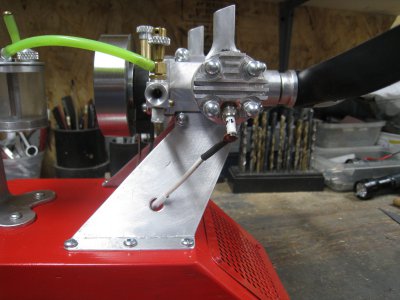
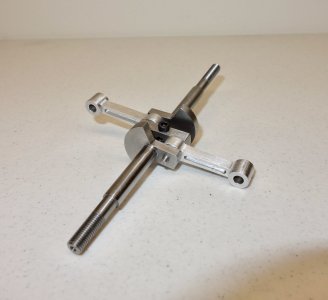
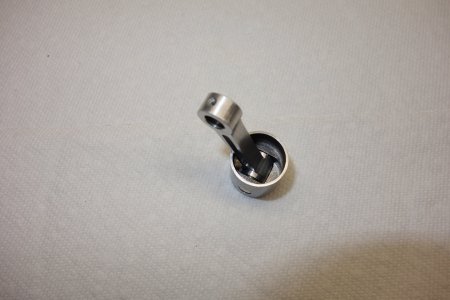
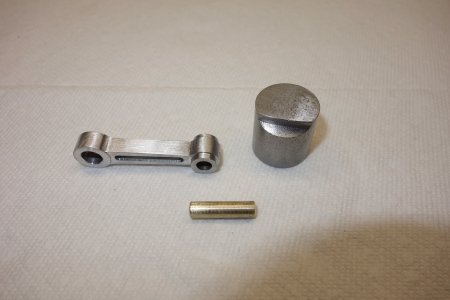
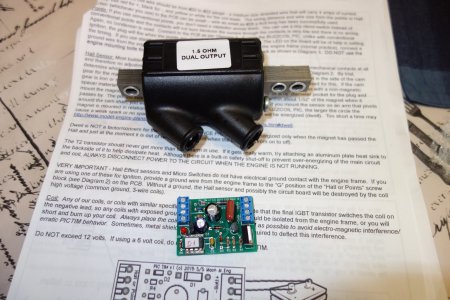
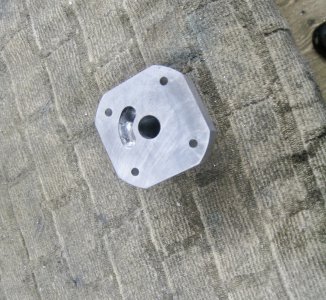
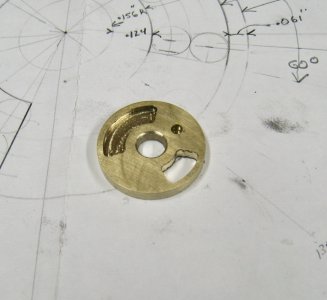
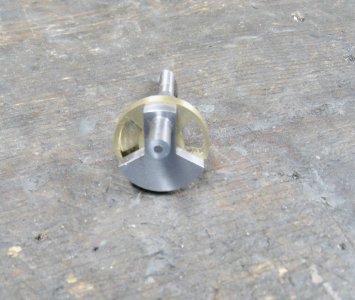
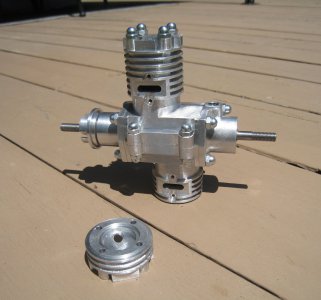
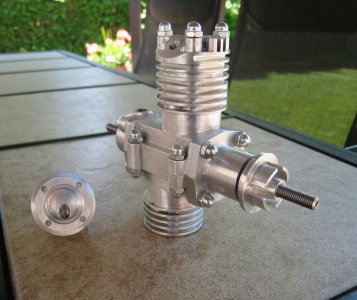
I made the crank from 1144 CRS, rods 7075 AL, pistons CI, sleeves C12L14, rotary valve from brass and the rest from 6061 AL. The crank is double-ended which accommodated a prop out front, and, instead of the original rear mounted magneto, I used it to mount a flywheel with embedded magnet to smooth out running, and the rear flange machined to hold a Hall sensor bracket for a modern electronic ignition system. Ordered the ignition parts from Outpost Enterprises in Ohio that will fire both plugs at the same time - this was the most expensive part of the engine but necessary! Those dang spark plugs are really expensive too!
Used a carb I made myself and a fuel tank from a previous engine.
Ordinarily a simple box for the electronics and to mount the engine would work, but the 12 inch prop needed vertical clearance and a way for the prop-wash to exit at the bottom of the swing. This would have caused vibration, so I just sloped the front 45 degrees to get rid of the airflow and also added a screen to divert some to the electronics inside. A bit ugly but it works.
Lots of noodling about what fuel to use. A chap at a local Great Hobbies store suggested a 80/20 mix of Methyl-hydrate and castor oil so gave it a try and it seems to work.
The engine starts easy enough and runs fairly smooth but is sensitive to the combination of needle valve/throttle/advance/retard settings at any one speed but fun to play with.
Thanks for looking.
Castings were used originally but are not available now, however, there were enough dimensional drawings in the article for construction, and it looked like it could be made from bar stock, so thought I would give it a go!
The biggest challenge was the need to see things from a 3D perspective to get rid of as much metal as possible. This just resulted in a lot of extra milling time which was fine with me. The crankcase and heads looked pretty good when finished.
I made the crank from 1144 CRS, rods 7075 AL, pistons CI, sleeves C12L14, rotary valve from brass and the rest from 6061 AL. The crank is double-ended which accommodated a prop out front, and, instead of the original rear mounted magneto, I used it to mount a flywheel with embedded magnet to smooth out running, and the rear flange machined to hold a Hall sensor bracket for a modern electronic ignition system. Ordered the ignition parts from Outpost Enterprises in Ohio that will fire both plugs at the same time - this was the most expensive part of the engine but necessary! Those dang spark plugs are really expensive too!
Used a carb I made myself and a fuel tank from a previous engine.
Ordinarily a simple box for the electronics and to mount the engine would work, but the 12 inch prop needed vertical clearance and a way for the prop-wash to exit at the bottom of the swing. This would have caused vibration, so I just sloped the front 45 degrees to get rid of the airflow and also added a screen to divert some to the electronics inside. A bit ugly but it works.
Lots of noodling about what fuel to use. A chap at a local Great Hobbies store suggested a 80/20 mix of Methyl-hydrate and castor oil so gave it a try and it seems to work.
The engine starts easy enough and runs fairly smooth but is sensitive to the combination of needle valve/throttle/advance/retard settings at any one speed but fun to play with.
Thanks for looking.
Attachments
-
 DSC07887.jpeg160.2 KB · Views: 43
 -
 DSC07893.jpeg310.7 KB · Views: 38
 -
 DSC07894.jpeg286 KB · Views: 29
 -
 DSC07897.jpeg273.6 KB · Views: 27
 -
 DSC07898.jpeg229.4 KB · Views: 31
 -
 DSC07901.jpeg292.5 KB · Views: 30
 -
 DSC07904.jpeg456.9 KB · Views: 33
 -
 DSC07914.jpeg412.9 KB · Views: 38
 -
 IMG_0118.jpeg429.1 KB · Views: 36
 -
 IMG_0124.jpeg459.8 KB · Views: 35
 -
 IMG_0126.jpeg291 KB · Views: 27
 -
 IMG_0127.jpeg361.1 KB · Views: 26
 -
 IMG_0128.jpeg571.8 KB · Views: 25
 -
 IMG_0133.jpeg260.1 KB · Views: 25
 -
 IMG_0135.jpeg386.6 KB · Views: 26
 -
 IMG_0139.jpeg285.7 KB · Views: 27
 -
 IMG_0143.jpeg511.9 KB · Views: 25
 -
 IMG_0147.jpeg278.9 KB · Views: 25
 -
 IMG_0148.jpeg396 KB · Views: 24
 -
 IMG_0150.jpeg399.2 KB · Views: 45
Last edited: