- Joined
- Jun 29, 2014
- Messages
- 4,111
I've been putting off another project for more than year and finally committed to getting started. In order to machine the base casting for the project, I decided to make some angle plate fixtures to bolt down to my Atlas Horizontal Milling Machine.
The base casting needs to be flipped several times and spun due to the limited travel 6" x 9" on my Atlas. Here is the mockup renderings I made in Fusion 360 to plan my angle plate design:
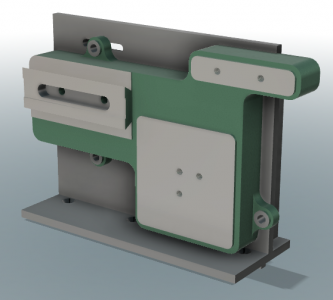
The plan is to fabricate the angle plate from welded 1018 steel, 3/8" plate. There is a provision for a key seat in the bottom that will mate up with the middle of the Atlas mill table. While the rendering shows the angle plate as one piece, the 12" wide angle plate will actually be two 6" wide angle plates. I'll do a proper drawing and update at a later date, but here is the basic print below:
Print Available in Downloads
Materials
2pc, 9"L x 6"W x 3/8", 1018 steel
1pc, 12"L x 4-1/2"W x 3/8", 1018 steel
4pc, 8-3/8"L x 1-1/2"W x 3/8", 1018 steel
4pc, 5/16-18 x 3/4"L, FHCS
Sawing
Nothing too exciting here, but I like showing off my Millers Falls power hacksaw. Some of the material needed to be cut to size. My cutting depth on the hacksaw isn't deep enough to handle.
View attachment IMG_6849.MOV
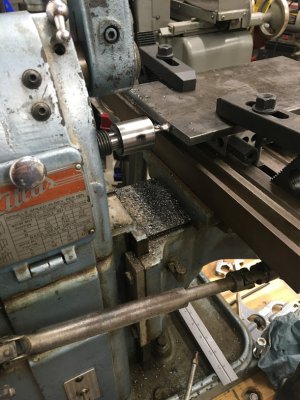
The hacksaw support is pretty clapped out, this saw hasn't cut straight in many a moon. Another project someday! In the meantime, I cleaned up all the cut edges on my mill:
Prepping the Base Plate
As stated previously, the project will yield two angle plates. In order to guarantee alignment after they are split, I drilled the base fixturing holes, milled a flat locating feature for welding the uprights and milled the key seats in the bottom.
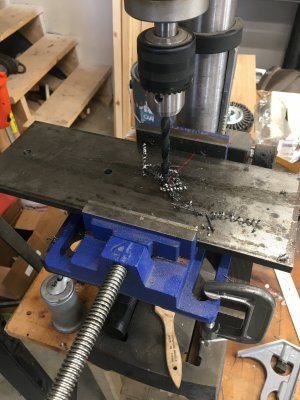
Drilling clearance fit clearance holes for 5/16-18 UNC FHCS. Letter drill Q.
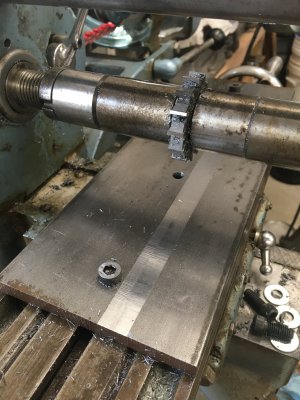
Milling a shallow locating feature for welding the uprights. 3/8" wide cutter.
The pass on the right looks nice, the second pass on the left has poor surface finish.
Turns out I was stripping my lead nut in the table. I replaced here in this post.
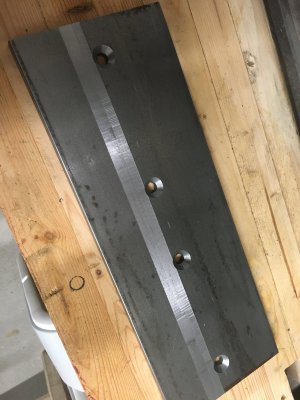
Countersunk the holes for the FHCS
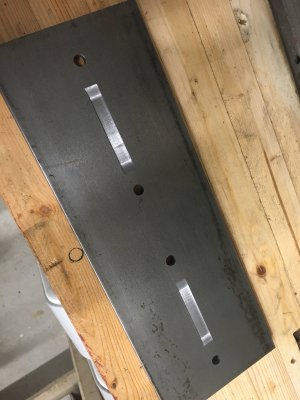
Milled two key seats to locate the angle plates in the mill table T-slot. 3/8"W x 3" long.
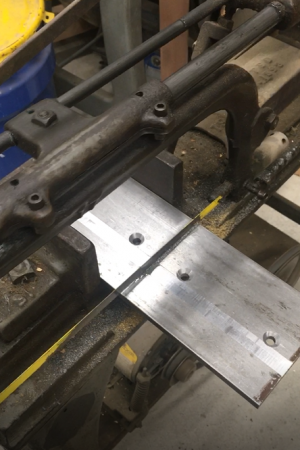
The final split prior to welding.
Welding
I am a novice welder. This is the thickest material I have welded and it gave me some trouble at first. I use a small Harbor Freight FCAW, its the Titanium 125. Once I figured out the right hand speed I got the hang of it. I also made some dumb rookie mistakes, I.E. its ugly. But sometimes ugly works. It is all one piece now and it works.
Some photos. The Harbor Freight welding table is kind of a waste of money, in my opinion. You can see I clamped a big piece of aluminum jig plate to the top of the table so I had something rigid to work on and clamp my parts up on.
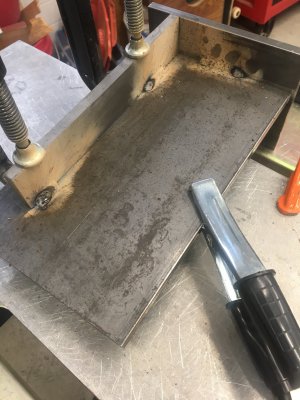
Finally controlled my enthusiasm and made nice short welds.
My final puddle on each weld needs work.
Haven't quite figured out whatever that little final swizzle move is.
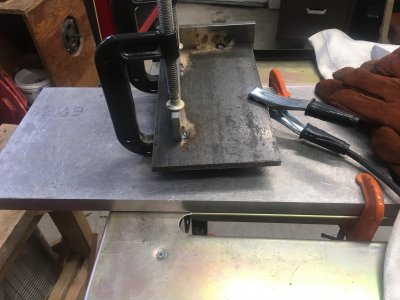
The Harbor Freight table is uneven and flimsy. The 1" jig plate clamped to it is not.
Slotting
Final operation is to put the slots in the angle plate to fixture the casting. Laid out 5 hole positions per slot, 1/2" apart to create 2" long slots. Spotted and stepped up the drills until I got to 31/64". This leaves a little room for milling out the slots with a 1/2" roughing mill. One problem I ran across in the slotting operation was limited travel. I laid the angle plates down on their sides and indicated them square. Then the slotting went off without a hitch.
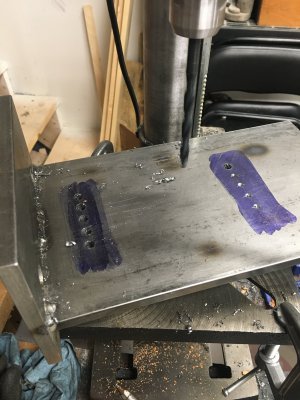
Material waste removal prior to slotting. I need more than 1/3 hp in my drill press!
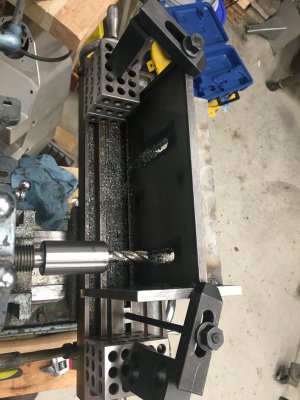
Slotting in the angle plates with a 1/2" roughing end mill.
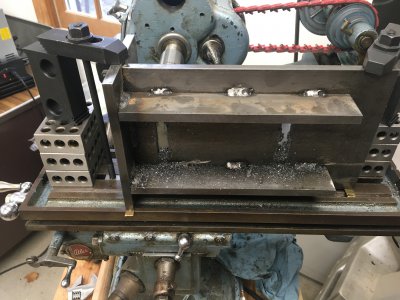
Slotting operation from the back view of the angle plate.
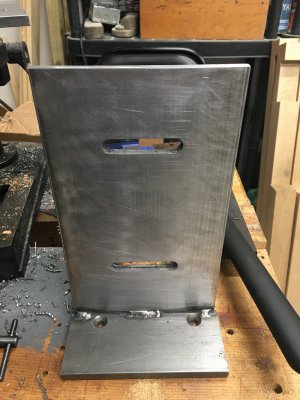
A finished angle plate.
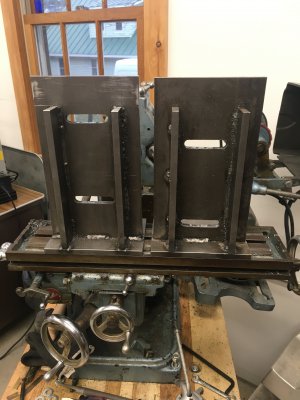
Back view of all my embarassing, but finished and strong, welds.
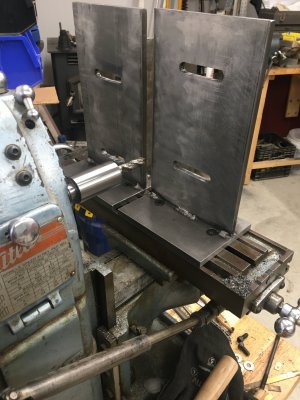
The pair of finished plates installed and ready for the base casting of the gear hobber.
That's it! They work great and moved up a level of achievement in my quest for building a tool to build a tool so i can build more tools to build tools.
Couple lessons learned:
The base casting needs to be flipped several times and spun due to the limited travel 6" x 9" on my Atlas. Here is the mockup renderings I made in Fusion 360 to plan my angle plate design:

The plan is to fabricate the angle plate from welded 1018 steel, 3/8" plate. There is a provision for a key seat in the bottom that will mate up with the middle of the Atlas mill table. While the rendering shows the angle plate as one piece, the 12" wide angle plate will actually be two 6" wide angle plates. I'll do a proper drawing and update at a later date, but here is the basic print below:
Print Available in Downloads
Materials
2pc, 9"L x 6"W x 3/8", 1018 steel
1pc, 12"L x 4-1/2"W x 3/8", 1018 steel
4pc, 8-3/8"L x 1-1/2"W x 3/8", 1018 steel
4pc, 5/16-18 x 3/4"L, FHCS
Sawing
Nothing too exciting here, but I like showing off my Millers Falls power hacksaw. Some of the material needed to be cut to size. My cutting depth on the hacksaw isn't deep enough to handle.
View attachment IMG_6849.MOV
The hacksaw support is pretty clapped out, this saw hasn't cut straight in many a moon. Another project someday! In the meantime, I cleaned up all the cut edges on my mill:

Prepping the Base Plate
As stated previously, the project will yield two angle plates. In order to guarantee alignment after they are split, I drilled the base fixturing holes, milled a flat locating feature for welding the uprights and milled the key seats in the bottom.

Drilling clearance fit clearance holes for 5/16-18 UNC FHCS. Letter drill Q.

Milling a shallow locating feature for welding the uprights. 3/8" wide cutter.
The pass on the right looks nice, the second pass on the left has poor surface finish.
Turns out I was stripping my lead nut in the table. I replaced here in this post.

Countersunk the holes for the FHCS

Milled two key seats to locate the angle plates in the mill table T-slot. 3/8"W x 3" long.

The final split prior to welding.
Welding
I am a novice welder. This is the thickest material I have welded and it gave me some trouble at first. I use a small Harbor Freight FCAW, its the Titanium 125. Once I figured out the right hand speed I got the hang of it. I also made some dumb rookie mistakes, I.E. its ugly. But sometimes ugly works. It is all one piece now and it works.
Some photos. The Harbor Freight welding table is kind of a waste of money, in my opinion. You can see I clamped a big piece of aluminum jig plate to the top of the table so I had something rigid to work on and clamp my parts up on.

Finally controlled my enthusiasm and made nice short welds.
My final puddle on each weld needs work.
Haven't quite figured out whatever that little final swizzle move is.

The Harbor Freight table is uneven and flimsy. The 1" jig plate clamped to it is not.
Slotting
Final operation is to put the slots in the angle plate to fixture the casting. Laid out 5 hole positions per slot, 1/2" apart to create 2" long slots. Spotted and stepped up the drills until I got to 31/64". This leaves a little room for milling out the slots with a 1/2" roughing mill. One problem I ran across in the slotting operation was limited travel. I laid the angle plates down on their sides and indicated them square. Then the slotting went off without a hitch.

Material waste removal prior to slotting. I need more than 1/3 hp in my drill press!

Slotting in the angle plates with a 1/2" roughing end mill.

Slotting operation from the back view of the angle plate.

A finished angle plate.

Back view of all my embarassing, but finished and strong, welds.

The pair of finished plates installed and ready for the base casting of the gear hobber.
That's it! They work great and moved up a level of achievement in my quest for building a tool to build a tool so i can build more tools to build tools.
Couple lessons learned:
- Need a bigger drill press. 1hp floor model with 5/8" chuck would be sweet.
- Welding. Go slower. Shorter welds. Be patient.
- Key seats didn't' really work out the way I wanted weld wise. I just couldn't get a strong weld underneath that key. So I use them loose for now.

 If I could ever get some time off I think I have 100 or so from thru out the years !