Usual litany of todo's has kept this slower than desired - but significant progress made.
Once box was mounted to wall, I replaced the temporary wiring from box to machine with final.
This included new nice and flexible liquid tight conduit and fittings.
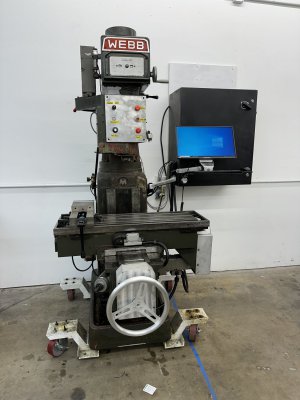
I also sourced a fancy articulating arm for the keyboard (found new on eBay for ~$200).
I bent and welded up some spare aluminum sheet to create a mount to attach the screen to it.

Next up was mounting the cables and wires to the machine to keep them tidy.
Found some cool looking spark plug wire holders on Amazon at $20 for a bag full (
https://www.amazon.com/gp/product/B0B9GKV69S/ref=ppx_yo_dt_b_search_asin_title?ie=UTF8&th=1 ) and tapped holes on the machine to attach.


The wires all home run to the box on the wall and attach with DB plugs - making good connections that can be un-attached if needed.
There is enough slack without unplugging to roll the machine a 3 or 4 feet from the box if I need to clean up or the like.
The break out boards with DB connectors visible below.

Finally - I took all the new wiring and carefully routed it - keeping low and high voltage as separate as possible.
This is probably as clean a wiring job as I have ever accomplished - though the bar was arguably not very high...
Box is tidy and clean.
I have some notes on what the connections on the

Before we did anything - Jim had me turn the torque down very low - and we tested all the key functions.
Sure enough - I had managed to switch the upper and lower Z limit switches - rendering them useless.
I also had one of the servo motors polarity swapped - causing a runaway.
Luckily - the low torque settings caused it to shut down before any damage was done.
Thanks Jim!
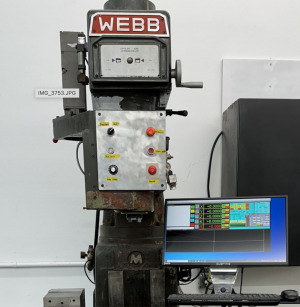
After that - we took the first test cut - in mid air - with no tool.
Was magnificent to see the table moving in what was clearly a circular fashion - with X,Y, and Z axis all moving together at once.
Very cool!
We have a few adjustments to make before it's ready to make its first chips (or saw dust as the case may be for my first test cut).
I plan to put feet on it to get it off the wheels as well - and make it more stable.
Then the first project will be a new face plate for the control panel.
Things progressing nicely.
-CM


")